

Changing the language settings in Windows 8

In certain situations, it can be helpful to swap between different languages when using an operating system. For example, this may come in handy for employees of multi-lingual companies. In this way, different users are able to view menus, dialog windows, and other elements in their preferred language.
Are you unsure which Windows version is installed on your computer? With a few simple commands, you can view the Windows version that’s currently installed on your system.
In this article, we’ll reveal how to change the display language in Windows 8 step by step.
Changing the language in Windows 8.1: install a new language
If until now you’ve never used any additional languages on your computer, you may need to install the desired language pack before you can change the system language in Windows 8. This is done as follows:
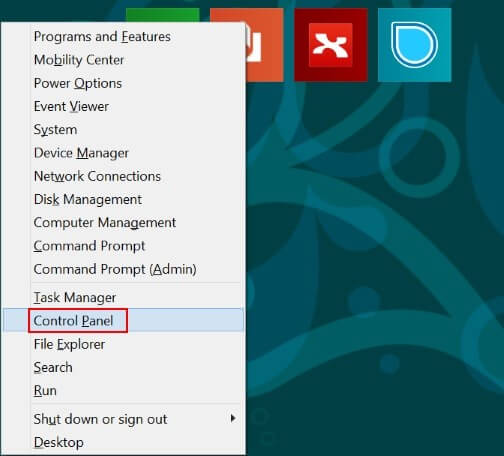
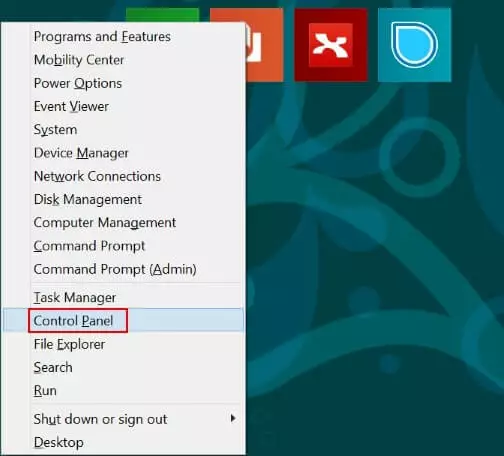
- Open the Control Panel. You can use the Windows shortcut [Windows] key + [X] or right-click on the Windows symbol at the bottom left of the task list. A menu window will launch at the bottom left. Select “Control Panel.”
- Within Control Panel, open the dialog for language settings from the “Clock, Language, and Region” menu by selecting “Add a language” or “Change input methods.”
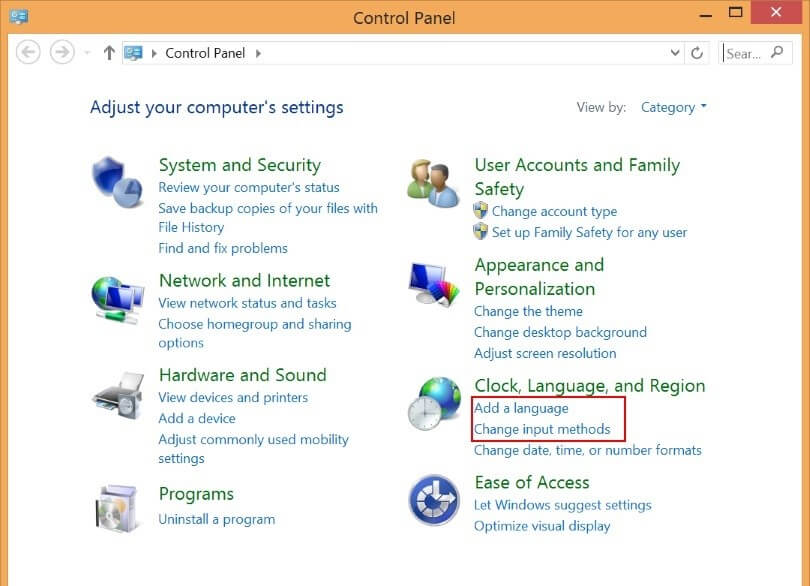
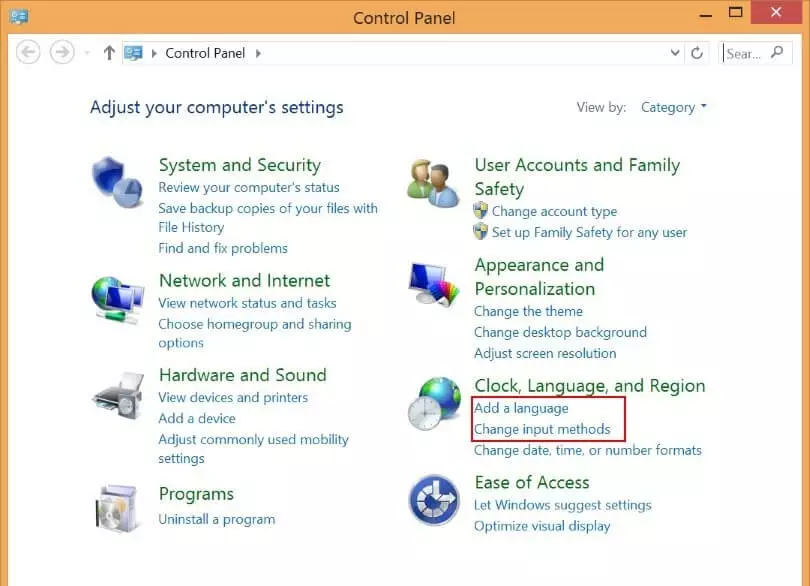
- Select “Add a language” from the options:
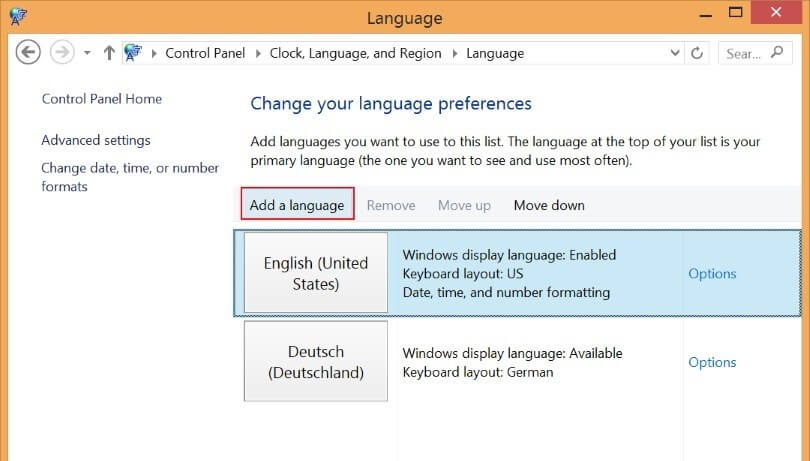
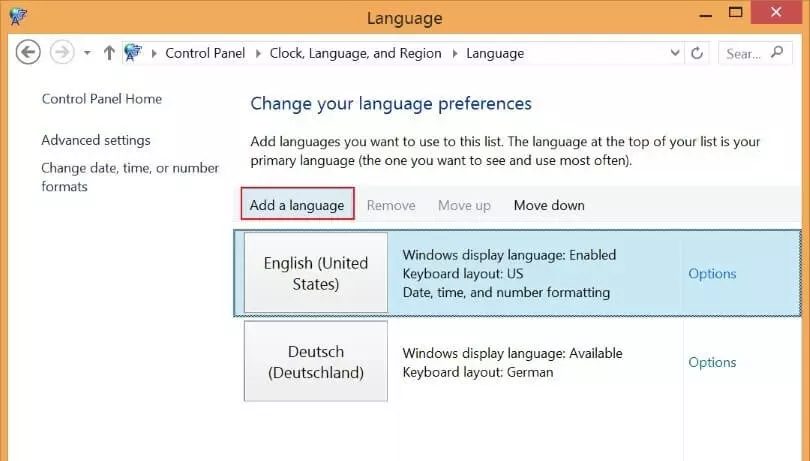
- Choose the new language(s) you wish to add by clicking on them. Select “Open” if multiple language options are available.
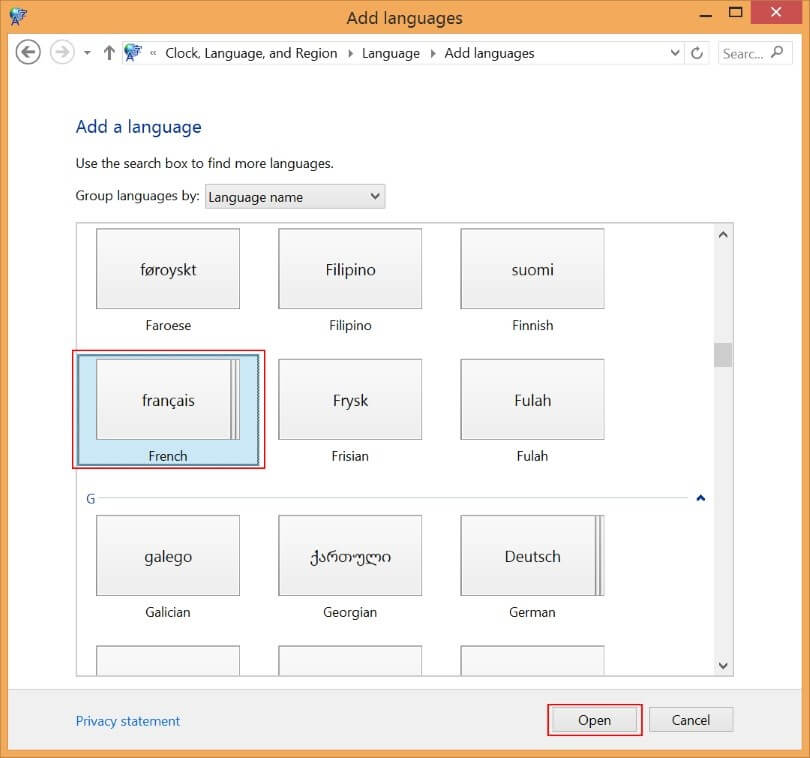
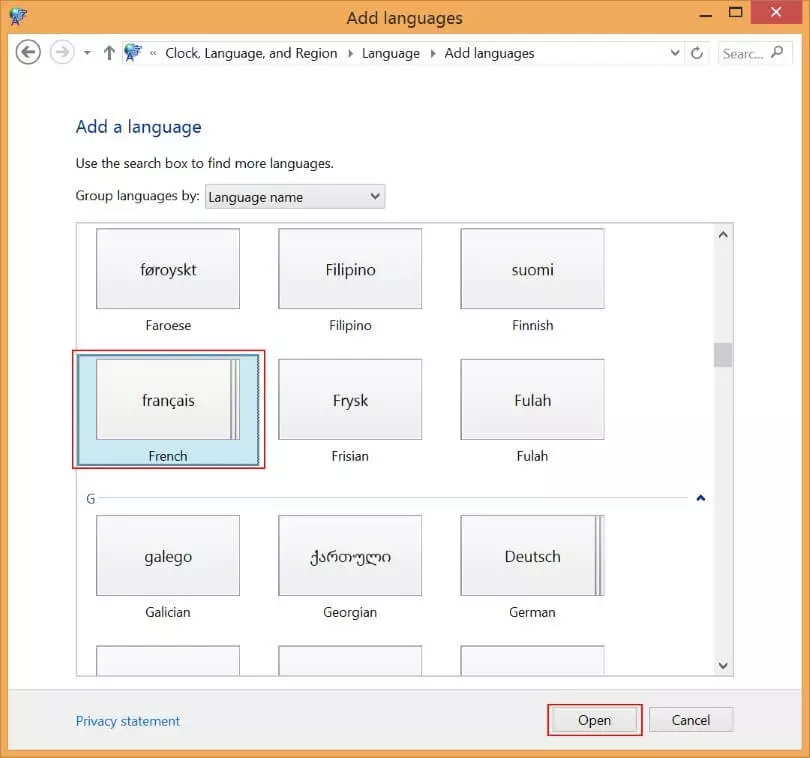
- For some languages, you may have to choose between different spelling options (as is the case for English, for example). Select your preferred option and click “Add.”
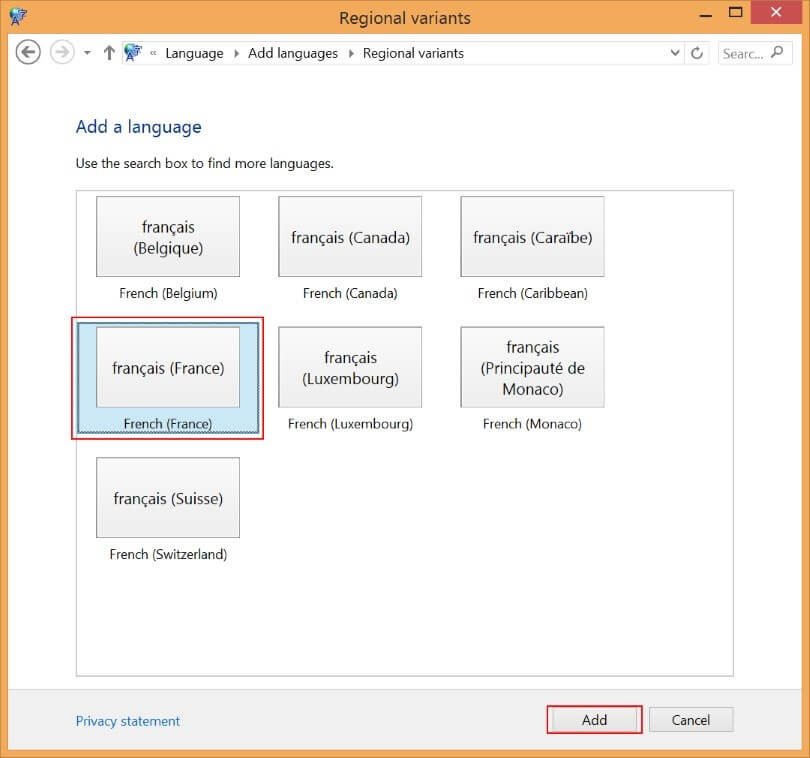
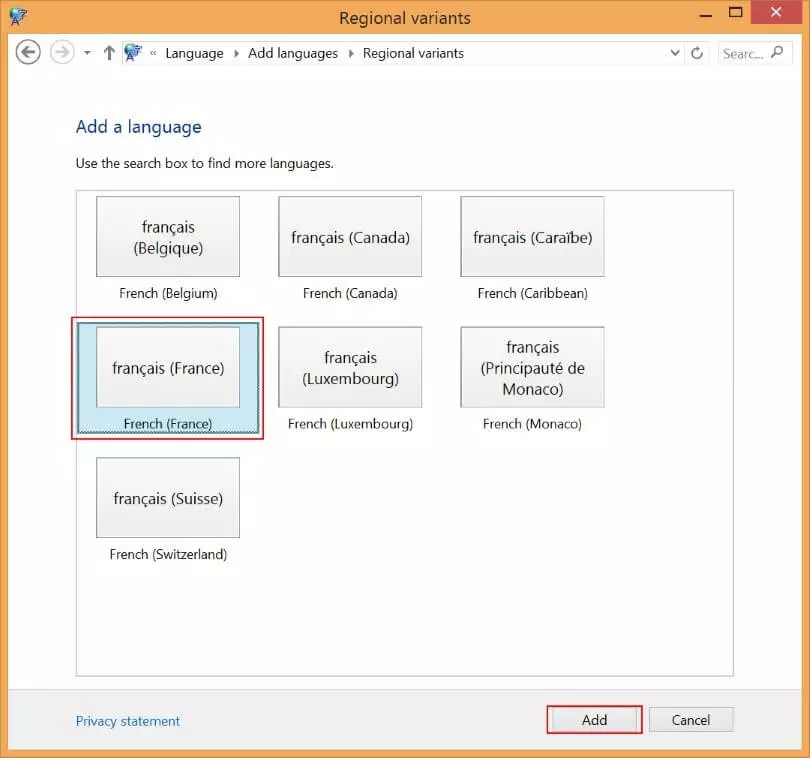
- The new language should now be visible in the list of added languages, but it won’t be activated just yet. Click on “Options” to access the settings for the added language.
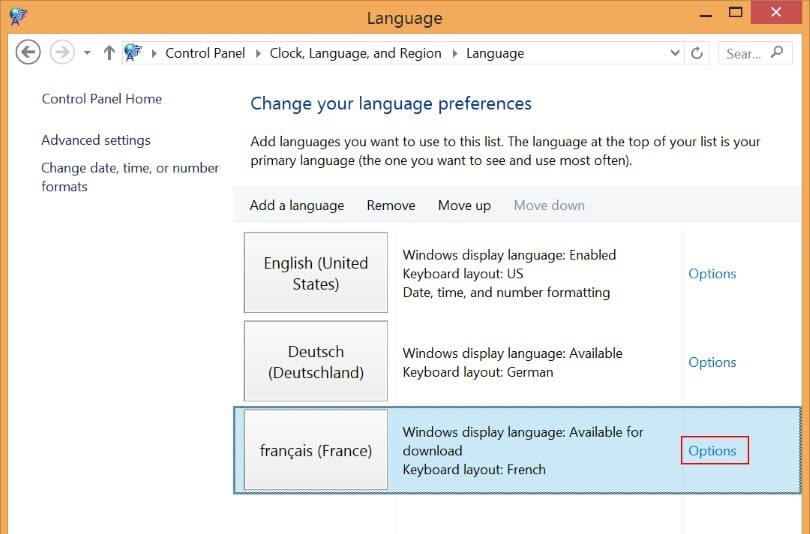
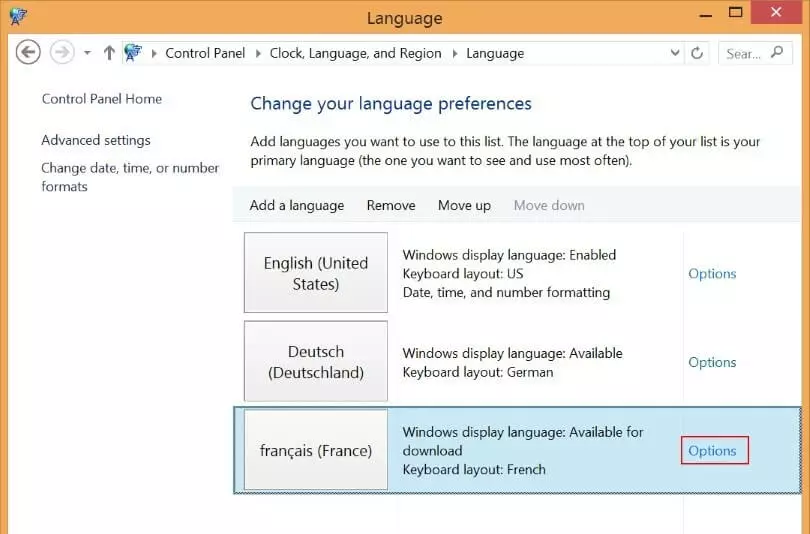
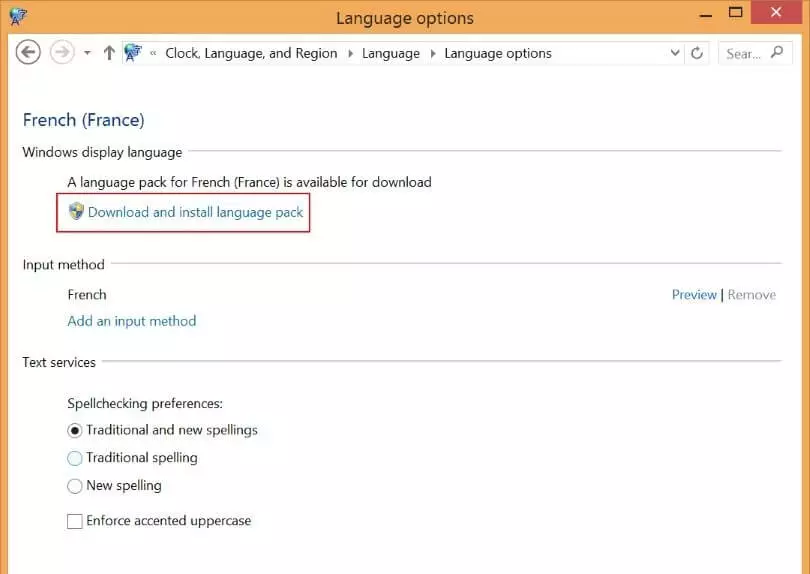
- For commonly used languages, you can automatically download and install the relevant language package by clicking on “Download and install language pack.”
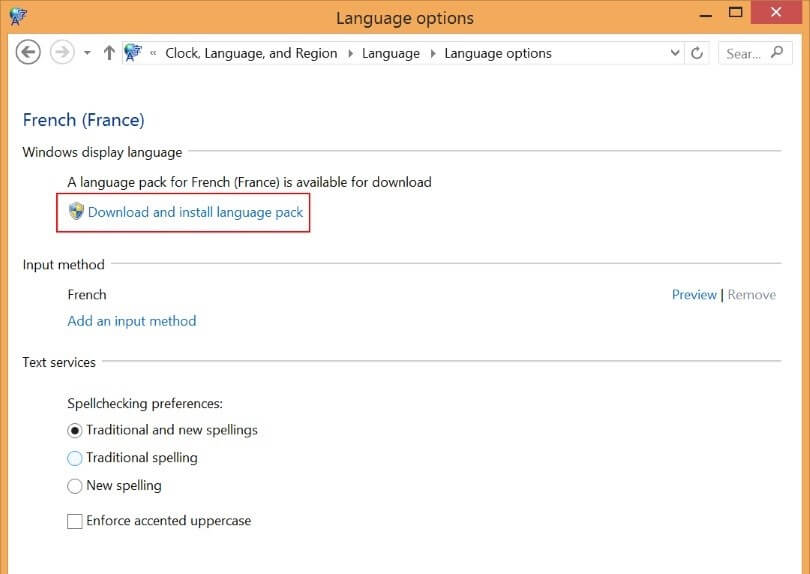
For additional language packs, which may not be available for download directly via the Control Panel, check the Microsoft support page.
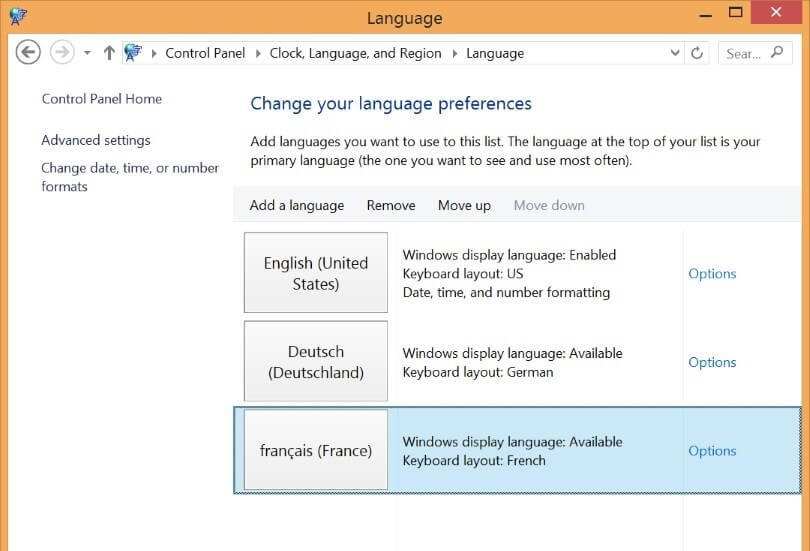
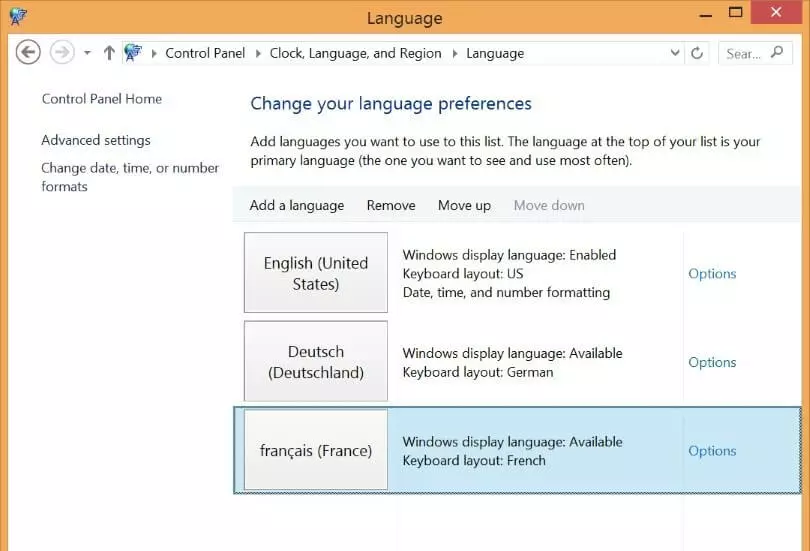
- The added language should now be visible for activation in the language preferences menu.
Changing the language in Windows 8.1: activate a different language
Swapping between languages in Windows 8 is easy if you’ve already installed your preferred language packs.
- Launch the dialog window “Change your language preferences” as described in the previous steps 1 and 2.
- Choose your desired language and activate it by selecting “Move up” and moving the selection to the first position in your list. Alternatively, you can click on “Options” within the language field and make it your primary language.
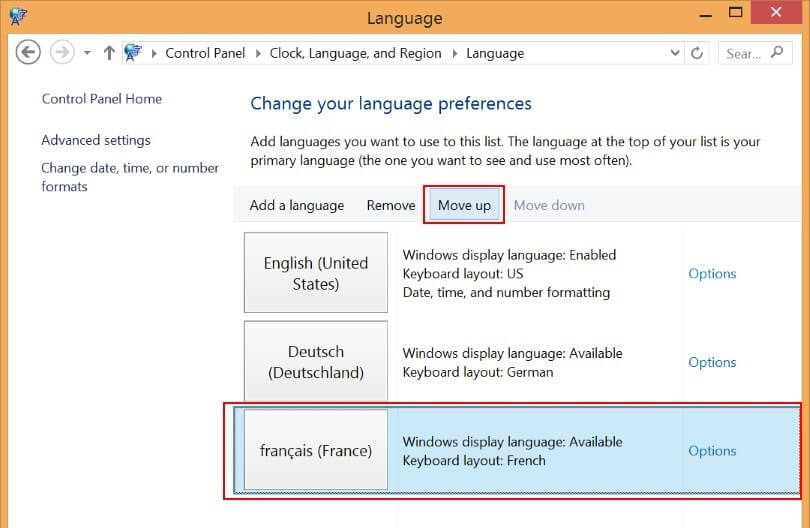
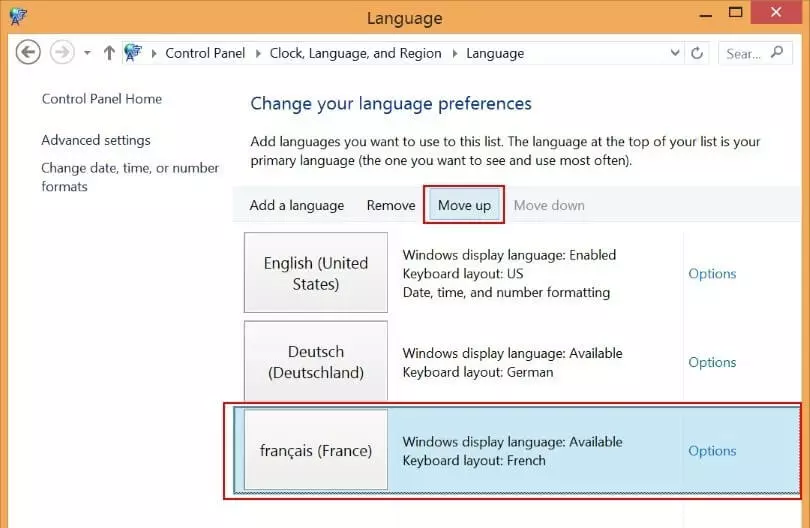
- Once you log-on and off again or restart the system, the new language should be the default display language.
Changing the system language in Windows 8: the impact on other Microsoft programs
Once activated, the selected language becomes the default language for all system settings, dialogs, and even Office settings.
For Office to recognize the language, it needs to be included in the pre-installed Office version. If that’s not the case, you may have to install the missing Office language pack to activate it for documents and displays.
The keyboard language is also adapted when you modify the language in Windows. This is important when using Office, because you may find that your keyboard layout no longer matches the language setting. You can change the keyboard language settings in the Windows task list on the bottom right.
In Office, the language of the user interface (menus and push buttons), spell-check and grammar, and processing (keyboard language) can be personalized from the Office menu independently of the Windows operating system settings. Each feature could be set to a different language if desired.
Remove Windows languages
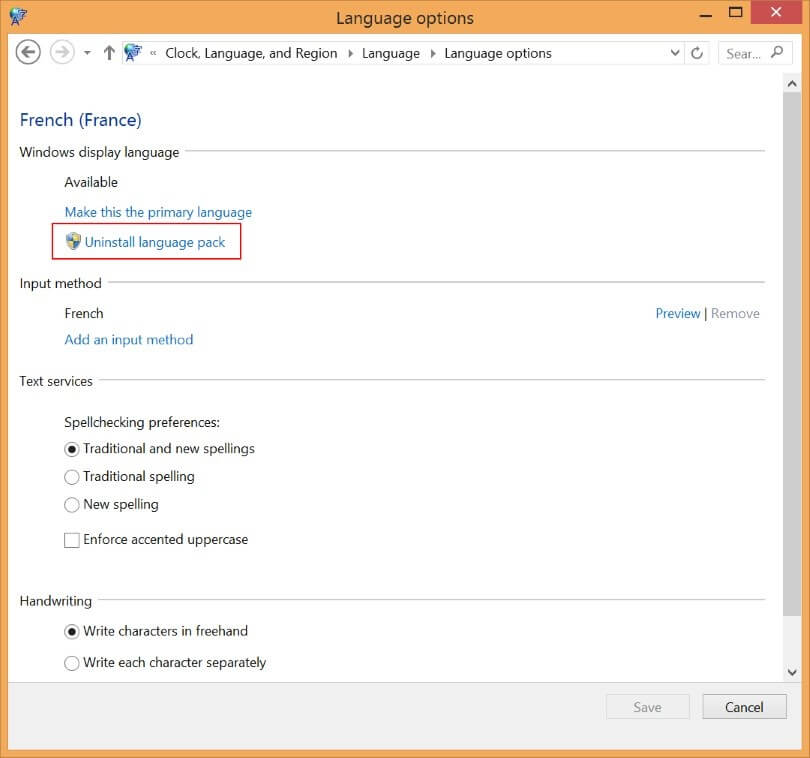
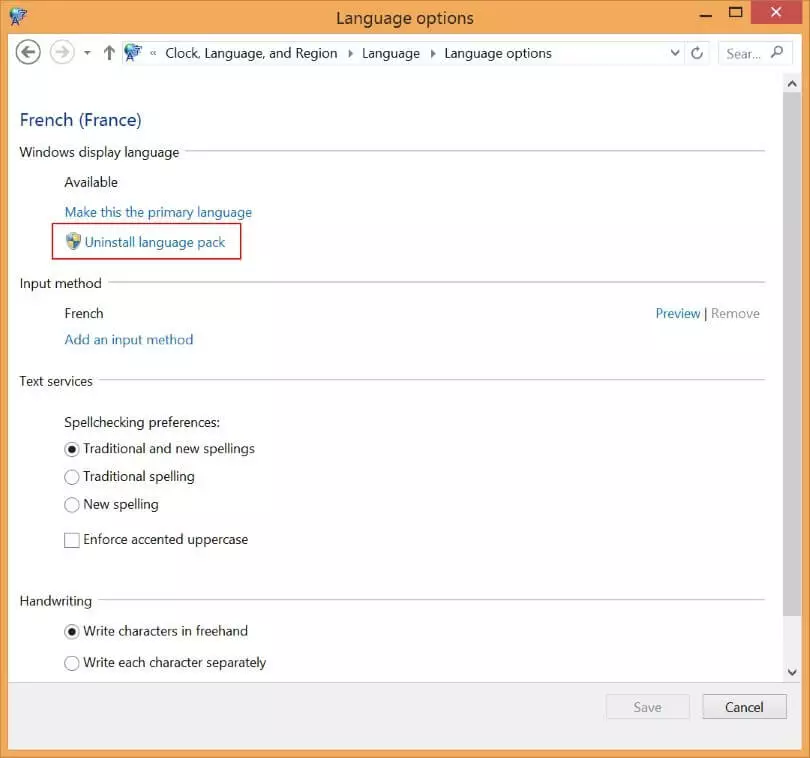
By selecting “Remove,” you can get rid of inactive languages from your language menu. However, it’s best to ensure that the language-to-be-removed is not your currently-selected display language. Once removed, the languages will no longer be visible in the list. The process does not deinstall the language packs.
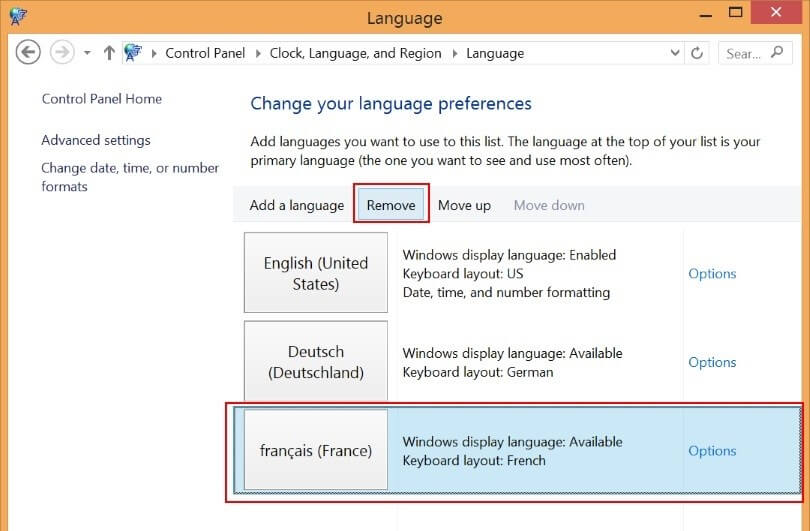
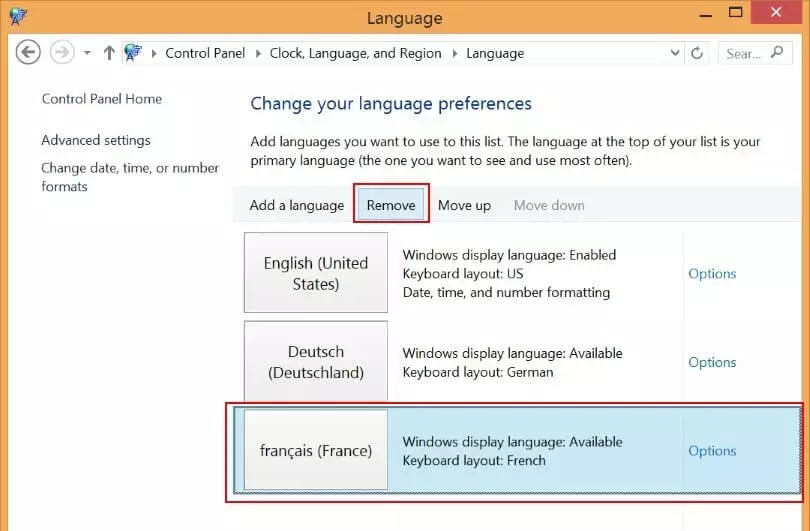
If you want to deinstall a language pack, you need to select the relevant option from the advanced options in the relevant language pack.
Having trouble starting your operating system after language installation, or running into problems with your operating system? You can still reverse your changes by restoring Windows 8 to factory settings or to previous settings.
- Build trust with email matching your domain (you@yourbrand.com)
- Free domain included to get your brand online instantly
- Work smarter with AI writing support
Reviewer

Christian Heldmaier
Christian Heldmaier is an experienced online marketing and SEO specialist from Karlsruhe. He has been working as an SEO Manager at IONOS since July 2020.