How to change the language in Windows 7
When you install Windows 7, you have to specify your preferred system language for the operating system. However, the system setting can be easily modified later on if you change your mind. This applies to both the display language and the keyboard layout. In this guide, you will learn how to change the language in Windows 7 and the difference between its Starter, Home, and Enterprise editions.
Installing a Windows 7 language pack: how do the editions differ?
One factor that determines how to change the system language is the edition of Windows 7 you are using. Generally, the Starter, Basic, and Home editions offer significantly fewer features and options than the Ultimate and Enterprise editions, including language set-up options.
Microsoft discontinued official support for Windows 7 on January 14, 2020. Technical support and security updates are no longer available for the product. This does not include support for the paid Professional and Enterprise editions which will be available until 2023. If you do not have access to this support, we strongly recommend upgrading to a newer Windows edition. For more information, you can check out our in-depth article on the end of Windows 7 support.
If you use the Windows 7 Starter, Basic, or Home editions, you can download language interface packs (LIP) which translate the most frequently used parts of the interface using the base language installed. You can download user interface language packs as needed from the Microsoft support website and install them on your computer.
If you use Windows 7 Ultimate or Enterprise, you automatically have access to language packs with fully translated dialog boxes, menu items, and help content. To change the Windows 7 language in either of these two editions, simply go to the Windows Update Center to download and install the language you want. Some basic languages like English can also be installed this way if you have one of the private user editions.
How to change the language in Windows 7 Starter, Basic, and Home
If you use the Windows 7 Starter, Basic, or Home edition and wish to change the Windows 7 system language, you will need to obtain and install the required pack for the target language yourself. In the following sections, we have summarized the exact procedure with step-by-step instructions for downloading, installing, and setting up language packs.
Step 1: Download the language pack
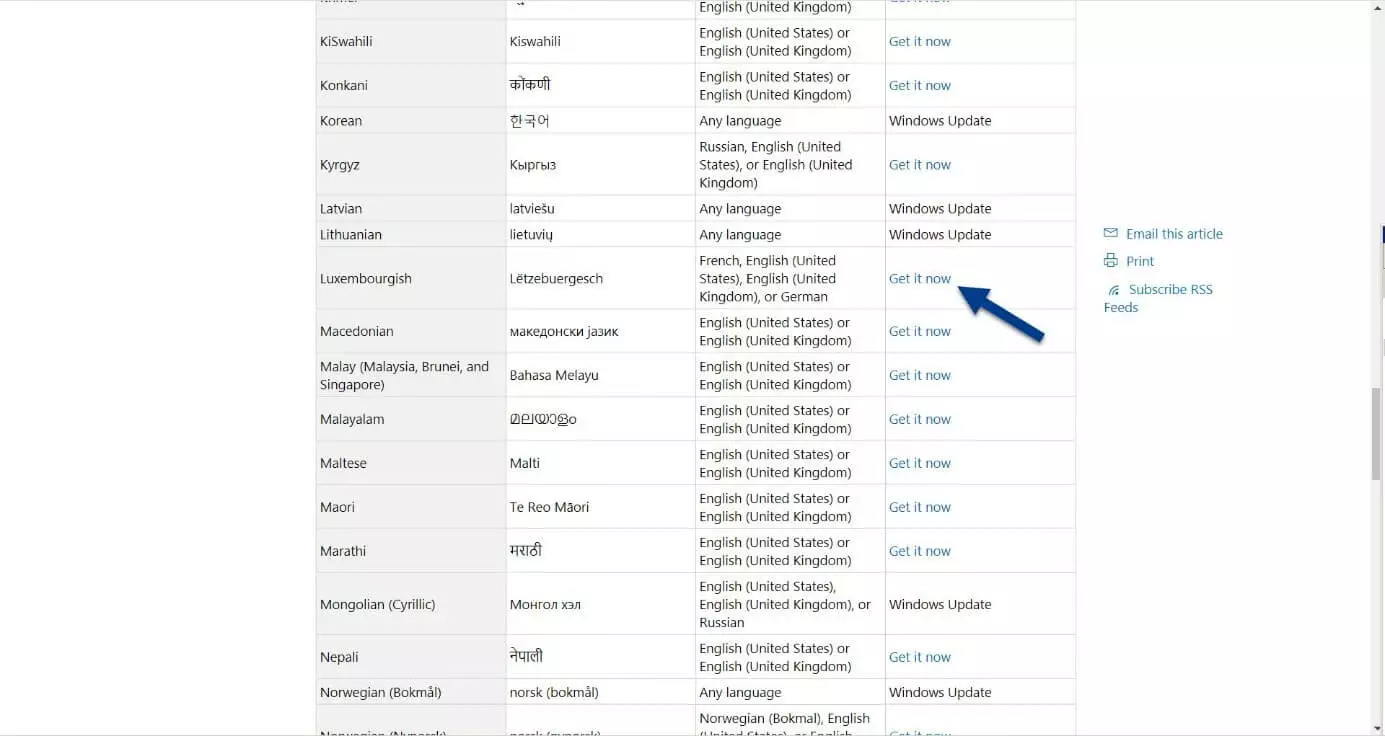
Go to the Microsoft support website and select “Windows 7” as the desired product version. Download the required language pack by clicking “Get it now” next to the respective language. If you see the note “Windows Update” instead of this link, you can easily install the language via the Update Center (this procedure is described in the following instructions). In addition, it lists which base languages are required for the language pack.
Step 2: Install the language pack
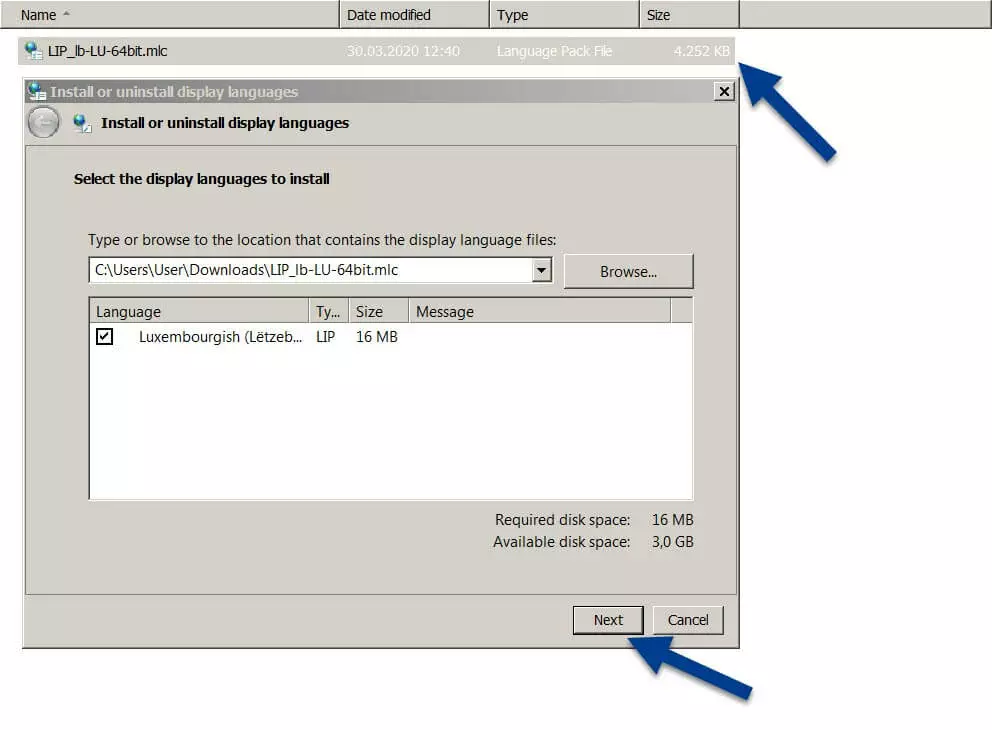
Once the download is complete, you can install the Windows 7 language pack by double-clicking the file. The assistant for installing and uninstalling display languages will launch automatically. Make sure that the box next to the language you wish to install is checked and then click “Next.”
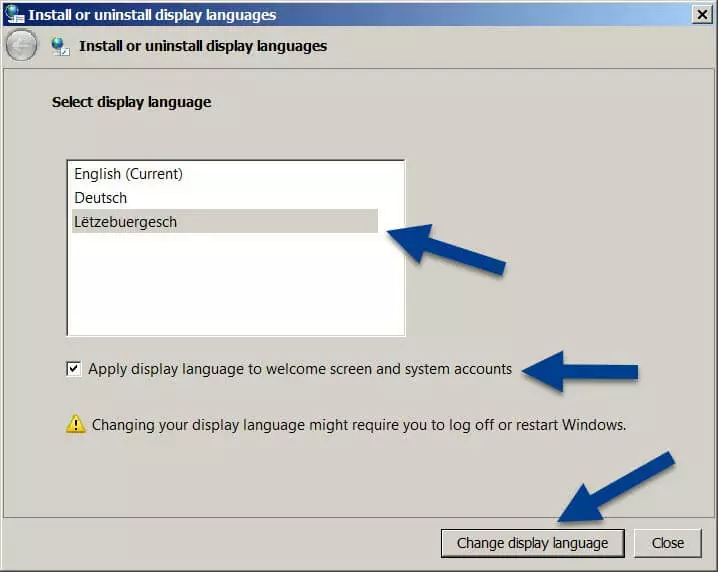
Following the installation, you can set the language as the new display language and change the Windows 7 language immediately. You can also apply your selection to the welcome screen and system accounts by clicking the corresponding checkbox. To finish the installation process, click “Change display language,” log out of your profile and then log in again. You might also need to restart your operating system.
Step 3: Manage your installed language packs
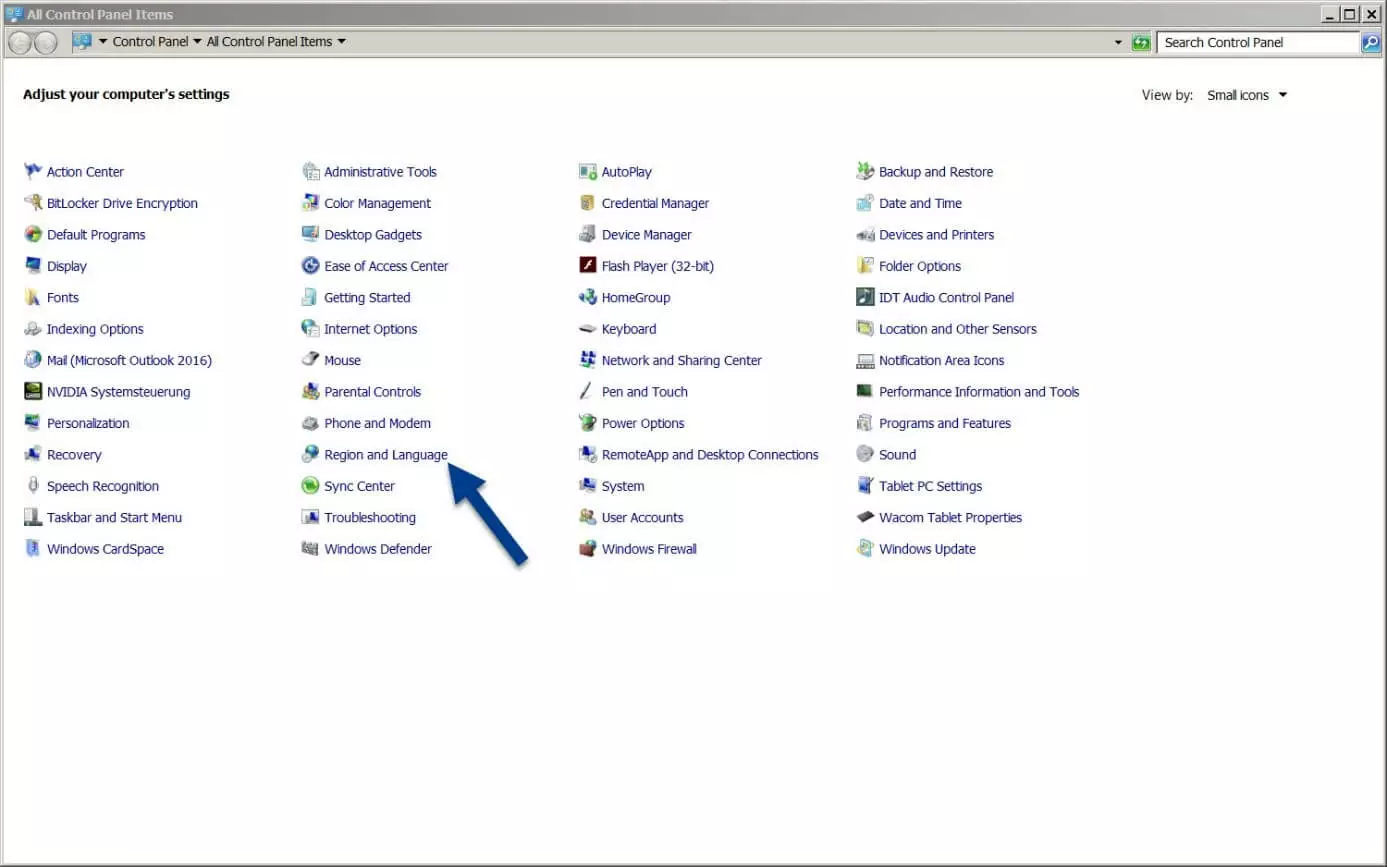
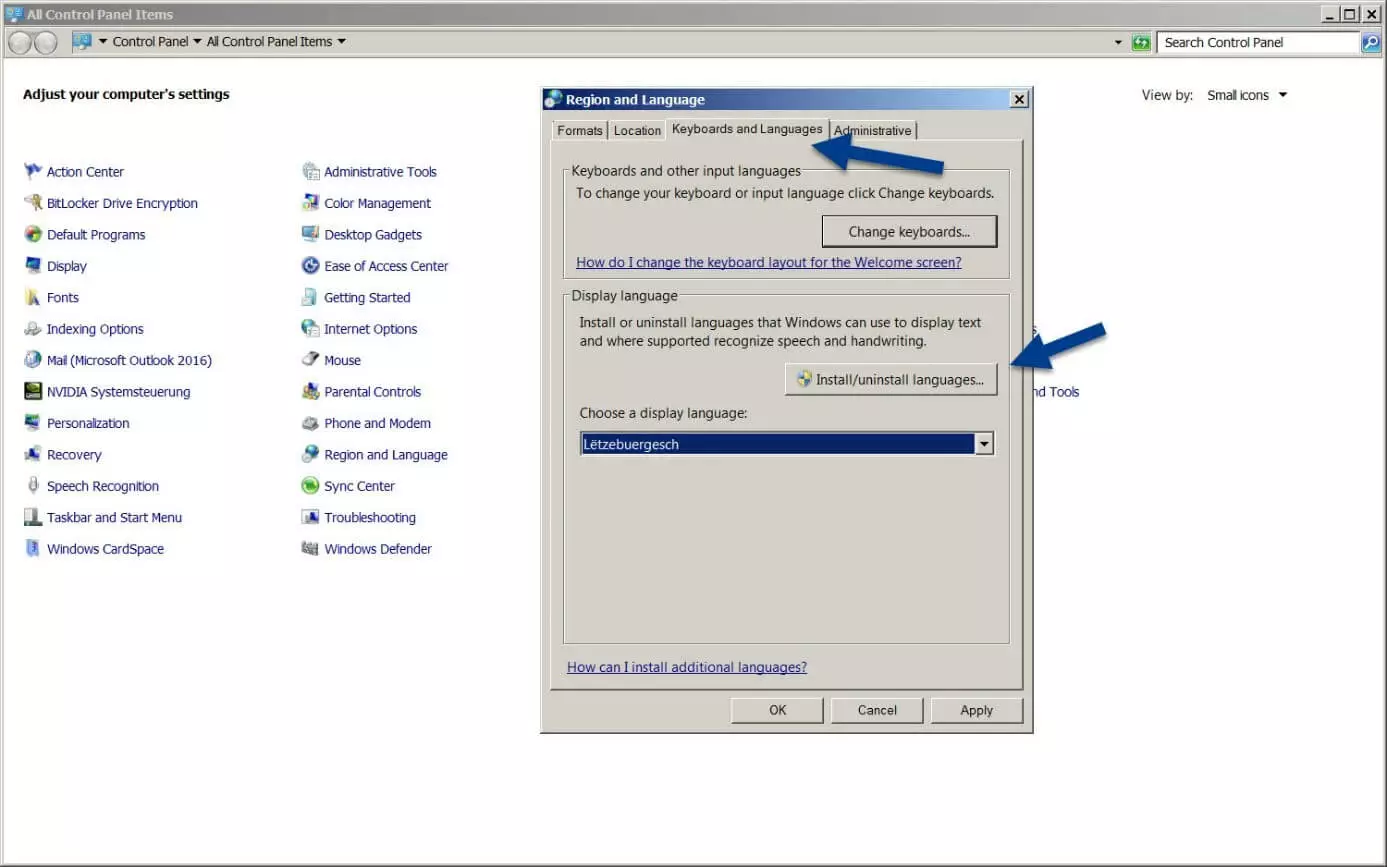
You can use the Control Panel to change the time, language, and region settings in your system. Open the Control Panel by clicking Start and then Control Panel. Alternatively, you can use the search bar to search for “Control Panel.”
Then, click “Region and Language.”
Changing the language in the Windows 7 Ultimate and Enterprise editions
If you have the Windows 7 Ultimate or Enterprise edition, you can download and switch languages through the Update Center. Alternatively, you can manually search your computer for language packs to change the Windows 7 language. To change the language in the Windows 7 Ultimate or Enterprise edition, follow the instructions below.
Step 1: Open the Control Panel
Go to the Control Panel and select “Region and Language.”
Step 2: Install the language via Windows Update
Under the “Keyboards and Languages” tab, click “Install/uninstall languages...” to install new language packs for the Windows Ultimate or Enterprise edition or to uninstall them. Finally, select “OK.” Then, you can select the language pack to download and activate it.
If the desired language packs are installed and activated, you can use keyboard shortcuts to change the keyboard language in Windows 7. Press the [Shift] and [Alt] keys at the same time to change your keyboard language. Then, check the bottom of the screen to see whether the active keyboard language has been modified.
Useful guides for using Windows 7
If Windows 7 is causing you problems or if you have questions, the following guides may be helpful:
- How do I display my Windows version?
- How do I reset Windows 7?
- Windows is not starting up. What do I do?
- What shortcuts are used in Windows?


