How to install WordPress on a subdomain
You can easily divide your web address into several areas by creating a WordPress subdomain. In this article, you will find out the advantages and disadvantages of doing this as well as how to install WordPress on a subdomain you have created.
- Simple registration
- Premium TLDs at great prices
- 24/7 personal consultant included
- Free privacy protection for eligible domains
What are the pros and cons of a subdomain?
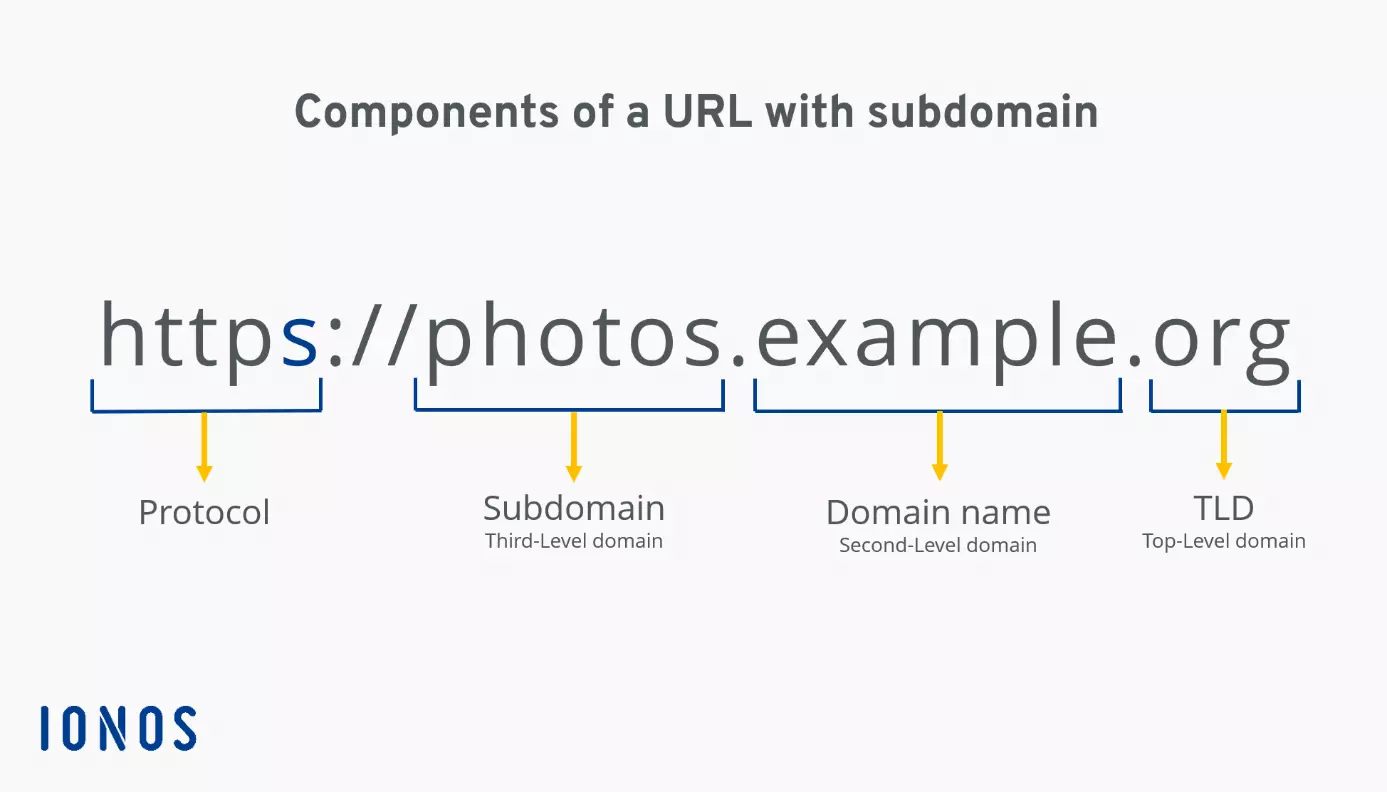
A subdomain is a component of a domain that is subordinate to the domain name, it is also called a second-level domain. Consequently, a subdomain can also be referred to as a third-level domain. It precedes the domain name and is separated by a period. The following graphic shows the subdomain’s placement in the example.org URL.
Using a subdomain has several advantages. Firstly, you can create as many new subdomains as you want without incurring any extra cost or paying for a new web address. You can also market several products or offers on the same root domain, strengthening your brand.
It is worth noting that every subdomain is marked as its own website in the Google Search Console. It usually also requires much more effort when it comes to linkbuilding. Subdomains also generally don’t offer any advantage over a standard domain when it comes to Search Engine Optimization.
Relying on WordPress on subdomains, along with subdirectories, is one of the URL structures you can choose when setting up WordPress multisite.
How to create a subdomain
The exact procedure for creating and installing a subdomain on WordPress and others depends on which provider you host your project with. Many providers allow such configurations via the web-based tool cPanel. IONOS customers can create any subdomains as follows:
- Log into the cloud panel via the Login page.
- Click on the “Domains & SSL” heading.
- Choose the domain you want to create a subdomain for.
- Open the “Subdomains” tab.
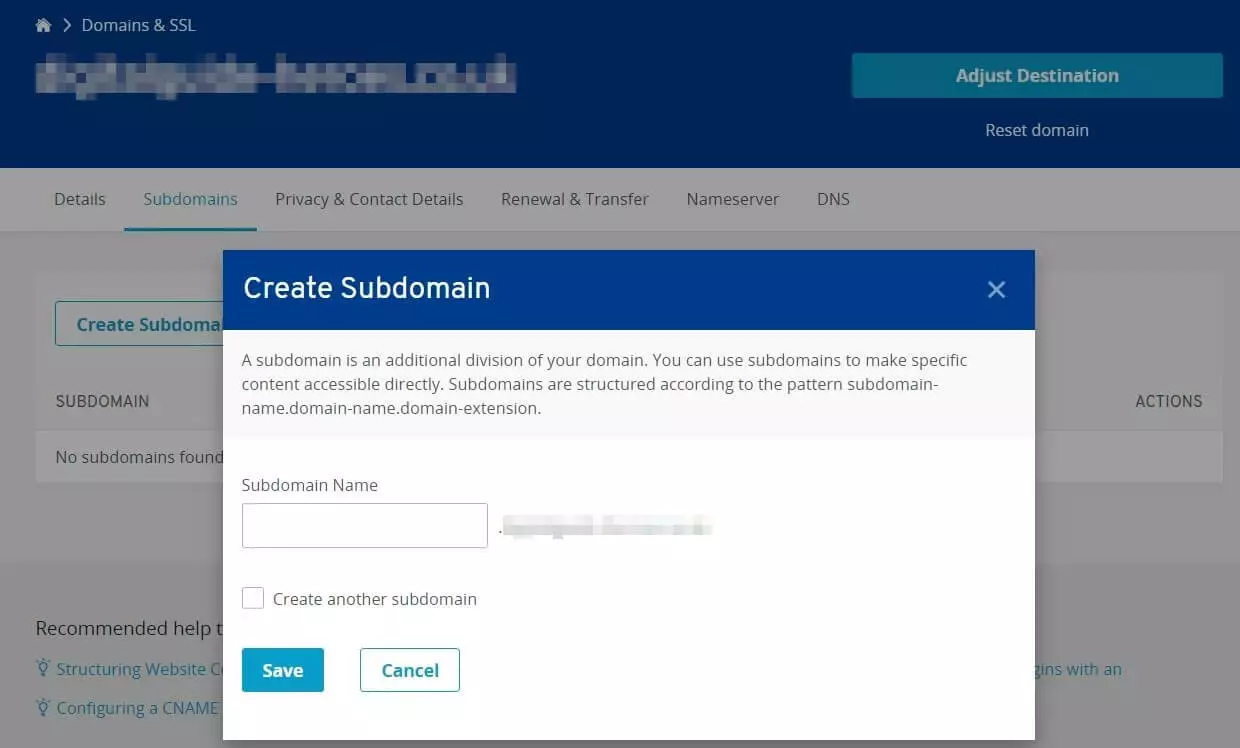
- Press the “Create Subdomain” button.
- Choose the desired name for the subdomain and click “Save”.
Still don’t have the right domain for your WordPress subdomain-installation ready? Register the perfect domain name with IONOS and get an SSL/TLS certificate as well as a mailbox with 2 GB storage space for free!
How to install WordPress on a subdomain, step by step
Installing WordPress on a subdomain is basically the same process as creating a new WordPress site. 1-click installation allows you to save a huge amount of time and effort. You can also choose a manual installation option if you want.
In the following steps, we outline each step with examples of both variations for IONOS customers.
Manually installing WordPress on a subdomain
Manually installing WordPress on a subdomain gives you control over which version you have on your online storage. It’s generally advised that you choose the most up-to-date version, but you can also opt for an older version this way.
Step 1: Download WordPress
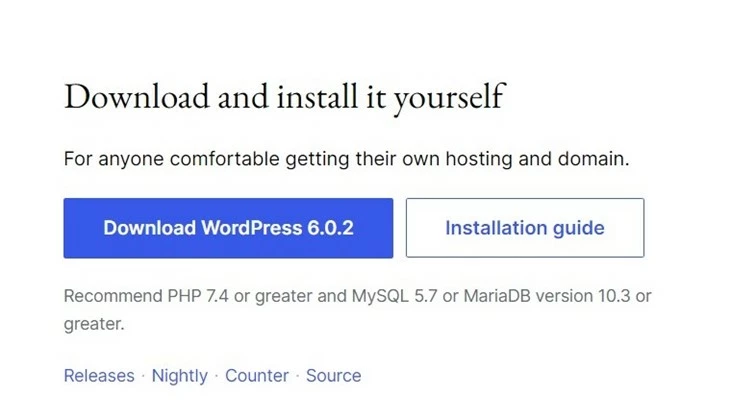
Firstly, you download your chosen version of WordPress. Go to the official WordPress download page and click on the “Download WordPress x.x.x” button to get the latest version. You will find older versions under the “Releases” page.
Extract the downloaded ZIP file and save it to your local drive. In later steps, you will then need to transfer these program files into the WordPress subdomain online storage.
Are you still searching for a suitable hosting solution for your WordPress subdomain installation? Choose WordPress hosting from IONOS and profit from benefits such as maximum speed, maximum control and the best protection!
Step 2: Create a subdomain and add a DNS entry
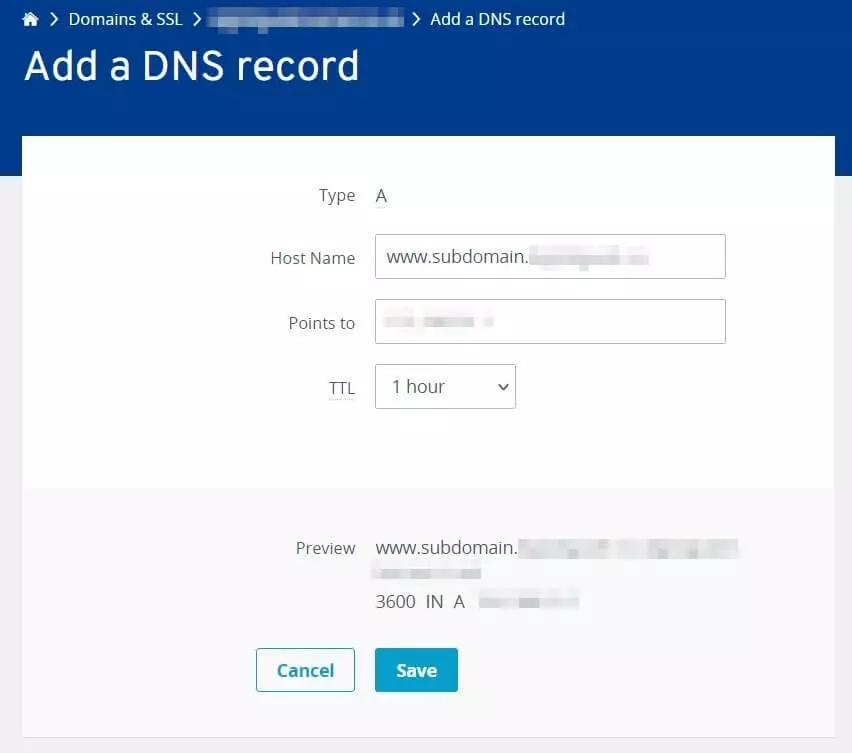
If you have not already done so, create the desired subdomain as described above. However, once you have created a subaddress, you still need to create a new DNS entry for it. You can do this in the IONOS Cloud Panel using the following steps:
- Log in using the IONOS Login page.
- Click on the “Domains & SSL” button.
- Choose the domain for which you have created a subdomain on WordPress.
- Click on the “DNS” tab.
- Click on “Add a DNS record” and choose type “A”.
- Add the relevant information. Type in the address of your new subdomain under “Host Name”.
- Then save your work.
Should your subdomain contain an alias? Simply create the appropriate CNAME record directly in the panel.
Step 3: Create a database
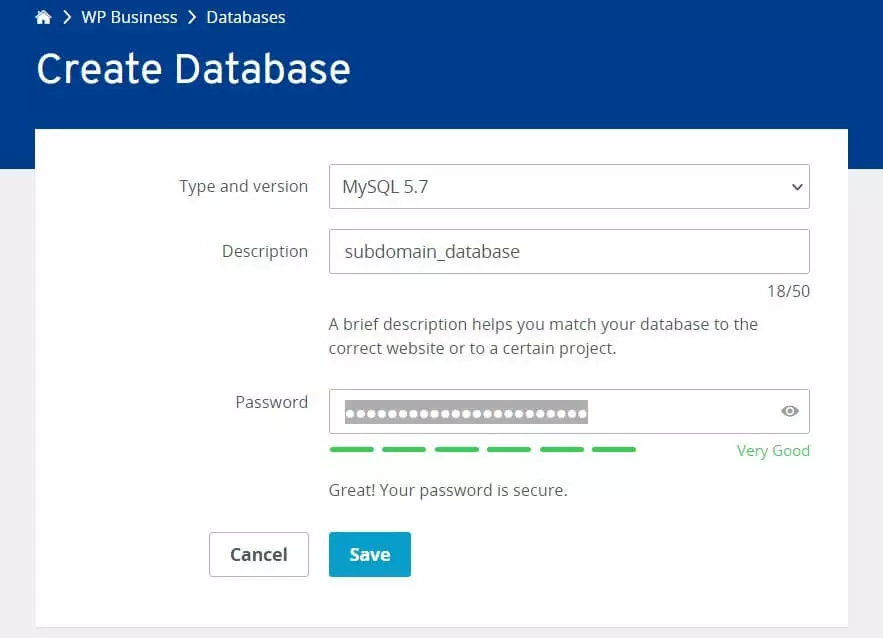
You need a new database to install WordPress on a subdomain. IONOS users can also easily create these in the Cloud Panel. After logging into the customer area, take the following steps:
- Switch to the “WP Business” section.
- Click the “Manage” button in the “Databases” entry.
- Click on “Create database”.
- Choose your desired database type (Standard: MySQL).
- Insert a description and password.
- Click “Save”.
Please note down the following data: database name, hostname, username and password. They will be required to include the created database into the WordPress installation on the subdomain.
Step 4: Upload WordPress files onto online storage
The next step is to install your chosen FTP client and connect it to the online storage your subdomain is being hosted on.
You can read how to download the popular FileZilla FTP client and how to connect it to your chosen online storage in the FileZilla tutorial.
Look for the ./public.html/subdomain directory and upload the unzipped WordPress program files to this folder.
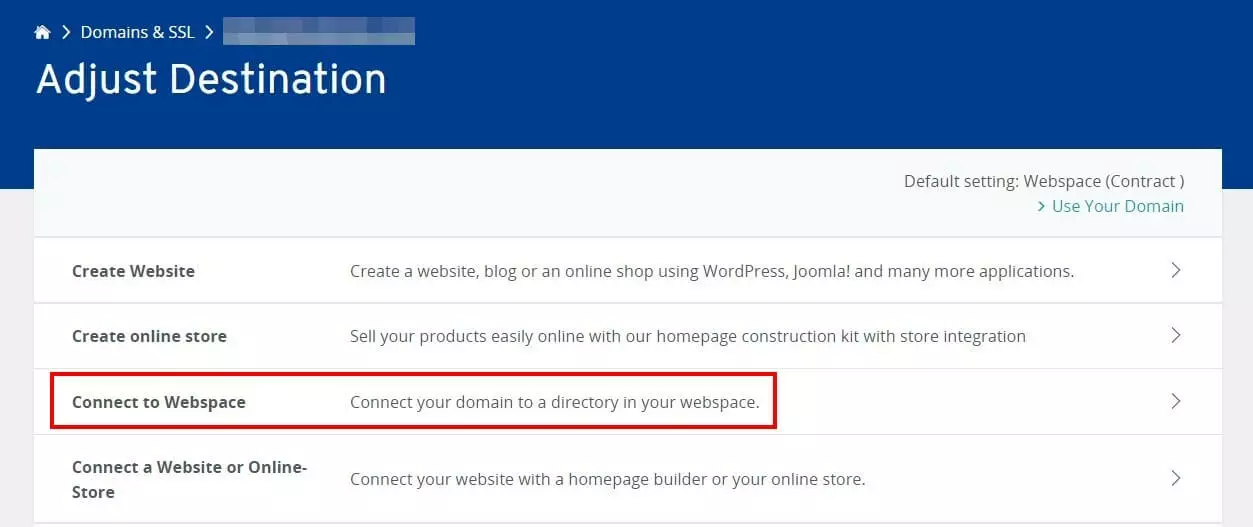
If you can’t find the directory, it is possible that the subdomain isn’t connected to the online storage. If so, take the following steps on IONOS Cloud Panel:
- Go to the “Domains & SSL” section.
- Choose the domain your subdomain runs under.
- Click the “Subdomains” tab and then click on the “use domain” button.
- Choose the “Connect to webspace” option and confirm this change by clicking “Save”.
Step 5: Edit wp-config.php
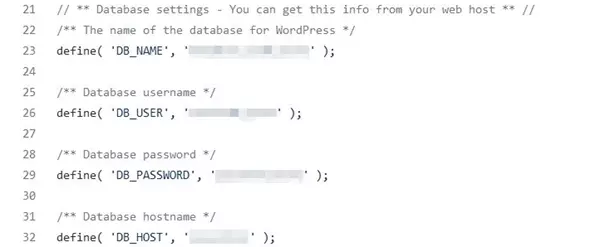
You will find a file named wp-config-sample.php in your uploaded files. Rename the file wp-config.php and open it in any text editor. Finally, add the data from the third step into the corresponding spots:
- DB_NAME: Database name
- DB_USER: Username
- DB_PASSWORD: Password
- DB_HOST: Hostname
Step 6: Install WordPress on a subdomain
Once you have added the database information to the configuration files and saved them, you can finally begin to install WordPress on the subdomain. Paste the following URL into your browser:
subdomain.domain.tld/wp-admin/install.phpReplace the preexisting subdomain.domain.tld with the address of your subdomain. As soon as you load the URL, the WordPress installation wizard will automatically start.
How to install WordPress on a subdomain with 1 click
Many providers enable you to install WordPress on a subdomain with the help of 1-click installation. This way you save a lot of time and effort as well as cutting out the most common error sources during setup. This variant is highly recommended for beginners.
Want to install WordPress with ease, without the effort of manual setup? Choose a suitable plan with IONOS and enjoy quick and easy WordPress installation.
IONOS enables you to install WordPress on your subdomain with 1 click using the following steps:
- Log into cloud panel through the login page.
- Go to the “Domains & SSL” section and choose the domain your subdomain runs under.
- Click the “subdomains” tab and then click on the “use domain” button.
- Choose the “create website” option
- Click on “flexible & complete” and choose WordPress.
- Give the installation a title and click on “Create website”.
- Create a user and then choose “Continue with WordPress”.
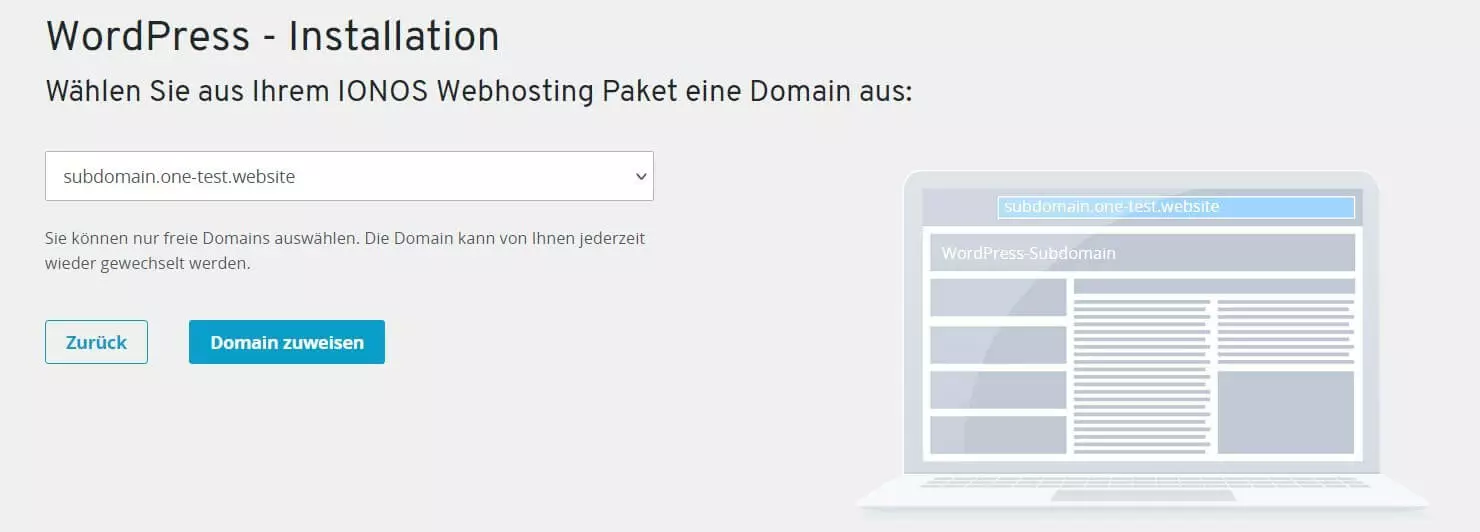
- In the last step, assign the subdomain once again and WordPress will be installed and set up automatically.
Interested in more information about WordPress? The following articles contain interesting topics about the popular Content Management System:
Install WordPress on a subdomain to save costs and strengthen your brand. As soon as you have created a suitable subdomain, you will usually have the option to choose between a manual or 1-click installation. The former requires you to copy all program files into the online storage, the latter uses a ready-to-use app from the provider.


