How to perform a Gigabyte BIOS update
Updating the BIOS on a Gigabyte motherboard is important for ensuring the stability, compatibility and performance of your computer. BIOS updates fix hardware problems, enable support for new components and provide additional features.
- Simple registration
- Premium TLDs at great prices
- 24/7 personal consultant included
- Free privacy protection for eligible domains
Step 1: Prepare for the update
Before you start the Gigabyte BIOS update, you’ll need to make some important preparations to avoid potential risks like system failures and data loss. First, you should find out which BIOS version is currently installed on your motherboard. That’s how you can tell whether you need an update.
To do that, turn on your computer and press [Del] repeatedly during startup to open the BIOS. Look for the BIOS version currently installed and make note of it. It is often shown at the top of the main page. You can also find out the BIOS version using the operating system – press the keys [Windows] + [R] and enter msinfo32. You’ll find the BIOS version currently installed under “BIOS Version/Date”.
On some motherboards, BIOS is opened using a different key than [Del]. If you have the name of your hardware, you can find out which key to use with a simple Google search.
Step 2: Download the most recent BIOS version from the Gigabyte website
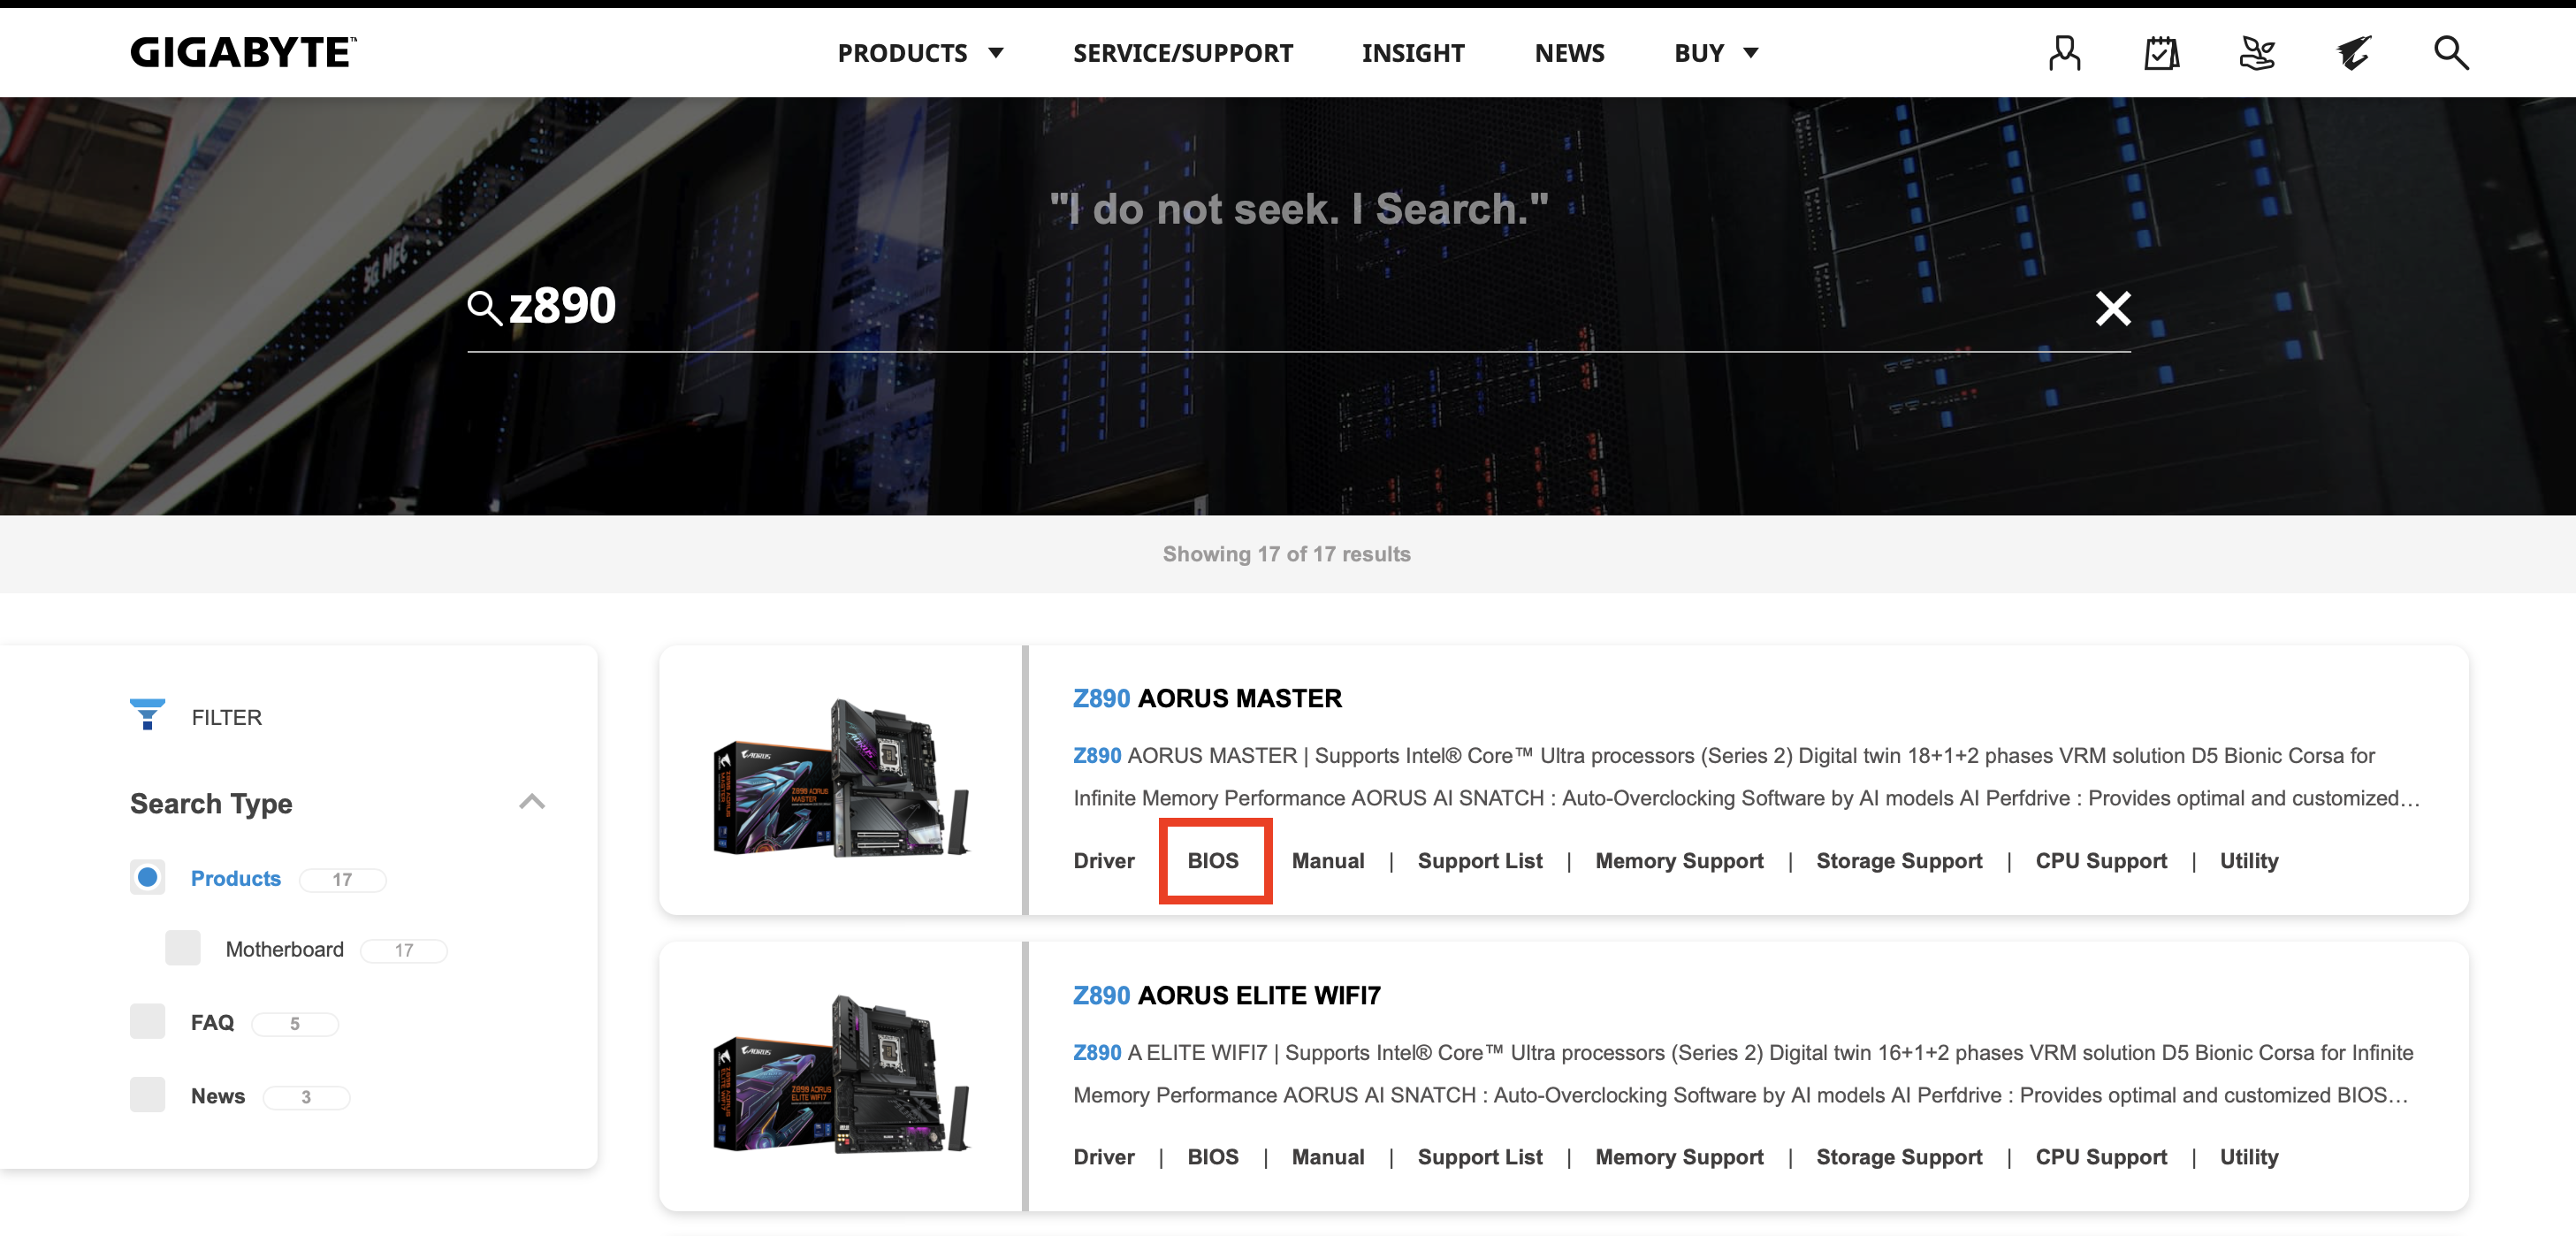
To obtain the current BIOS version, you’ll need to visit the Gigabyte website. Enter the model of your motherboard in the search bar. You can find the model name on the packaging, in the handbook or on the motherboard itself. Afterwards, select your model from the search results and click on BIOS in the menu.

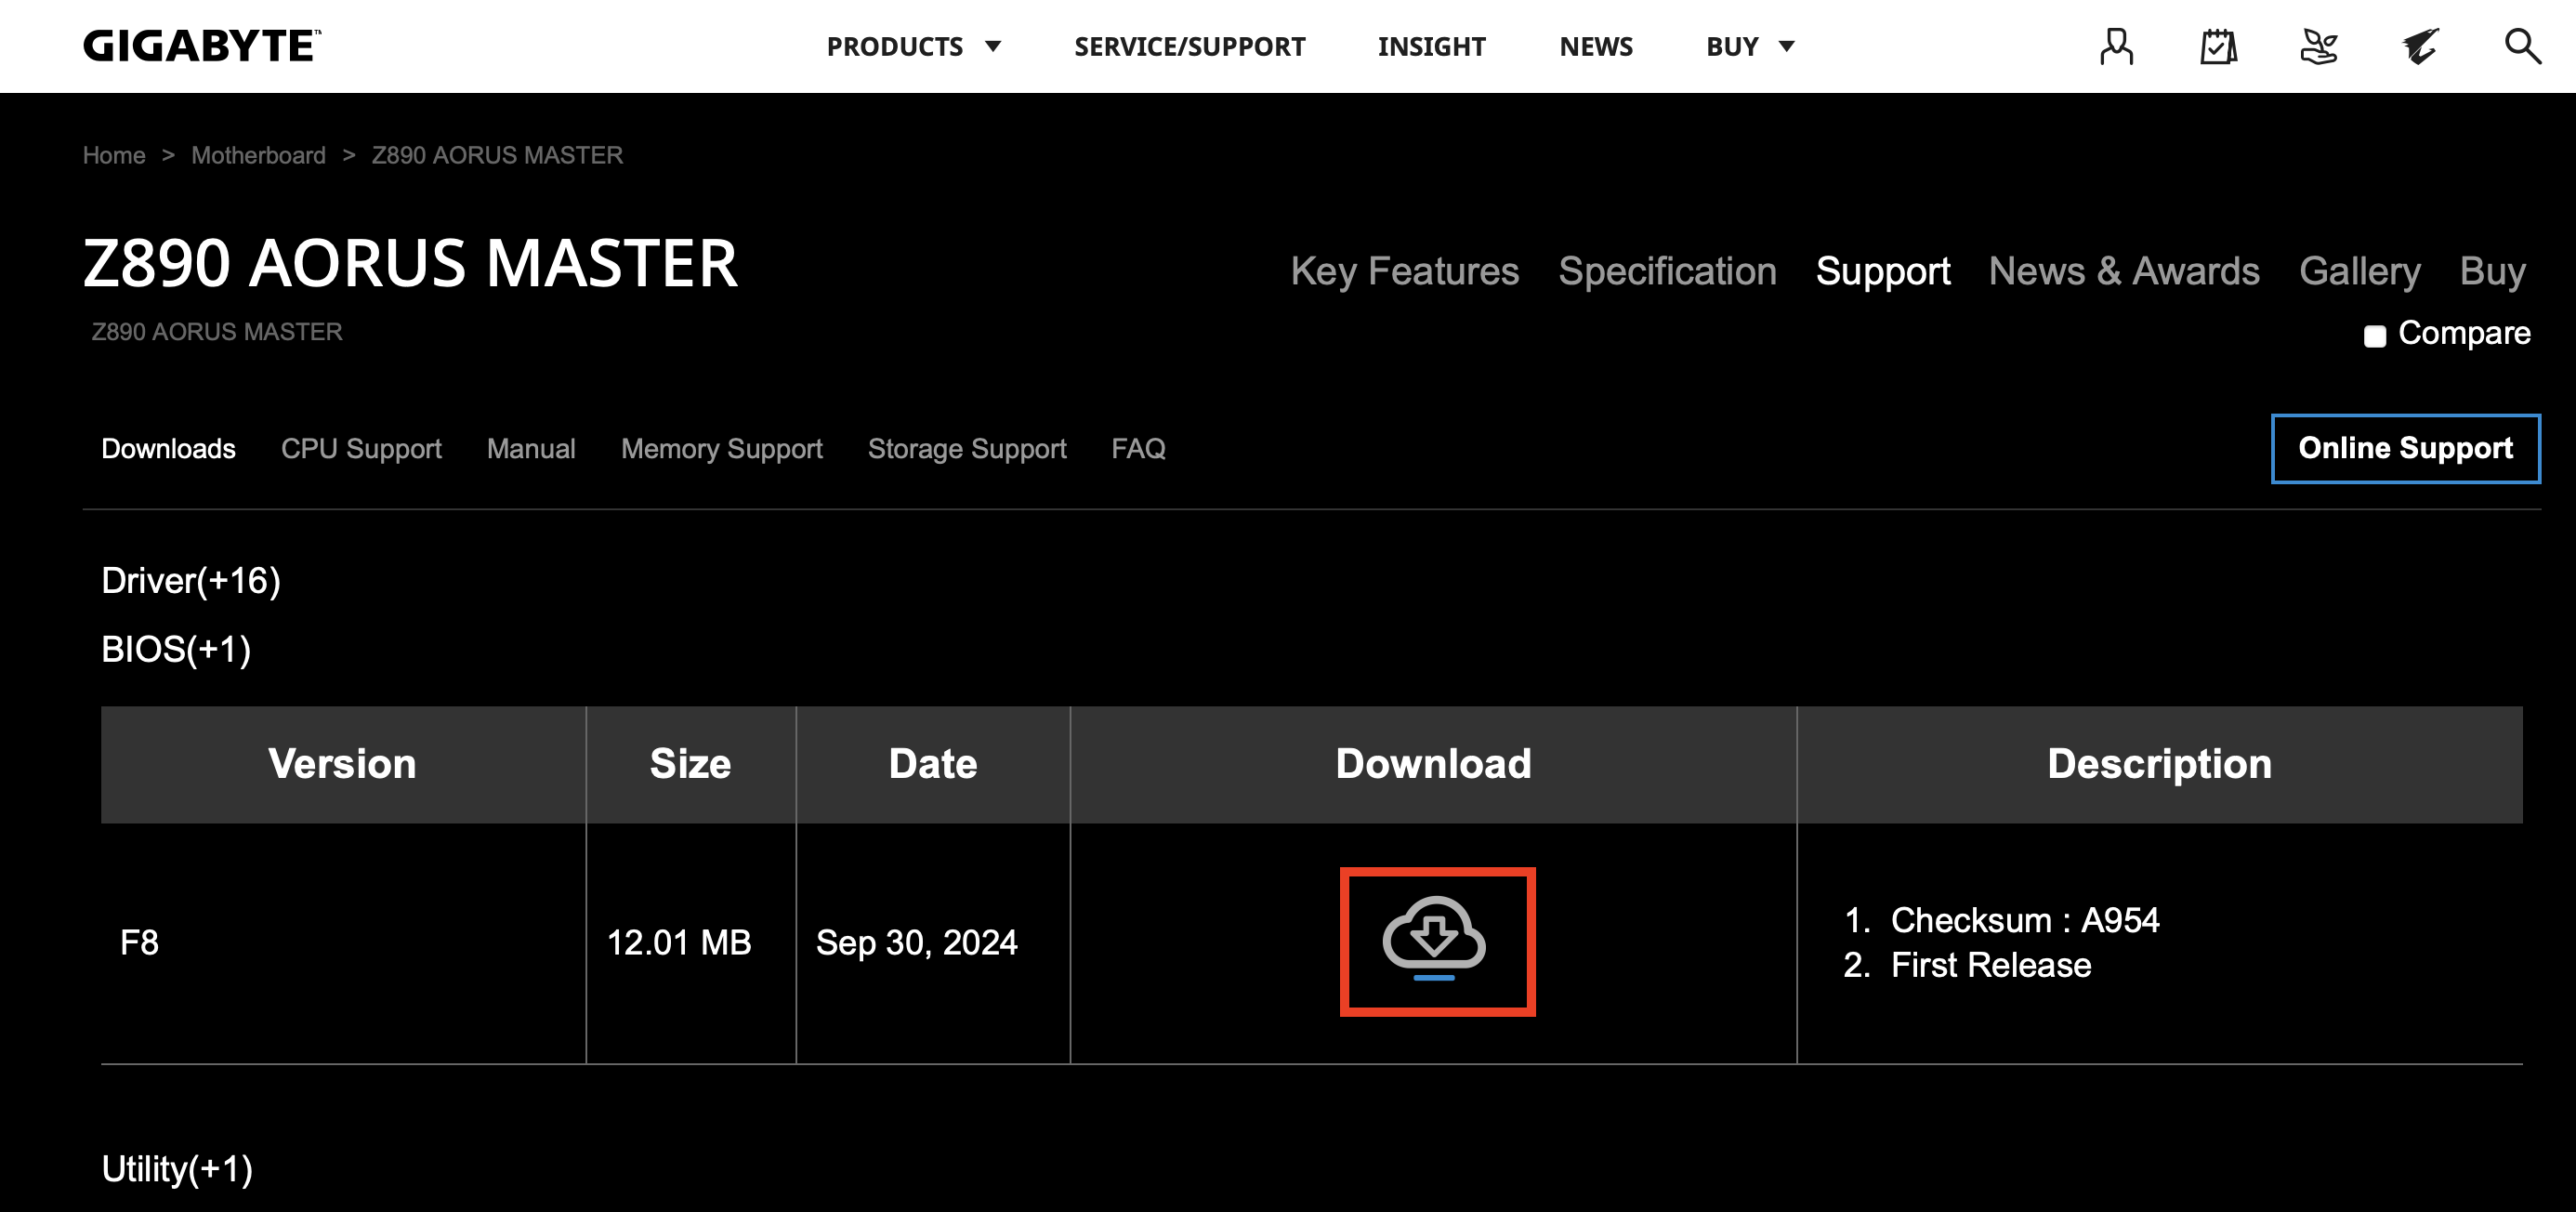
Then download the most recent BIOS version. Make sure that it’s compatible with your motherboard.

Step 3: Prepare your USB stick
To install the Gigabyte BIOS update, you’ll need a USB stick that’s empty, sufficiently large and formatted for the FAT32 file system.
When you format your USB stick, all the data on it will be deleted. Be sure to either use an empty USB stick or one with data you don’t need anymore.
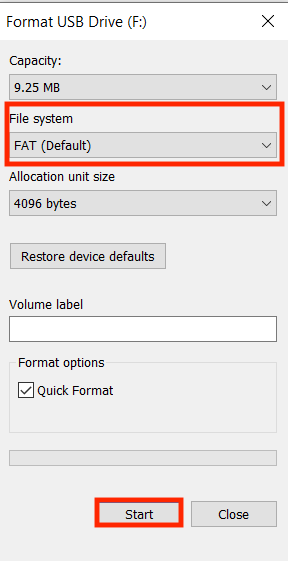
To format the USB drive, first connect it to your computer. Open it in Windows Explorer and right click on the stick. Then choose Format. Ensure that FAT is chosen as the file system and then click on Start:

After formatting, unzip the BIOS file you downloaded with a program of your choice and copy its contents onto the USB stick.
Step 4: Prepare your computer
It’s important that your computer doesn’t crash or turn off during the Gigabyte BIOS update, as this could damage the motherboard. Make sure that your computer is plugged into a reliable power source, close all programs and save any open documents. You should also remove any unnecessary USB devices like external hard drives or printers to ensure the update goes as smoothly as possible.
Step 5: Open Q-Flash in BIOS
Gigabyte motherboards have an integrated tool called Q-Flash that was developed specially for BIOS updates. To use it, restart your computer and press [Del] repeatedly during startup to open the BIOS. In the BIOS menu, look for Q-Flash. It’s often at the bottom of the start page or in a special submenu. You can also press [F8] in BIOS to access Q-Flash. Then click on Update BIOS.
Step 6: Select the BIOS file
Now you need to select the BIOS file from your USB drive to start the update. First stick the USB drive into the USB port of your computer, and then select the option Update BIOS from Drive in Q-Flash. Q-Flash will then automatically search for the BIOS file on your USB stick. Make sure the version is correct before proceeding with the update.
Step 7: Start the Gigabyte BIOS update
Once you’ve selected the correct file, you can start the update. To do so, confirm that you want to update BIOS. Q-Flash will start the process. The progress of the update will be shown on the screen. Do not under any circumstances turn off or unplug the computer during the update. That could cause irreparable damage to the motherboard. After the update your computer will automatically restart.
Step 8: Confirm update
To ensure that the Gigabyte BIOS update was successful, you can check the BIOS version again like we did in Step 1 or display it using msinfo32.
You want to update your BIOS but your motherboard isn’t from Gigabyte? No problem! Take a look at one of our other guides:

