How to install Joomla on a web server and in XAMPP
The content management system (CMS) Joomla can be installed locally or on a web server of your choice. You just need to fulfill a few software requirements. If your database, web server, and CMS are configured for sharing, then Joomla can be set up as you wish.
- Simple registration
- Premium TLDs at great prices
- 24/7 personal consultant included
- Free privacy protection for eligible domains
What’s required for a Joomla installation?
To install Joomla, you’ll need to fulfill a few requirements. First, you’ll need the most recent version of PHP (the language Joomla is written in) installed on your system. If you want to set up Joomla 4.x, you’ll need PHP version 7.2.5 or newer. To be on the safe side, you’re best off using PHP 8.0 or higher. The developers of Joomla also recommend defining the following values in PHP.ini, the configuration file for PHP:
- memory_limit: 64 M (Better yet: 128 M or more)
- upload_max_filesize: 30 M (or more)
- post_max_size: 30 M (or more)
- max_execution_time: 30
Next, you’ll need the following software components if you want to install Joomla locally or on the webspace of your choice:
Compatible databases (Joomla 4.x):
| Minimum | Recommended | Official website | |
| MySQL (InnoDB support required) | 5.6 | 5.6+ | www.mysql.com |
| PostgreSQL | 11.0 | 11.0+ | www.postgresql.org |
Compatible web servers (Joomla 4.x):
| Minimum | Recommended | ||
| Apache (with mod_mysql, mod_xml, and mod_zlib) | 2.4 | 2.4+ | www.apache.org |
| NGINX | 1.10 | 1.18+ | www.nginx.org |
| Microsoft IIS | 8 | 10+ | www.iis.net |
If you want to use Joomla to create your website, you’ll need your own web address and the right hosting environment. Whether that’s your own server or hosting with a professional provider of your choice.
IONOS’s Joomla hosting service provides the perfect foundation for your Joomla project. This includes your own domain, a SSL/TLS certificate, and ample storage space. You can also buy an additional domain if you need more than one web address.
What are the different ways to install Joomla?
As mentioned above, Joomla can be installed on a web server of your choice or installed locally. The latter might be an option if you want to test the system or certain configurations before your project goes live.
If you choose the more standard method of installing Joomla on a web server, you’ll usually have two options (if you’ve outsourced hosting):
- Install Joomla manually and retain maximum control over installation and setup. This option entails more time and effort.
- Use one-click installation offered by your hosting provider to install and set up Joomla as easily as possible. For example, with IONOS you can use “Click & Build” to install Joomla from your IONOS account.
The advantages of one-click installation are clear. In just a few steps, you can install Joomla and all the dependencies it requires on your server, without having to download software or dive too deep into the individual components involved. On the other hand, this option involves giving up a bit of control over your Joomla installation. Choosing to manually set up Joomla is preferable if you want to take care of software updates yourself and don’t mind devoting a bit of extra time to the project.
Joomla is especially well suited to large projects with extensive structures. Check out our article “WordPress vs. Joomla” to learn why that’s the case and how Joomla stacks up against the market leader WordPress.
How to install Joomla on a web server step-by-step
You’ve found the right hosting environment and are ready to install Joomla? Below we go through each of the steps in the process. Don’t forget that you first need to install the necessary dependencies, including PHP, the web server of your choice (we use Apache) and a database (we use MySQL).
Check out our Digital Guide to learn about how to install Joomla on a NGINX server.
Step 1: Downloading Joomla software
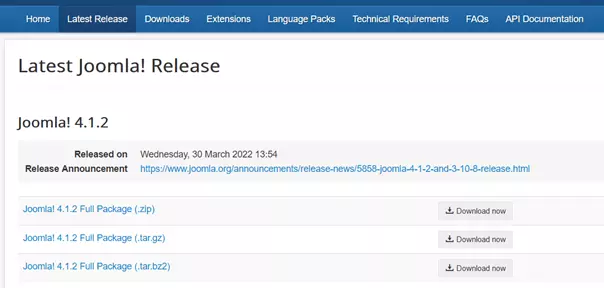
The first step is to get the current version of the Joomla software. To do this, go to the download page on the official Joomla website and download the newest version (4.1.2 in this example).
Step 2: Upload Joomla files using FTP client
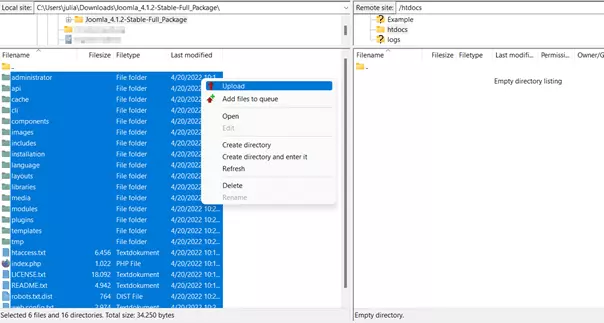
Extract the ZIP file and upload the Joomla package files to the root directory of your web server (usually “public_html” or “htdocs”) using an FTP-Client. We use the open source client FileZilla.
Step 3: Set up database
Next, set up the database you plan to use for your Joomla project. In this tutorial, we use a MySQL database. If you’re using a hosting provider, you’ll usually find a database option in your account. Note the name of the database as well as the username and password.
Step 4: Start the Joomla installation
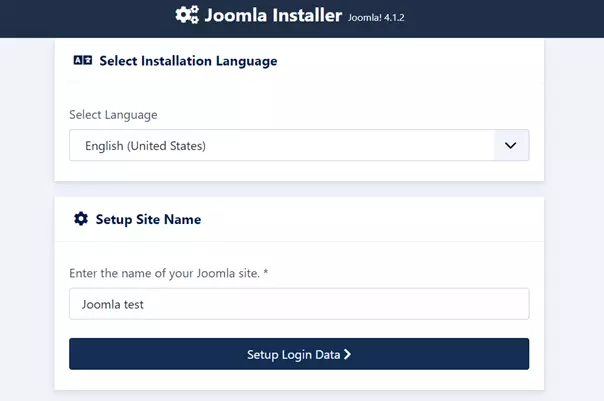
After you’ve uploaded the files and set up a database, you can start to set up Joomla. To do this, open your browser and type in the domain that your project will use. If the last few steps went as intended, you should see the Joomla Installer. Choose your preferred language, assign a name to your Joomla site, and click on “Setup Login Data”.
If Joomla setup doesn’t start when you enter your URL, it’s most likely due to a faulty connection between the installation directory and the domain. You can correct this in your account on your hosting provider’s website. If you’re having trouble, contact customer support.
Step 5: Set up Joomla login info and database connection
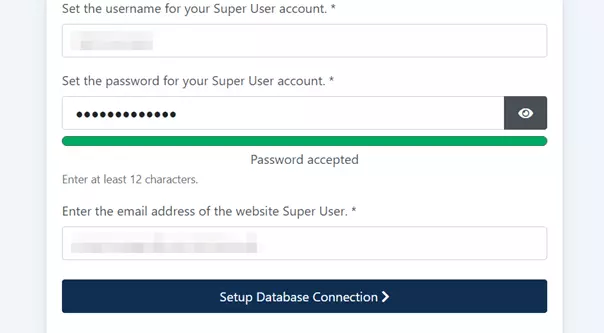
Set the login info for the Super User – name, username, password (at least 12 characters), and email address. Then continue the installation by clicking forward to the next step.
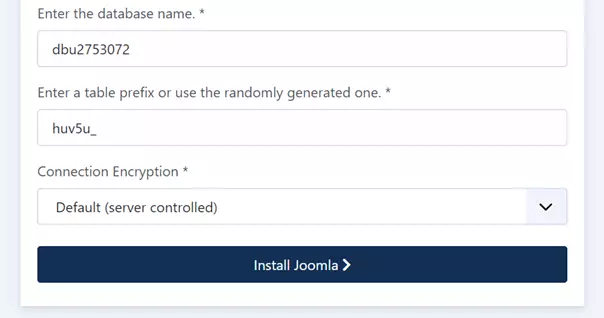
Now it’s time to connect the Joomla instance with the database you set up before. Enter the relevant information and then click “Install Joomla”.
Step 6: Log into the administrator area
After you’ve installed Joomla, you can log into the admin area of the CMS whenever you want. To do so, enter the admin URL for your web address into your browser. The admin URL is simply your domain plus “/administrator”.
mydomain.com/administratorHow to install Joomla in XAMPP step-by-step
If want to do a local install of Joomla for testing, you can’t do better than XAMPP. When you install this software bundle, you’ll get the current versions of all the components necessary for Joomla, no matter which operating system you’re using. Below we’ll show you how to install Joomla locally in XAMPP
Step 1: Install XAMPP
The first step in your local install of Joomla is installing XAMPP. You can find downloads for Windows, Linux, and macOS on the Apache Friends website, the non-profit organization behind XAMPP.
Download the install file for your operating system and then execute the installer by double clicking on it.
In some cases, especially when it comes to Windows Server, User Account Control (UAC) can interfere with the XAMPP installation process. It’s thus recommended that you temporarily turn off the feature while installing XAMPP.
Step 2: Start Apache and MySQL using the XAMPP control panel
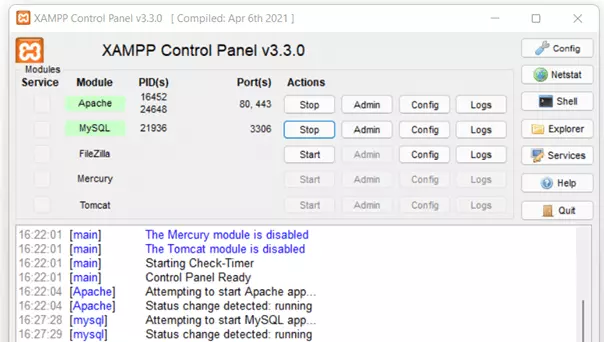
Open the XAMPP control panel and start the Apache server and the MySQL database (the first two items listed). You might encounter a message from your firewall the first time you start the two applications. If this happens, grant the necessary permissions. If the services were able to start as intended, they’ll be shown in green in the control panel.
Step 3: Download and extract Joomla software
Next, open Joomla’s official website and download the most recent version of the CMS (version 4.1.2 in this example).
After the download’s finished, extract the file and copy the Joomla folder into the XAMPP server directory. The directory will look as follows:
…\xampp\htdocsStep 4: Create database
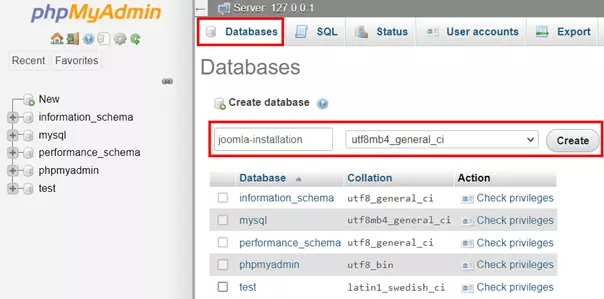
The final bit of preparation is to create a database for your project. To do this, open your browser and enter the following address:
localhost/phpmyadmin/Step 5: Set up Joomla
It’s now time to install Joomla. Go to your browser and open the localhost address for the Joomla folder that you just extracted and copied into the web server directory. We didn’t rename the folder after it was installed, so in our case it’s called “Joomla_4.1.2-Stable-Full_Package”. The address for starting the Joomla install will thus be as follows:
localhost/Joomla_4.1.2-Stable-Full_PackageChoose your preferred language for the install and enter a name for your Joomla project. Then continue to the next step.
On the next page you’ll set up the login for the Super User, the administrator with maximum control of the site. Fill out the fields and then click on “Setup Database Connection”.
Hold on to the information for database type, host name, prefix, and encryption and generate an individual database user (with password if you want). Under “Database name”, enter the name of the database you created in the last step. Finally, click on “Install Joomla”.
It takes a bit of time for Joomla to get set up. You’ll get a notification as soon as it’s finished.
The first steps after installing Joomla
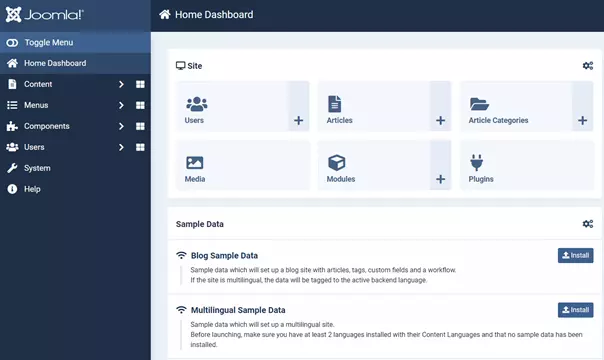
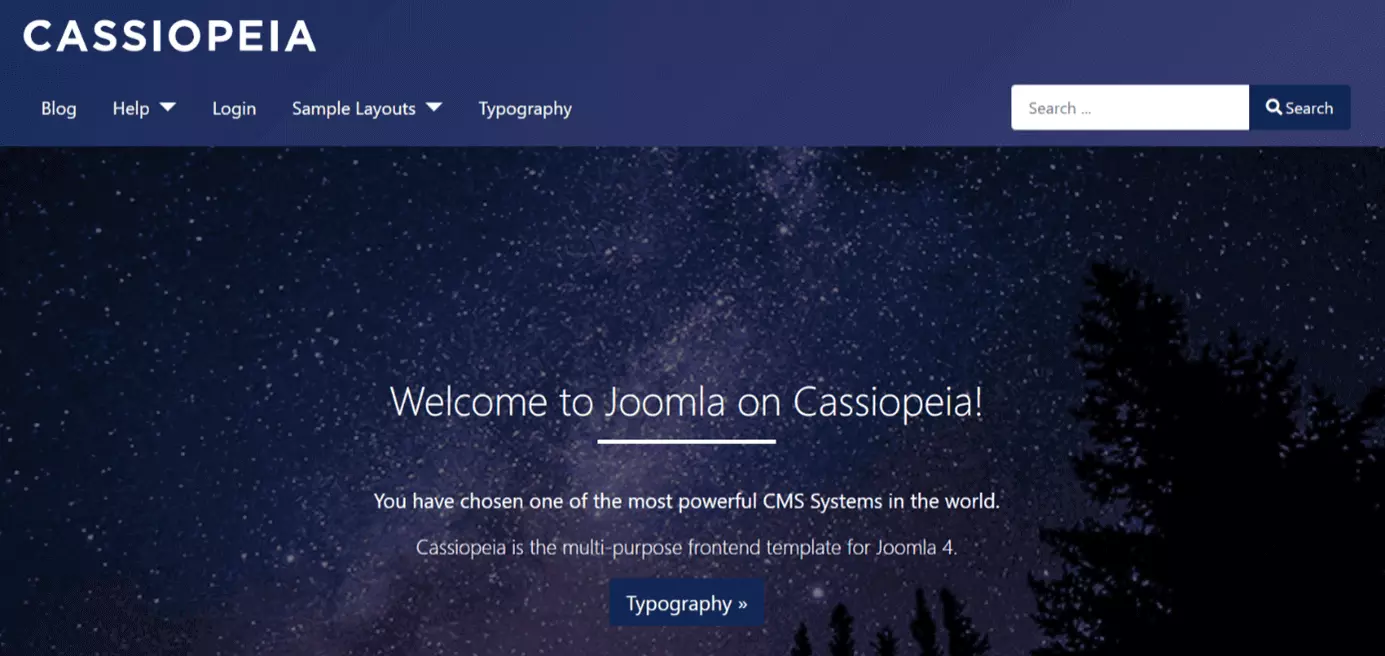
When you log in to the admin area after the installation is finished, you can complete the first admin tasks in the backend and get your Joomla project rolling. A good first step for everyone that wants to get to know Joomla better is to install the blog sample data. You’ll find it on the dashboard under “Sample Data”. Joomla will then create a small demo blog with placeholder content using the standard template Cassiopeia.
Below we’ll take you through some other first tasks to complete after your Joomla installation.
Install additional languages
When you log in, you’ll see an option for setting the language for the backend. However, the only language shown as an option will usually be the one you chose for the installation. If you want to add additional languages, follow these steps:
- Click on “System” in the menu on the left.
- Go to the category “Install” and then select “Languages”.
- Use the search field or find your preferred language in the list.
- Once you’ve found the language you’re looking for, click “Install”.
Install extensions
Do you already have some Joomla extensions in mind for your project? You can install extensions in the backend anytime.
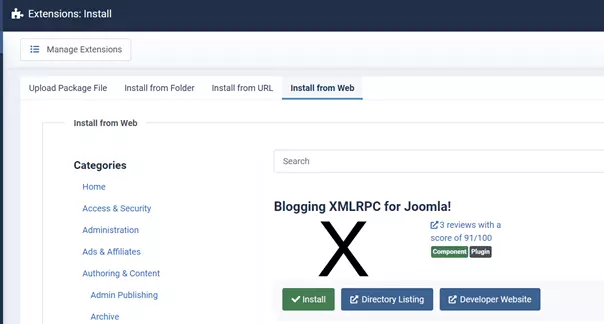
Click on “System” in the menu on the left and then select “Extensions”. You have four options for installing Joomla extensions:
- Upload package file: If you’ve already downloaded the Joomla plugin, install it using drag-and-drop or by selecting its location via “Choose file”.
- Install from directory: If you don’t want to navigate step-by-step to the directory where the extension is located, you can use this option to type in the directory.
- Install from URL: If you haven’t downloaded the extension yet but have the download link ready, you can paste it right in. Joomla will automatically download the file and install the extension.
- Install from web catalog: You can use the web catalog to search for extensions right in the Joomla backend. They can then be installed on the spot (if free).
Install templates
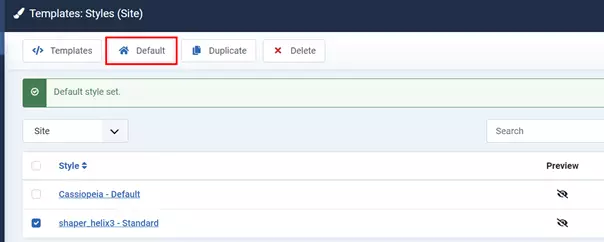
If you’ve installed a Joomla template using the Extension Manager, you can make it the standard template for your project in just a few steps:
- Click on “System” in the menu on the left.
- Select “Template Styles (Site)”.
- Select your preferred template.
- Click on “Standard”.
- Free Wildcard SSL for safer data transfers
- Free private registration for more privacy
- Free 2 GB email account


