How to create a Website with Joomla!
If you want to get extra attention and inform people about yourself, a company, an institution, or an association, for example, the best solution is to create your own website. As a kind of digital business card, websites are still of elementary importance and indispensable as a source of information for many internet users. Simple websites can be created with little effort and without any prior programming knowledge thanks to construction kits like IONOS MyWebsite, Jimdo, or Wix. They are an excellent solution for users without advanced IT skills and with a limited budget.
However, if you want to have a professional web project that offers maximum flexibility and can be scaled at any time, you should opt for a content management system such as Joomla!. In this article, we explain which requirements you have to meet to use this open source application and how to create your own Joomla! website.
- 99.9% uptime
- PHP 8.3 with JIT compiler
- SSL, DDoS protection, and backups
What's Joomla!?
Joomla! is a content management system released in 2005, which is characterized in particular by its high user-friendliness. This makes it possible to operate the software after only a short training period and with basic know-how. After a short familiarization period, you can start to create your own Joomla! website. The CMS system is licensed under GNU-GPL and written in PHP. For data storage, Joomla! uses the relational database management system MySQL by default. Since the open source application has been one of the most popular open source solutions for website management for years, there are already thousands of extensions for the front end and back end, most of which were developed by the very active community. However, Joomla! provides everything you need to create and administer a functional, search engine-optimized website without extensions.
Joomla! is suitable as a CMS solution for dynamic web projects of various sizes. Depending on which extensions you integrate into the standard installation, you can create simple, well-structured websites as well as sophisticated, complex web applications. By using shop components such as VirtueMart, it is also possible to set up and operate an online shop using Joomla!.
Joomla!: Setup and installation guide
Before you can create a website with Joomla!, you must first fulfil the appropriate requirements: First and foremost, you must select a suitable hosting environment where Joomla! and later the data of the web project should be stored. Before you begin, consider whether you want to host the CMS and your website on your own server or on a hosting provider’s server. Then you should think of your website’s address and register your desired domain.
IONOS offers various Joomla! hosting packages that allow you to create, host, and manage up to 50 websites with Joomla!. In addition to the necessary server resources, you also get access to your own domain and domain-specific e-mail accounts.
Installation and setup of web server and database
Once you have succeeded with the hosting and domain registration, you can start installing the software components required to operate the content management system:
Firstly, you need a web server that supports PHP (must also be installed on the server) and can be controlled via FTP. The Apache web server is recommended for this. Here in the Digital Guide, you'll learn how to set up an Apache web server.
You also need the database management system, in which Joomla! will store your website’s information. Since MySQL is an excellent solution, it is best to download the Oracle application installation files from the software manufacturer’s website. The difference between the commercial “MySQL Enterprise Edition” and the open source variant “MySQL Community Edition” is that the first is subject to a fee, and the latter is free.
If you are using a Linux distribution as your operating system on your server, you can usually install the Apache web server and MySQL database directly from the package manager.
Download and install the latest version of Joomla!
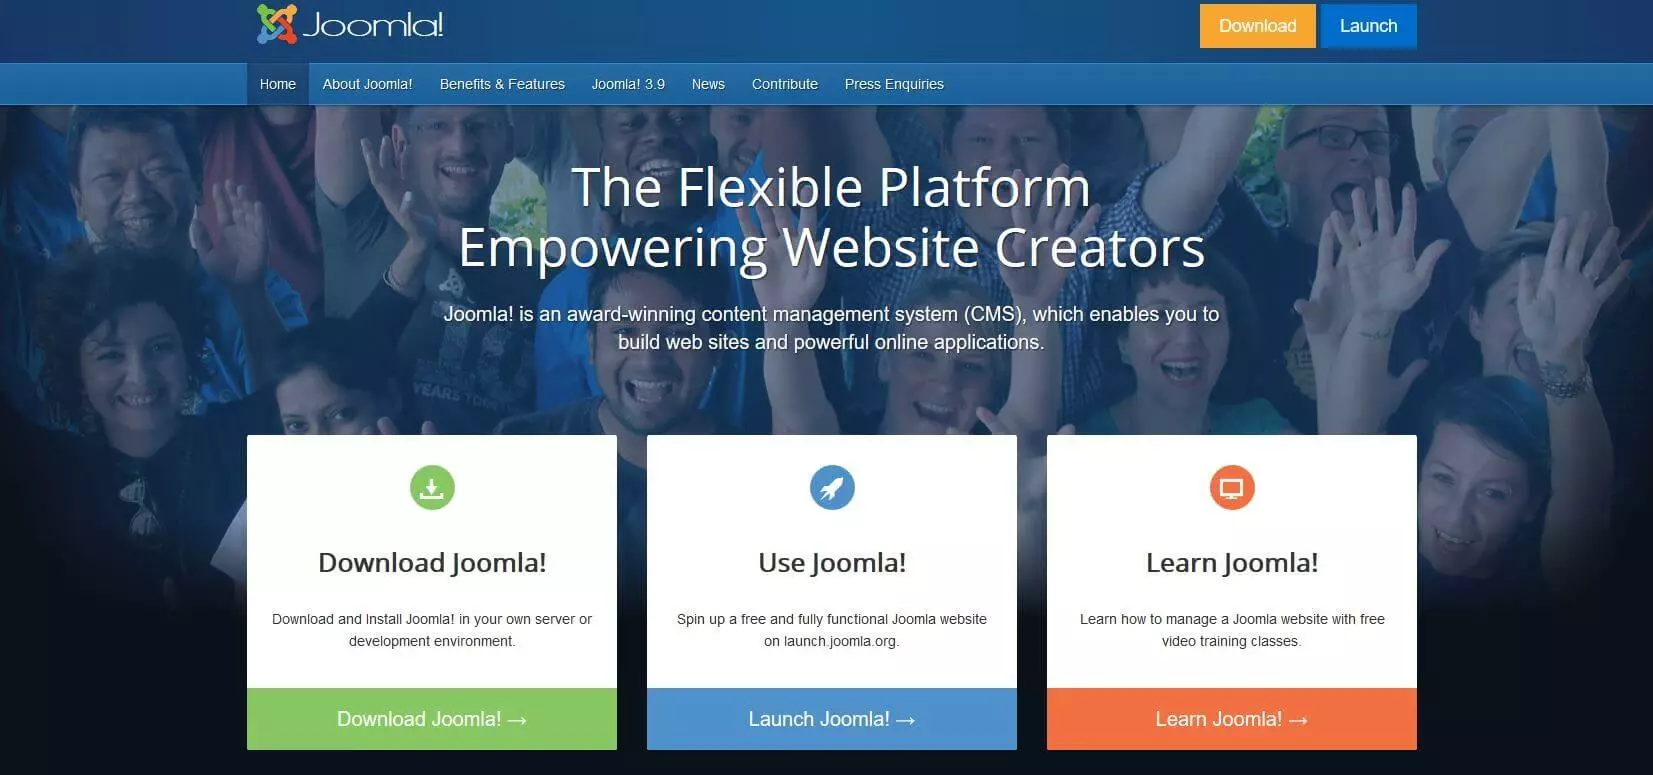
If the web server and database are running, visit the Joomla! website and download the installation files for the latest version of the content management system by clicking the download button:
The downloaded file is an archive file that you either unpack locally before moving it onto the web server using an FTP client such as FileZilla, or you can unpack it after the FTP upload. It is important that the contained Joomla! program files are located in the public root directory after unzipping, which is usually called “public_html” or in some cases also “htdocs”.
To start the installation of Joomla! now, access the web installer via the browser of your choice by selecting your domain (i.e.: “http://www.name-of-website.com") or Joomla’s local storage location (“http://localhost/path-to-joomla-folder”). First, Joomla! asks you to make some basic settings – starting with the language selection. However, the CMS should have already selected the appropriate language version automatically – based on the language selected for the browser. The following fields must also be completed:
- Name of the website: Here, you specify the name of your Joomla! website (you can change the name at any time in the global configuration).
- Description: Under the item “Description,” you enter the meta description of your entire website, which describes your website for search engines and contains the main keyword. 20 to 25 words is the optimal length.
- E-mail: Joomla! requests a valid e-mail address that’s associated with the administrator’s account. This is required if you want to change the password, for example.
- Username: The CMS uses the name “admin” by default for the super user, but you can change that here.
- Password: Define a secure password for administrator access and keep in mind that this user account has maximum access to the front end and back end.
- Site offline: With the option “Site offline,” you determine whether the Joomla! website you create should be accessible straightaway via its URL (“No”) or whether it should be offline at first (“Yes”).
Once you have completed the configuration page, click “Next” to open the database configuration menu. Enter the requested information on database type, server name, and login and click “Next” again to finish. Check on the overview page whether all data and settings are correct and start installing Joomla! by clicking on “Install.”
If you host Joomla! with a provider, it could be that the provider offers help with the installation for the content management system (including web server and database). IONOS, for example, enables Joomla! and other CMS (e.g. WordPress or TYPO3) to be installed with fast and free 1-click installation – via the app center available to customers.
- Get online faster with AI tools
- Fast-track growth with AI marketing
- Save time, maximize results
Creating a Joomla! website: Beginner tutorial
As a classic content management system, Joomla! offers two different levels for editing website content: The front end, which allows you to edit content directly on the respective pages, and the underlying back end, in which you create the basis for the functionality, design, and administration of the web project. If you want to create your own Joomla! website, your path will consistently lead you to the back end. In this tutorial for beginners you will learn, among other things, which administrative matters there are to be settled at the beginning and how to create a simple Joomla! site and fill it with content.
Login in the back end
You can work in the back end (and also in the front end) comfortably via the browser of your choice. After you have connected your desired domain with Joomla!, all you have to do is type the URL “http://www.name-of-website.com/administrator” into the browser to open the login window for the back end. Do not forget to replace the example address “name-of-website.com” with the domain address of your future website. On the login page that appears, enter the administrator data you specified during the installation before clicking on “Log in”:
Joomla! configuration menu: Change the global Joomla! settings
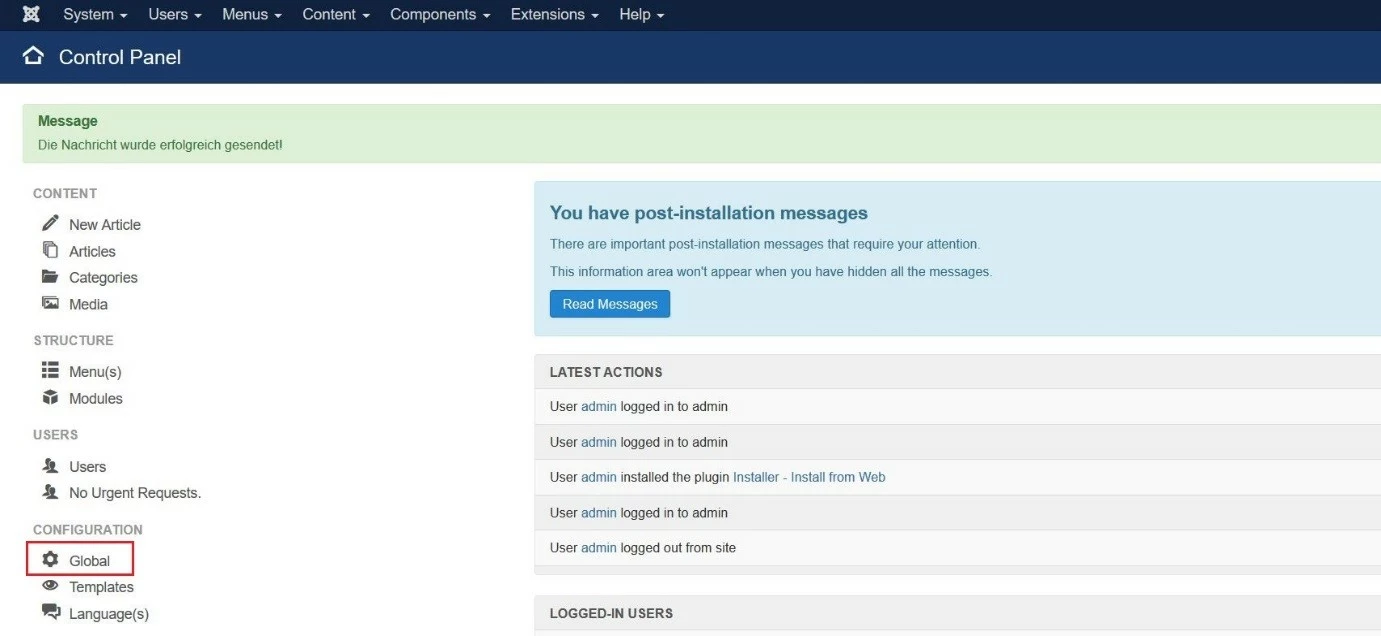
After logging in, you will be taken to the Joomla! control panel, which gives you an overview of the most important data about your website and its activities in the content management system. This way you can see which versions of the operating system, PHP, and database you are using or how many visitors are currently on your site, which users are logged in to the back end or front end, and which changes were last made to the web project. Via the control panel, you can also access the options menu of the CMS, where you can adjust the basic settings of your Joomla! website. Use the “Global” tab in the left menu bar to access it:
In the “Site” tab, you will find the settings decided on during the installation – such as the website name, the global meta data, or the switch for offline mode of your web project. You can also specify which editor you want to use for your work in Joomla!: The WYSIWYG editor TinyMCE is preselected – but as an alternative the simple code editor CodeMirror is available. However, thanks to appropriate extensions, popular editors such as ARK Editor or JCE can also be integrated.
Settings for indexing and search engine optimization are also possible: In the “Robots” field, you can specify whether search engine crawlers should index HTML pages (index) or not (noindex) and whether these links should be followed (follow) or not followed (nofollow). The other tabs of the global menu allow the following settings:
- System: Under “System,” you can specify the path to the log directory and make settings for caching, debugging, and session management.
- Server: In this menu, you find all important options for web server management and activate or deactivate FTP, HTTPS, or a proxy server, for example.
- Text filter: You use the text filter settings to define the individual user groups and which type of HTML elements they are allowed to use when using the editor.
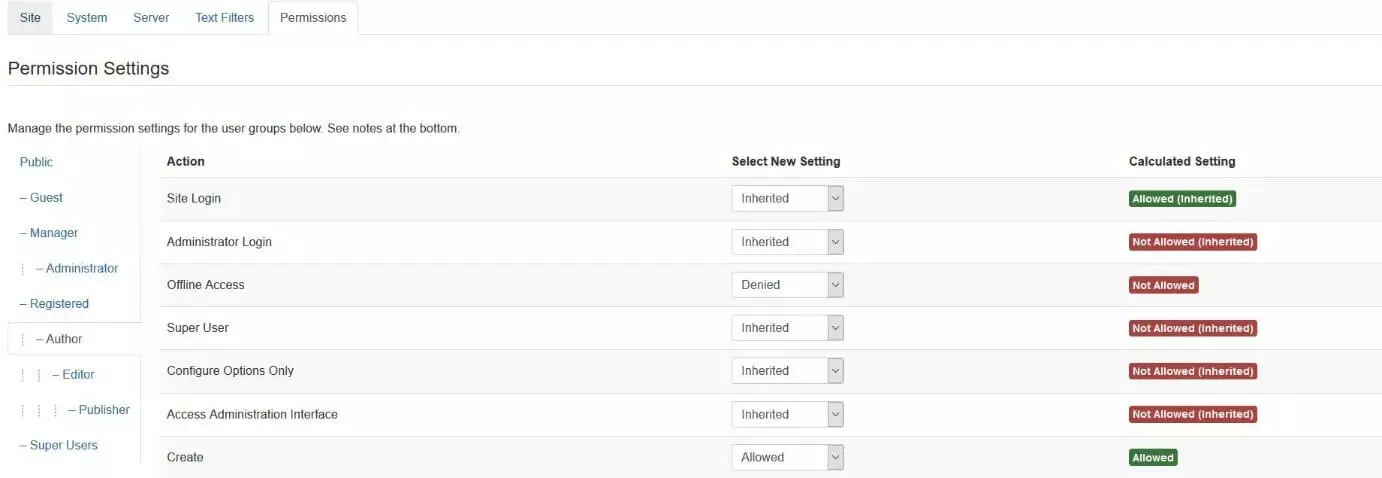
- Permissions: The rights of the various users can be defined individually in the “Permissions” menu. Definable actions include administrator access, site login, create, delete, and edit.
Manage user groups and add users
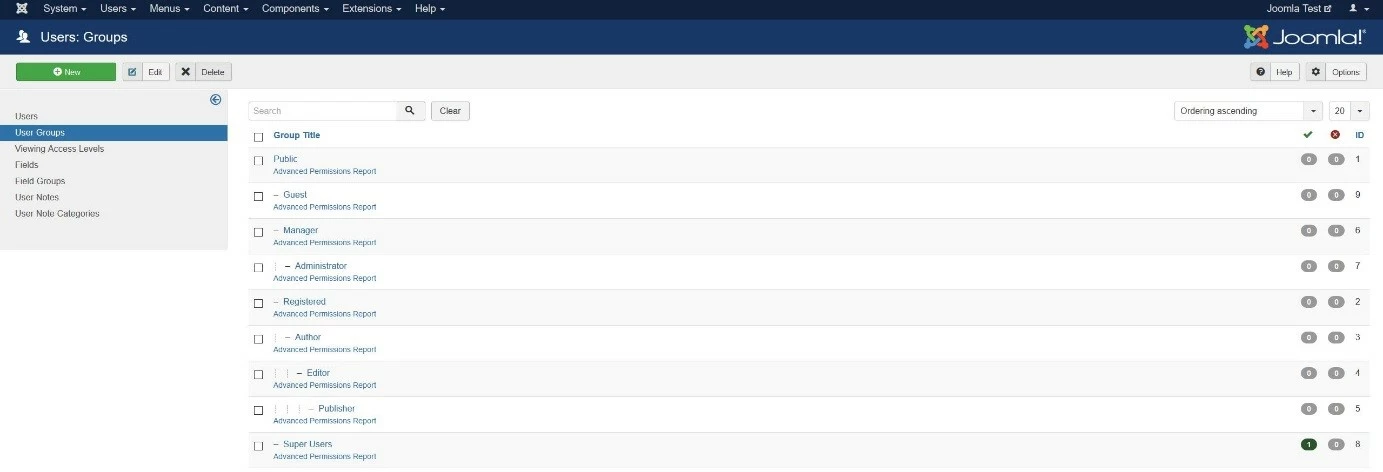
After installation, the administrator account is still the only user account. But of course – depending on the type and scope of the web project – there are also other users who are also involved in the management of the website or the design of the content. Therefore, Joomla! already provides a ready-made, hierarchically-structured user schema, which you can adapt at will. To do this, first click on “Users” and then on “User Groups”:
If you want to make changes to the user group schema, check the box for the desired group and then press the “Edit” button. Alternatively, you can delete groups completely using “Delete.” To define the access options for the various user profiles, switch to the “Permissions” tab mentioned in the previous section in the “Global” menu. There you click on the group or subgroup to be edited and then select one of the following three settings for the respective access action:
- Inherited: Permission is transferred from the parent group
- Allowed: User group may perform the action independently of the settings of the parent group
- Denied: User group may not perform the action regardless of the settings of the parent group
If groups and assigned access rights meet your requirements, you can create new users and assign them to the desired groups. To do this, access the “Users” menu and click on the “New” button. Now it is necessary to enter the names and user names as well as a valid e-mail address of the new user and to mark in the tab “Assigned groups” which group or groups this new user account should be assigned to. Then click on “Save & Close” to create the account. This should now be visible next to the administrator account (Super User) in the user listing.
As soon as you have created a new user, this user automatically receives a confirmation e-mail to the address entered. Joomla! transfers the access link as well as the user name and an automatically generated password, or the password that you entered when creating the account. The user can of course change this after registration.
Integrate the desired template for your own Joomla! website
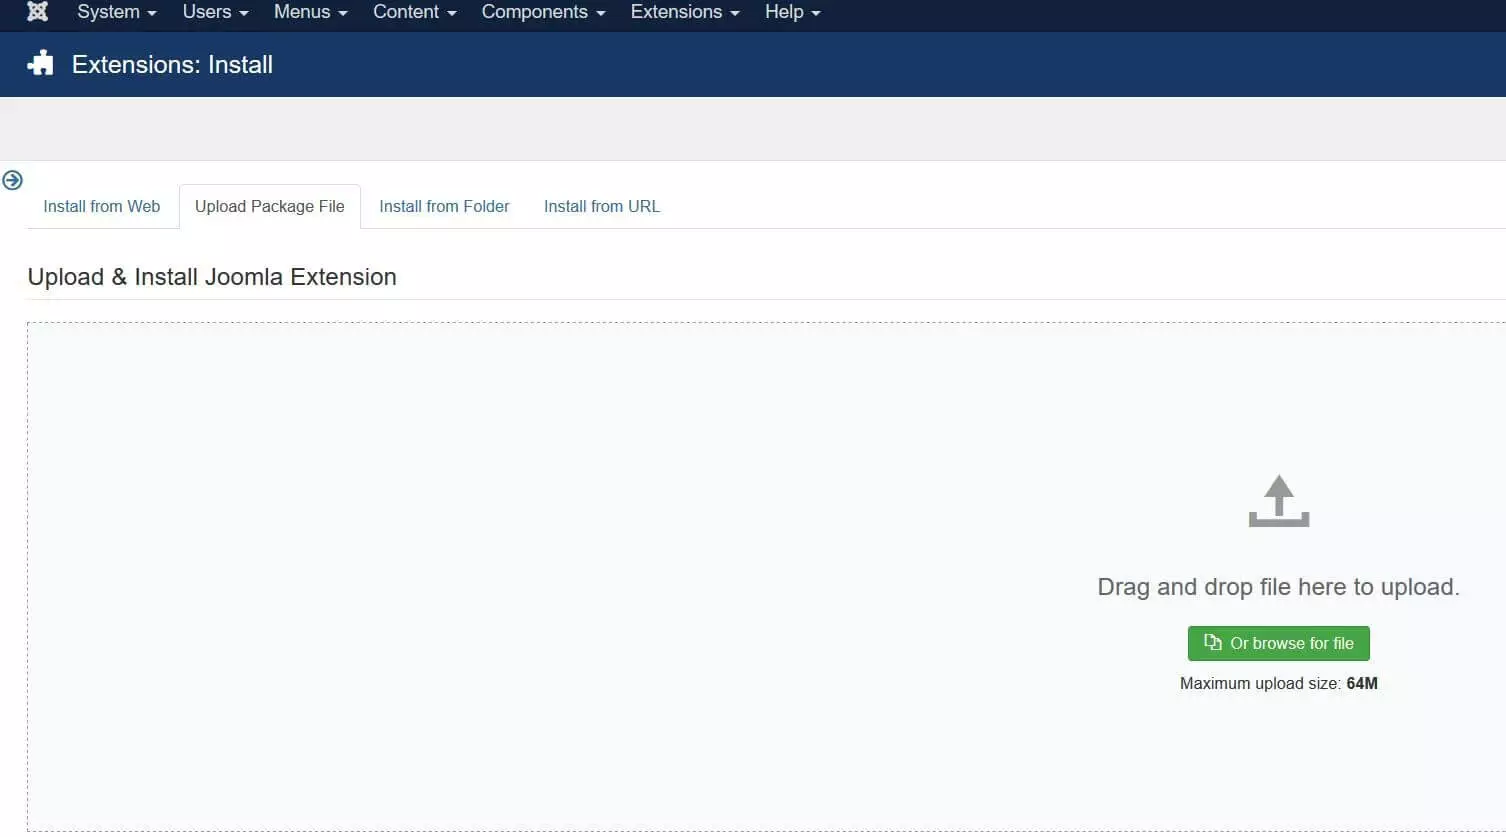
If you create websites with a CMS like Joomla!, you have the big advantage of having all design templates (mostly called themes or templates) available to you. In the basic version, Joomla! offers the responsive templates, Protostar and Beez3 (the former is selected by default). However, if you have another Joomla! template in mind for your web project, you can integrate it at any time via the back end. To do this, first download the template and then implement it by clicking on “Install Extensions” in the control panel and then on “Upload Package File.” If you drag and drop the downloaded template file(s) into the designated area, Joomla! automatically starts the installation.
After the installation, you will find integrated templates in the menu of the same name, which can be accessed via the control panel. In order to activate them, simply click on the asterisk symbol in the “Standard” column of the desired template. Joomla! confirms the selection in the following in the form of a notification.
Create the first Joomla! page and enter it as start page
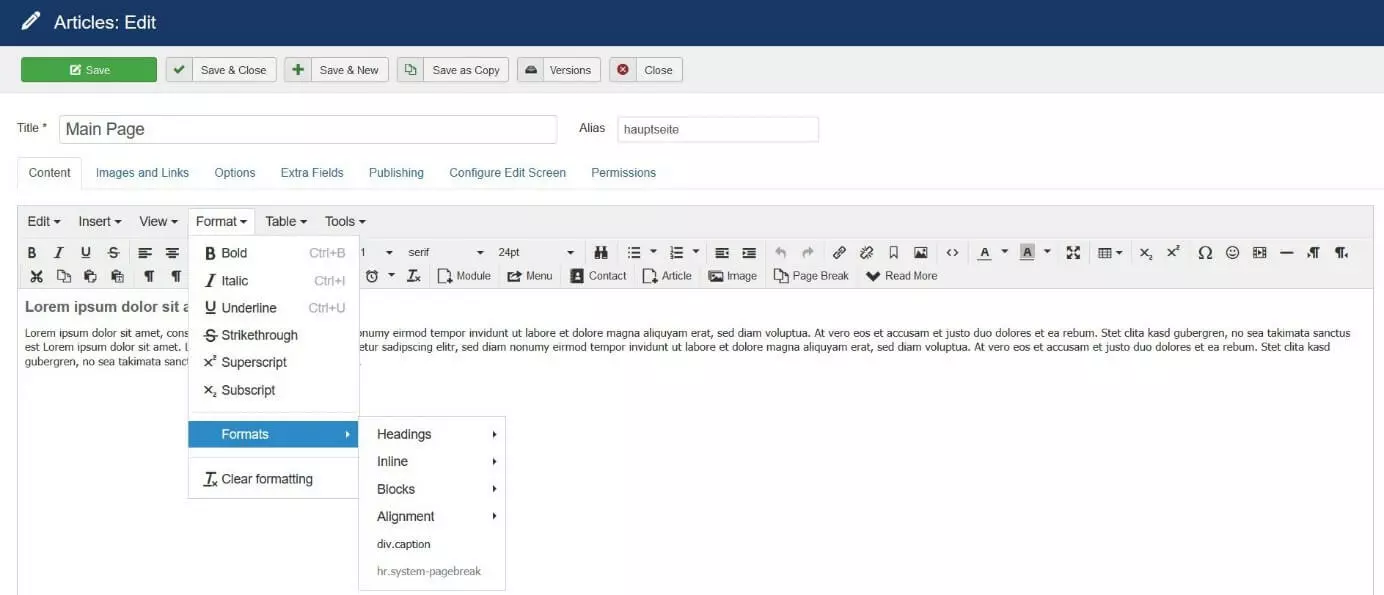
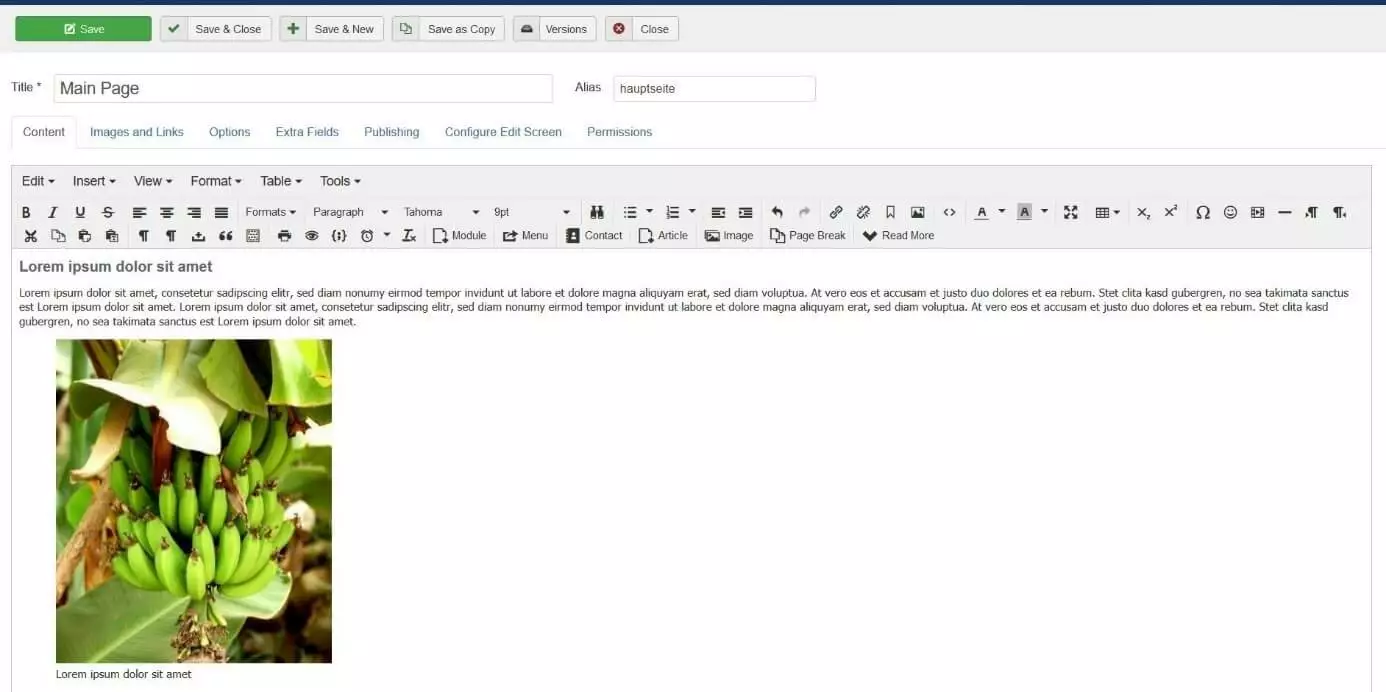
Pages of a web project are called contributions in Joomla!. If you selected this option during the installation, the placeholder “Getting Started” already exists, the content of which you can already see when you visit your website at the current time. To finally create the first page of your own Joomla! website, click on “Articles: Edit” in the control panel. Select a title for the page and then use the editor to add the required content. You can use the “Format” button to format headings, bold text, italics, or paragraphs. Finally, click “Save & Close” to generate the page.
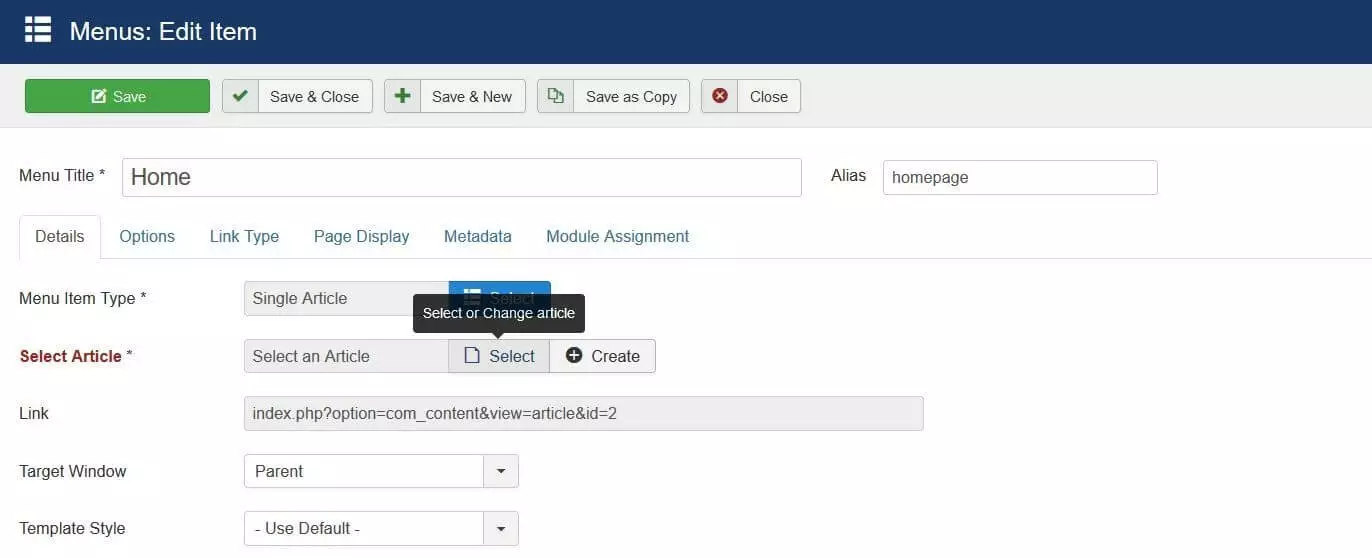
You can now edit or delete your created Joomla! page at any time under “Articles.” To make it the start page of your web project, you have to go to the “Menus.” First click on "Main Menu" and then on “Home.” At this point you can define the post that should be linked to the main menu and also to the homepage of your website. On the “Select Article” option, click “Select” and then click the created page:
Inserting links in Joomla! articles
Links are an important component of successful websites, because internal and external links increase the added value of your offer and improve the search engine ranking. As soon as you have the appropriate link material, you can place it in your texts with just a few clicks: For external links, simply select the text component to be linked to and click on “Insert/edit link.”
For internal links, click on “Article” and then select the desired post of your Joomla! project.
How to add pictures to your newly created Joomla! website
You should also integrate images into your web project, because even the most interesting content won’t attract readers if there aren’t images to break up the text to make it easy on the eyes. In order to enhance a post with photos and graphics, you only have to open it via the article menu and then select “Image” in the editor:
Joomla! offers you access to some banners, headers, and sample images, which you can use freely in your web project. If you want to use your own images instead, scroll to the bottom of the menu, click on the “Browse...” button and specify the location of the corresponding image files. Then select all the images you want to import and click “Open”. Joomla! shows how many files have been selected – start the upload to the web space with the button “Start Upload”:
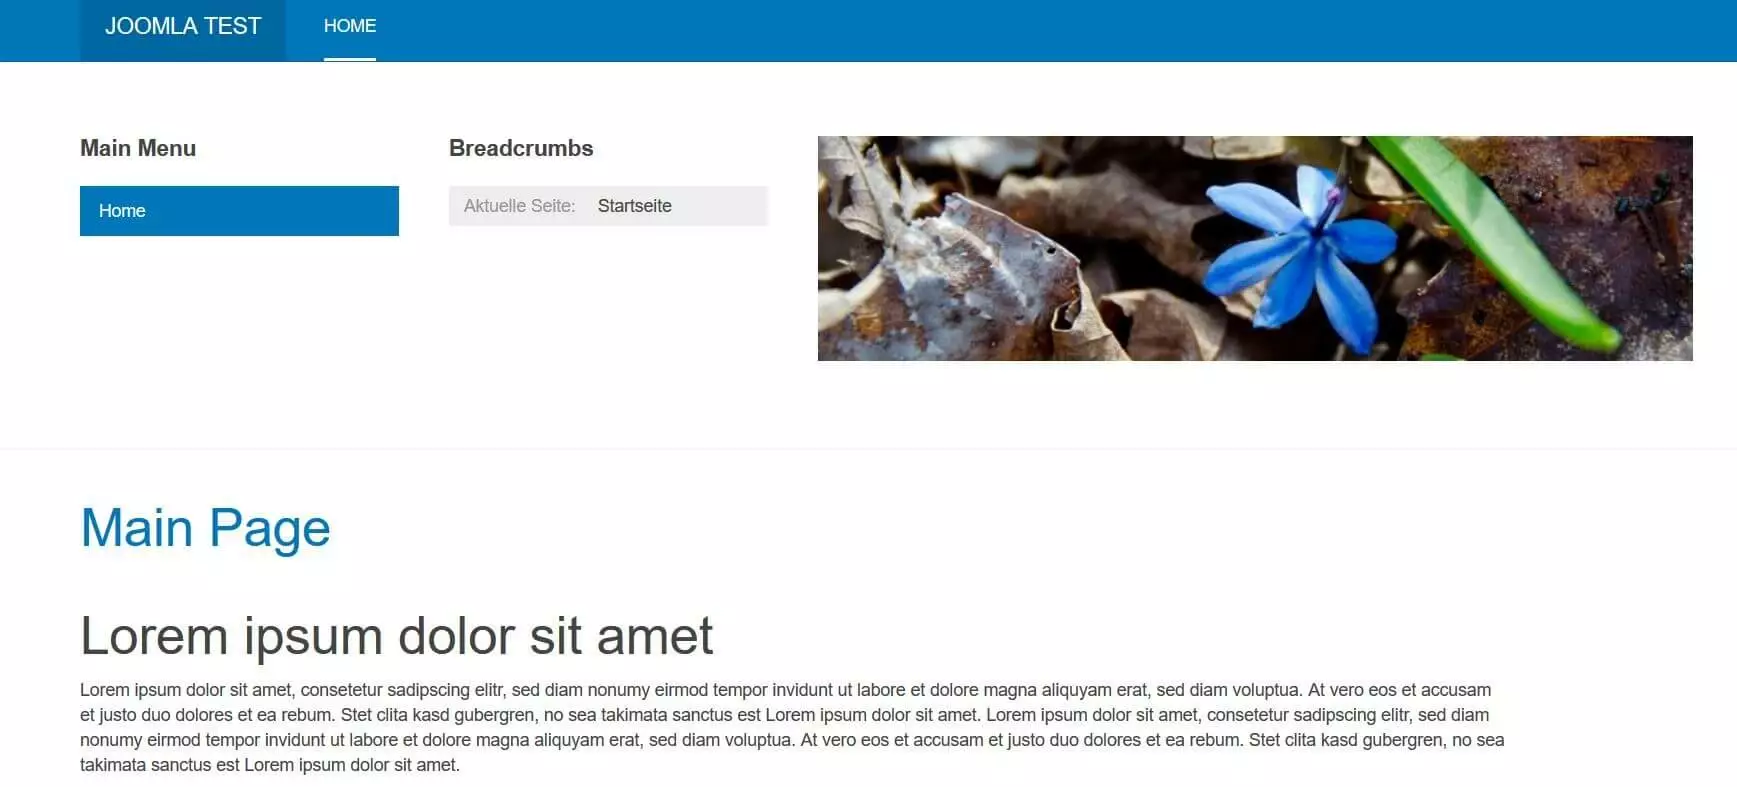
Now click on the image you want to insert into the article and fill in the information about the orientation (left, center, right), the image title, or the description. Finally, click on “Insert” and the image will appear at the desired position in the current post:
- 99.9% uptime
- PHP 8.3 with JIT compiler
- SSL, DDoS protection, and backups


