How to create a Joomla contact form
Using Joomla and want to add a contact form to your web project? The integrated form function is a good start. For more extensive or complex forms, you can choose from a range of plugins. So how exactly do you create and add a Joomla form? And what information should be included?
- Simple registration
- Premium TLDs at great prices
- 24/7 personal consultant included
- Free privacy protection for eligible domains
Quick guide to add a Joomla contact form
The quickest way to add a Joomla contact form to your website is via the backend Contact menu:
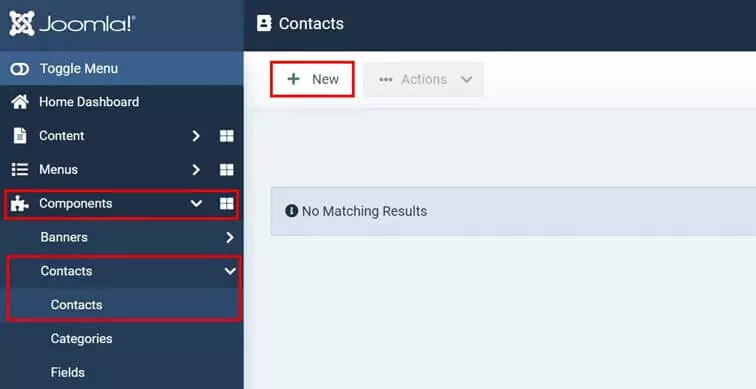
- Open “Components” from the left side menu.
- Click on “Contacts” and the sub-menu also called “Contacts”.
- Select “New” or “Create first contact”.
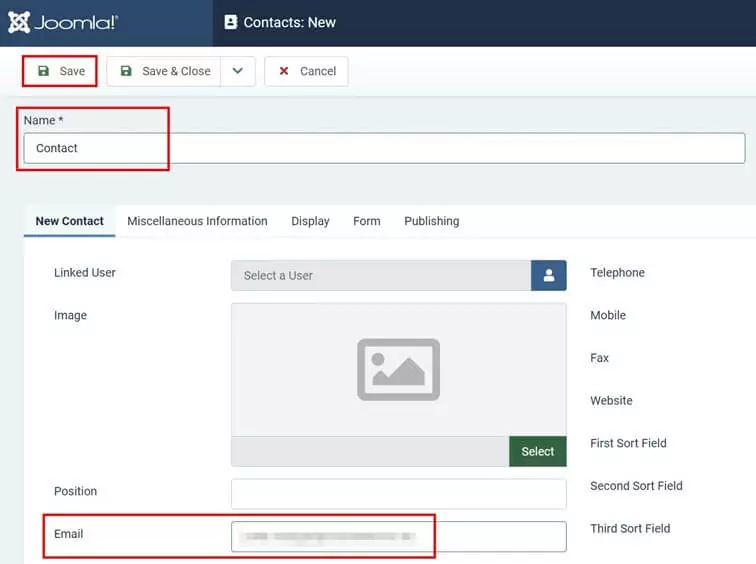
- Enter the name of your contact form (e.g. “Contact”) and a correspondence email address.
- Save the contact for the Joomla contact form via the same-named button.
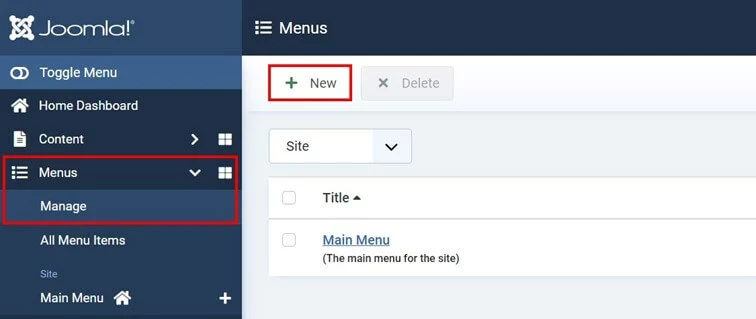
- Launch “Menus” from the left-hand menu.
- Select “Manage”.
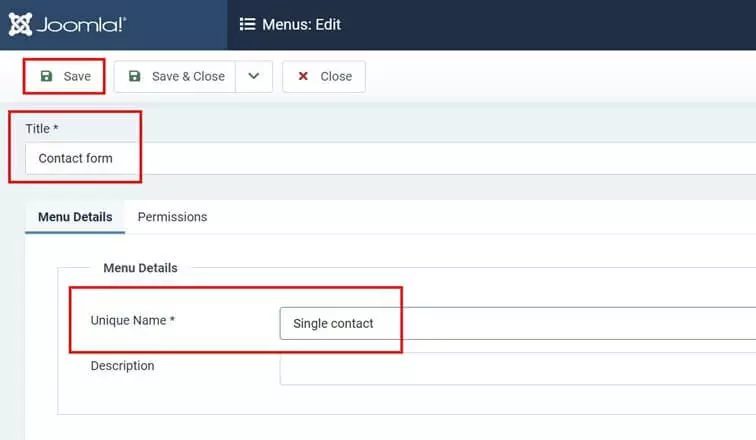
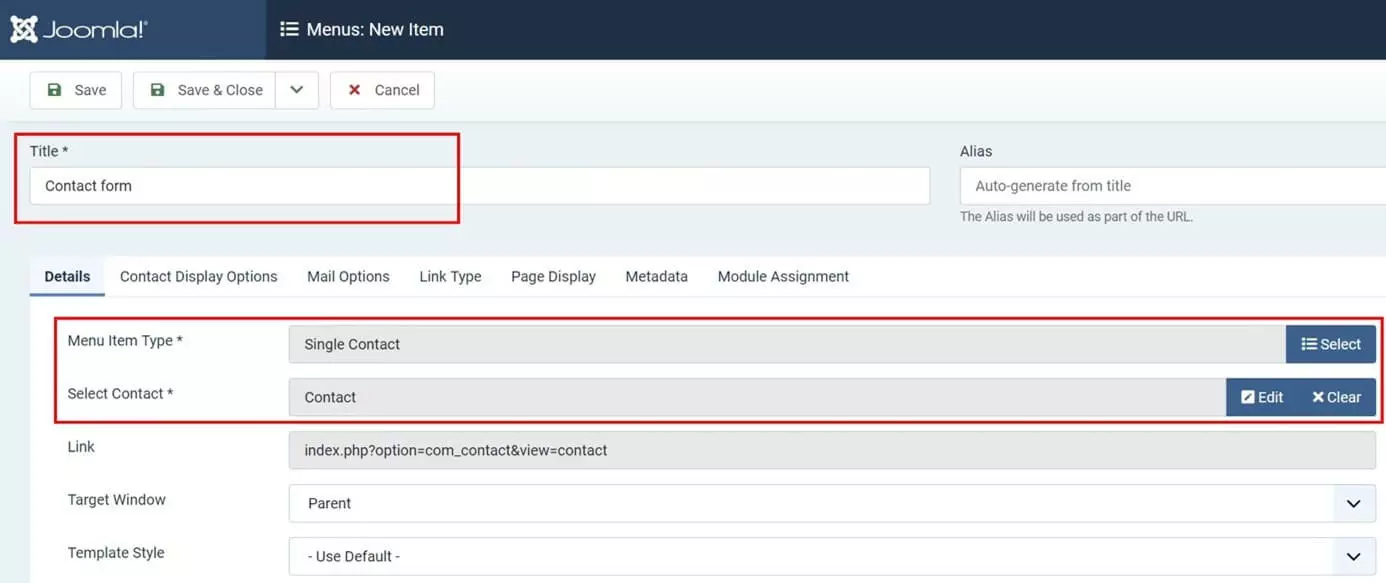
- Click on “New” and create a new entry with the title “Contact form”. For “Menu type” enter “Single contact”.
- Save your entry.
Still looking for a solution to get started with your web project using Joomla as a content management system? Get Joomla hosting from IONOS today and install the open-source platform in a single click.
Step-by-step tutorial to add Joomla contact form without plugin
Joomla provides a contact form by default. You can access the feature via the backend of the content management system to create a simple Joomla form. The individual steps are summarized below.
Step 1: Create a contact
The first step in creating a Joomla contact form using the integrated function is a contact profile. Here you’ll define a corresponding email address to send all contact requests to.
Once you’ve registered in the backend, call up “Components” from the side menu and select “Contacts” and the sub-menu of the same name. Click “New” or “Create first contact” if you haven’t added yours yet.
Step 2: Create a Joomla contact form
To the left, you should now see the menu item “Contact form”. Open it by clicking the plus sign (“Add site menu item”)
Step 3: Embed form
You can now link the created form to a module or a menu to add it to your project. From the main navigation, insert it as follows:
- Open “Menus” from the left-hand menu.
- Click “Main Menu”.
- Enter “Contact form” for the title field.
- From the “Menu Item Type” select the option “Contact” (in “Select Contact”). Select the contact to link the form to the desired email address.
- Hit “Save”.
As a test, you can fill in the details afterwards and submit the form to check how it works.
Create a Joomla contact form using a plugin
If Joomla’s native features aren’t enough to satisfy the needs of your project, you can use a Joomla extension. Just be sure that the selected extension matches your Joomla version and is actively maintained.
Here’s an example of how to set up a Joomla contact form using the extension visforms.
The basic version of visforms is available for free. A subscription gives you access to additional features such as bootstrap and Ulkit layouts.
Step 1: Install Joomla contact form plugin
First you need to install the extension. As with Joomla templates you can do this via the backend:
- Register in the Joomla backend.
- Click on “System” in the side panel.
- Select “Extensions” under “Install”.
- If you’ve already downloaded a plugin, select its installation package. Otherwise, proceed to step 5.
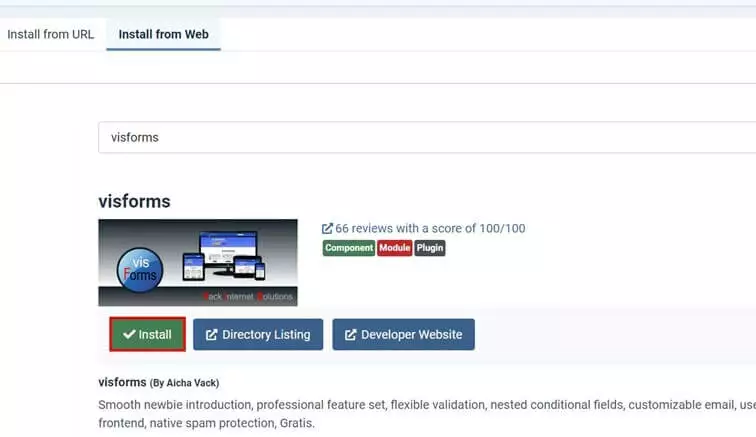
- Click “Install from Web”.
- Use the search function to find the desired extension.
- Select the desired extension and click “Install”.
Step 2: Create a Joomla contact form
Once you’ve installed the Joomla form extension, it will pop up under “Components” to the left. You can use the menu to create your Joomla contact form. For visforms, click the button of the same name and then “Form Factory”.
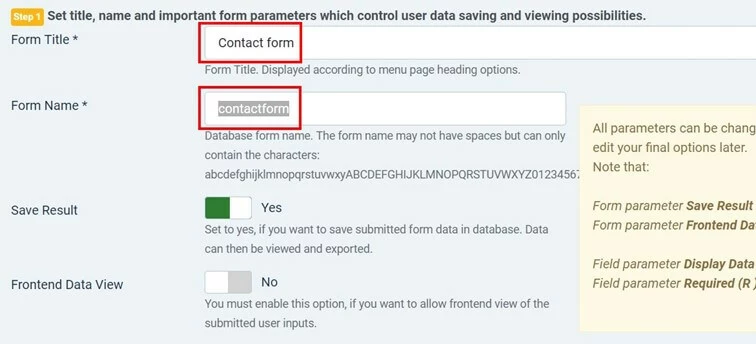
Now specify a form title which will be displayed on your website. Define the database name of the Joomla contact form in “Form name”.
Working on your Joomla project and still looking for the perfect web address? Register your domain today with IONOS and benefit from SSL/TLS certification and your own email address.
Step 3: Add contact form
You can link visforms to a module or to a menu to add them to your web page. Follow the steps below to add your contact form to the main menu navigation, for example:
- Access “Menus” on the left.
- Click on the sub-menu “Main Menu”.
- Click “New”.
- Select a strong title.
- Enter “Visforms” -> “Formular” as menu type.
- Select the Joomla contact form you created earlier.
- Hit “Save” and publish the form.
What should be added to a Joomla contact form?
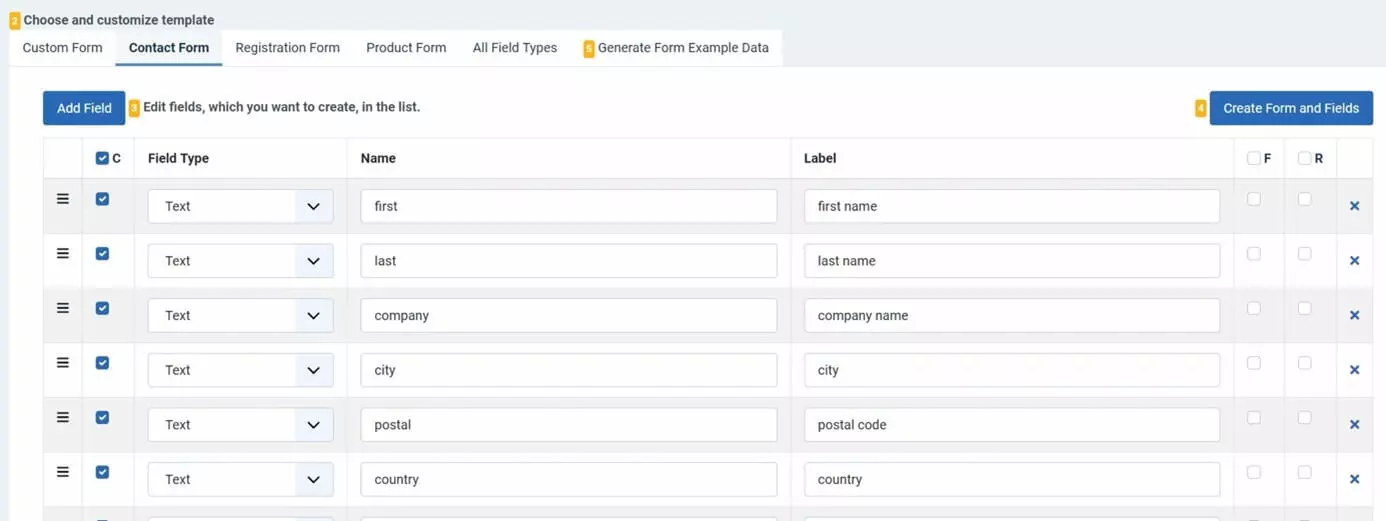
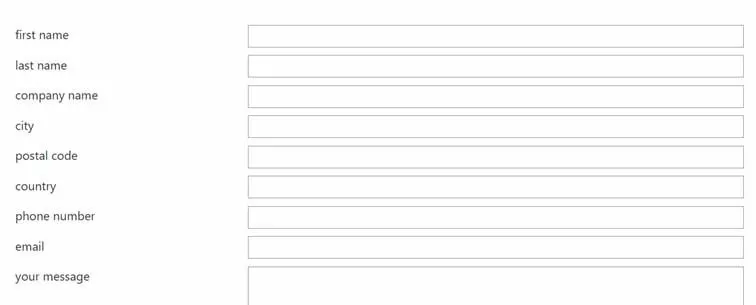
Knowing which fields to add to a contact form can be a bit of a challenge. You’ll want to collect your visitors’ contact details and achieve conversions using the form. A rule of thumb is to only ask for the information you actually need. The less information users need to provide, the higher the potential for conversion.
In most cases, three entry fields suffice:
- Name
- Message
This information is a good basis as you can collect your visitor’s email address and then address them by their name when sending a reply.
If desired, you can make these fields mandatory and other sections optional. This way you can collect other details without turning users away because of too many fields to fill.
Want to bring your Joomla website up to legal standard? Find out how to educate your visitors about the use of cookies using Joomla cookie notice plugins in our Digital Guide.


