GitHub Workflows—How to use this practical GitHub feature
GitHub Workflows expand GitHub’s features and can be created directly in the github/workflows folder of a repository. By employing workflows, you can carry out automated actions when certain events occur.
What are GitHub workflows?
In short, a GitHub workflow is nothing more than a collection of specific, mostly repetitious actions that are automatically carried out when a particular event occurs in a repository. A workflow is made up of multiple jobs, which are then further separated into individual steps. In addition to using workflows for specific events, you can also run them manually or specify a time period when they should be carried out. Workflows are an important part of the continuous integration platform GitHub Actions.
The person programming the workflow determines which specific actions are included in the GitHub workflow. Workflows are commonly used to automatically test code as soon as it’s updated in a repository or to notify team members when changes are made to a repository.
If you want to use GitHub for an online project, use IONOS Deploy Now to improve your productivity. The pre-programmed GitHub Actions workflow will run your build automatically.
How to create your own workflow: Step-by-step instructions
Creating your own GitHub workflow isn’t difficult. You just need basic knowledge of the programming language YAML and a GitHub repository in which you can run and create your workflow. If you want to use an integrated development environment to write your YAML code, GitHub Copilot can help you when creating your workflow code.
Step 1: Set up your workflow
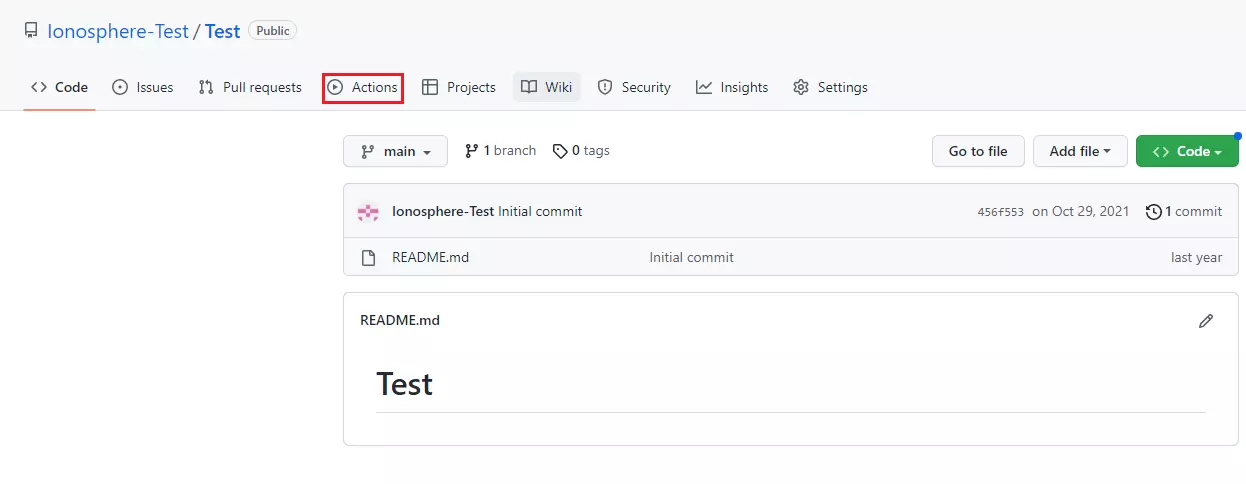
Once you have created a repository or have chosen an existing one for your GitHub workflow, click on the Actions button in the GitHub Actions menu.

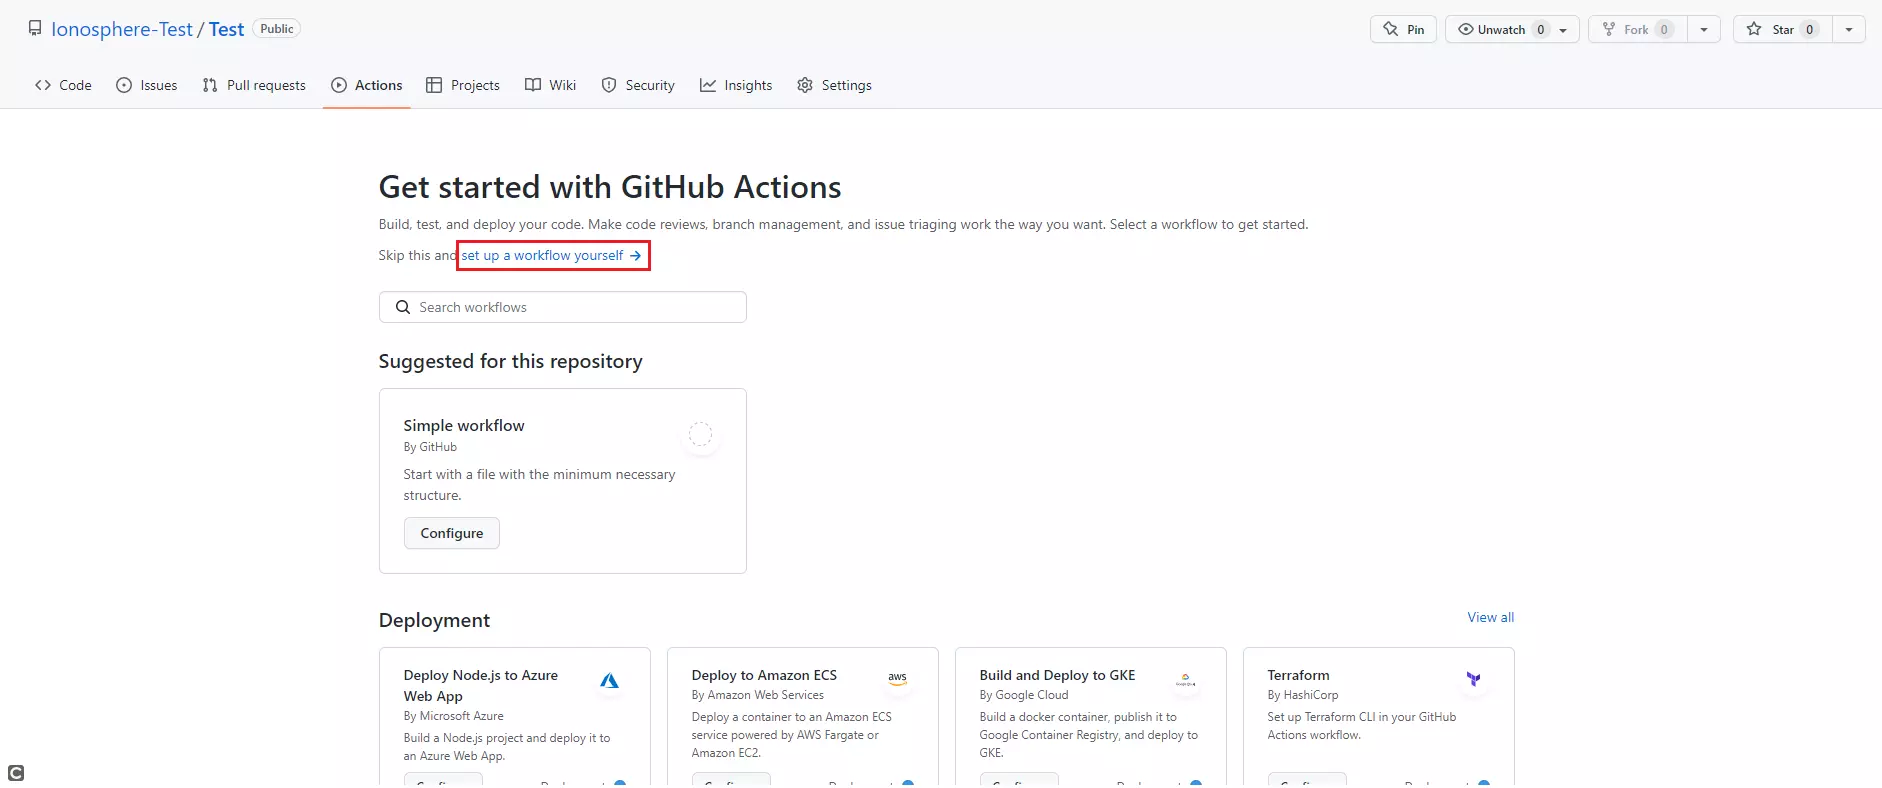
In the GitHub Actions menu, you can now select set up a workflow yourself.

Step 2: Write the code for your GitHub workflow
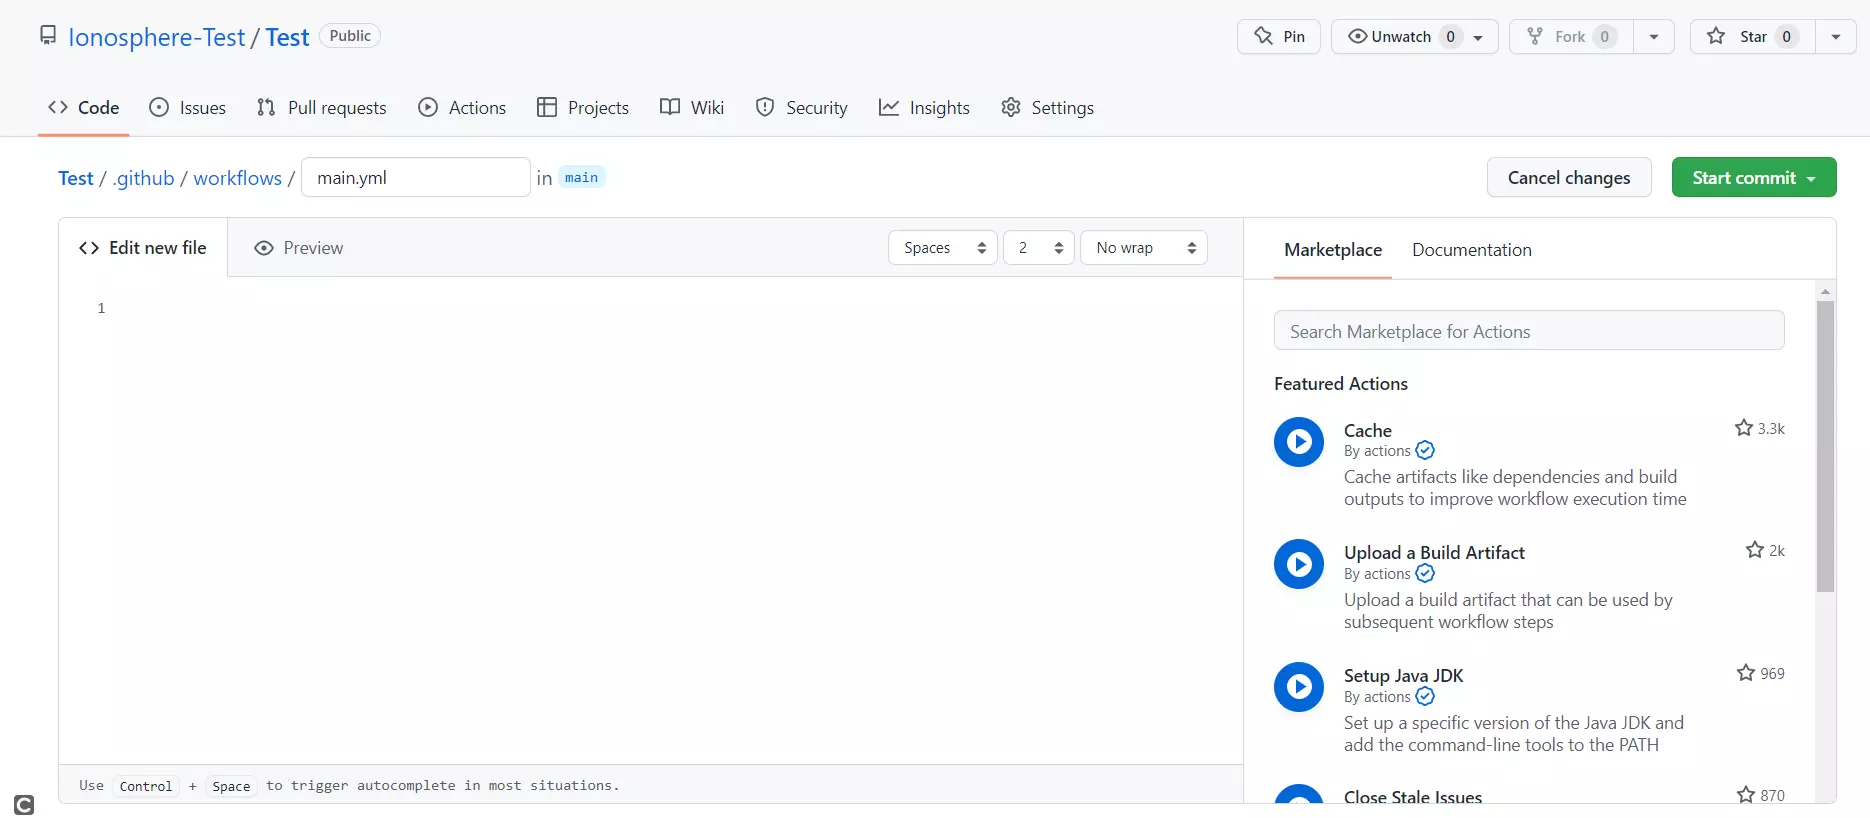
As soon as you have set up your workflow, a new file called main.yml will open automatically in the github/workflows folder. You can directly edit this file in GitHub and enter the code you want to put in your workflow. This code must be entered in YAML as the file extension is .yml.

Which action you choose to carry out with your code is completely up to you. In the example below, we’ve created a workflow called “example”, which is carried out every time there’s a commit to the branch “main”.
name: example
on:
	push:
		branches: [main]
jobs:
	build:
		runs-on: ubuntu-latest
		steps:
-  uses: actions/checkout@v2
    with:
	fetch-depth: 0
- run: makeNext you need to specify when the GitHub workflow should be carried out. To do so, use the key words “on” and “push”. These will trigger the workflow when the code is behind the keyword “branches”.
The workflow itself is made up of a job called “build”, which is made up of two steps and carried out on an Ubuntu host.
In the first step, a pre-defined GitHub action called “checkout” is used. It ensures that the entire repository code is downloaded to the host. The parameter “fetch depth” can be used to specify how many commits are to be downloaded. By entering “0”, the entire commit process of the “main” branch is downloaded.
The second step carries out the command “make” on the host. This compiles and manages code by executing commands that are usually specified in a file named Makefile.
Step 3: Save and commit your GitHub workflow
Once you’ve entered your code into your workflow, you just need to save and commit the file. Now, your workflow will always be carried out when the event you entered occurs.

