Change language in Chrome: step-by-step guide
Internet Explorer, Firefox, or Safari – the choice of internet browsers is huge. But there are clear favorites: Around 60% of worldwide internet users prefer Google’s Chrome browser. Its advantages include excellent performance as well as strong user-friendliness.
Like most browsers, Chrome automatically selects a language. But it might not always be the right one for you. In some cases, Chrome can also switch language without warning. This occurs primarily after running updates. However, the browser allows you to easily adjust the language setting manually. We’ll guide you through the steps to change language settings in Google Chrome.
- Improve your Google ranking without paying an agency
- Reply to reviews and generate social media posts faster
- No SEO or online marketing skills needed
Google Chrome: navigation options and settings
When you open Chrome for the first time after downloading it, the browser will select a language that matches your operating system’s language. Google’s browser also configures other settings automatically for you: Chrome saves all websites you visit, for example. The larger the archive and the more storage space required, the slower the browser performance will be. To prevent this, we recommend that you regularly delete your browser history. Find out how to do this in our article “Chrome: Deleting the Browser History – How It Works”. To save selected web addresses permanently for quick access, you can also use the practical feature to create bookmarks.
But before you start using Google Chrome, the navigation options and menu should be displayed in the most convenient language for you. Here’s how to change the default language.
How to change the default language in Chrome
To change the language, first open the browser. Before you change the Chrome language, it’s a good idea to save any content you might need later. Otherwise, the content will be lost because the browser will restart after the language update. Once you’ve saved important files and content, simply follow our guide.
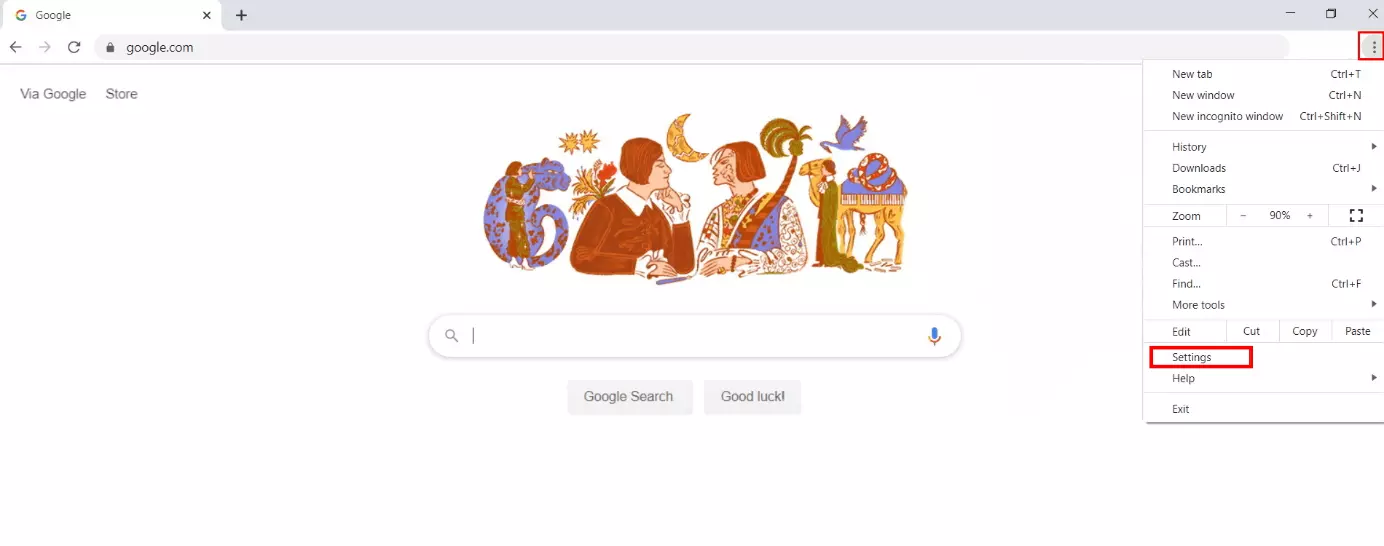
Step 1: Open Chrome settings
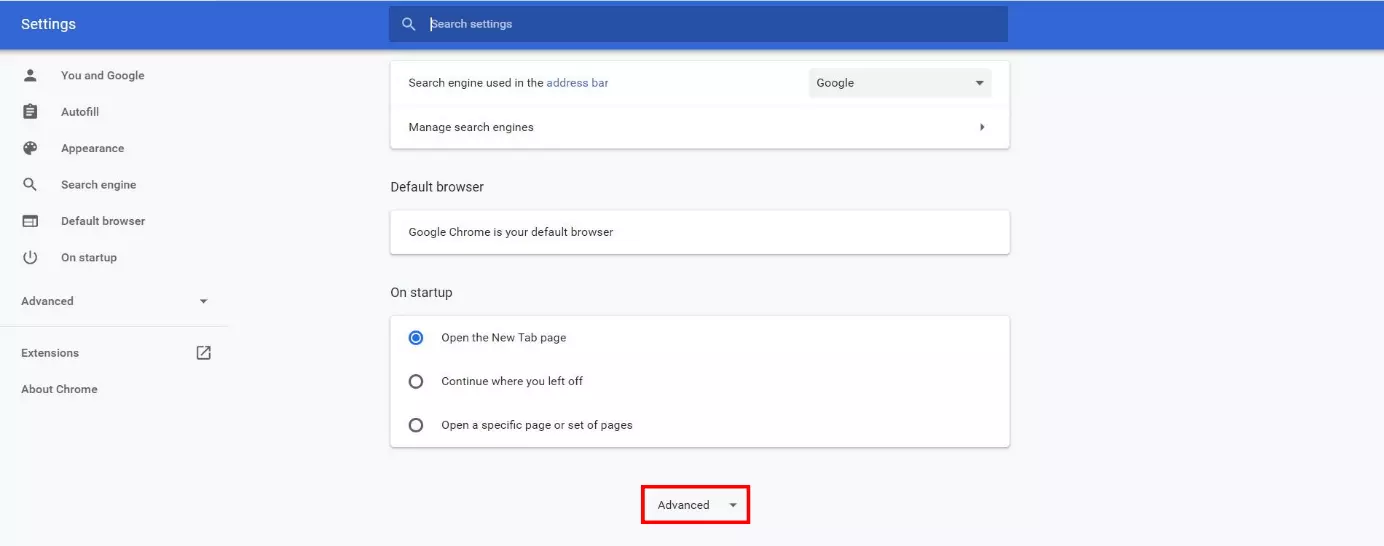
Step 2: Open advanced options
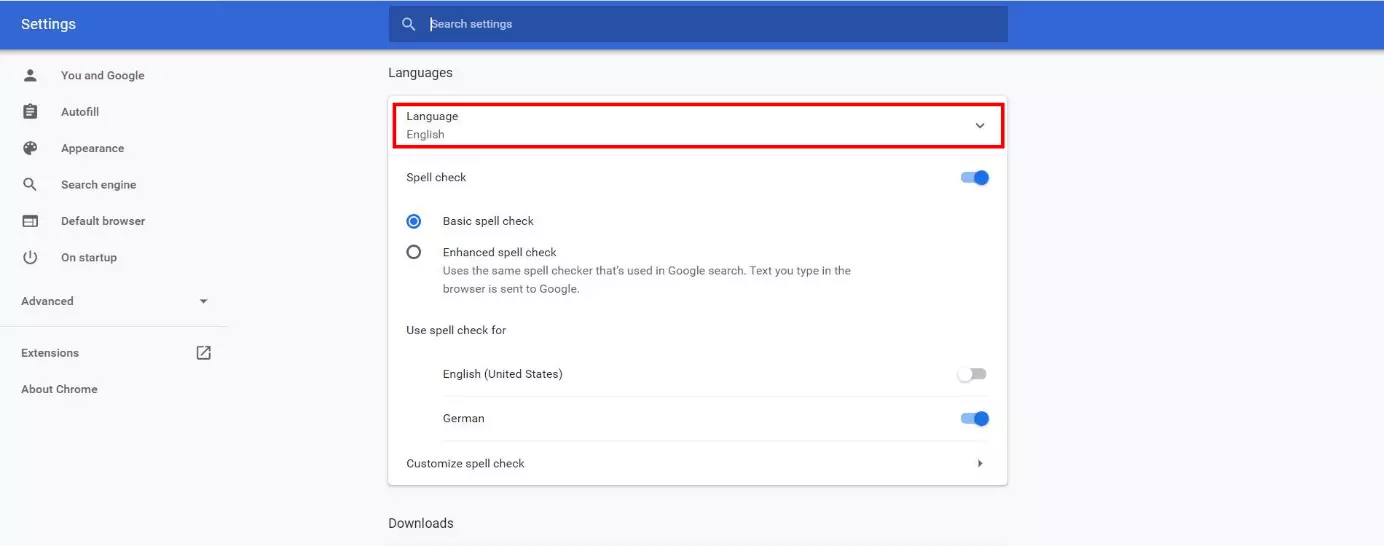
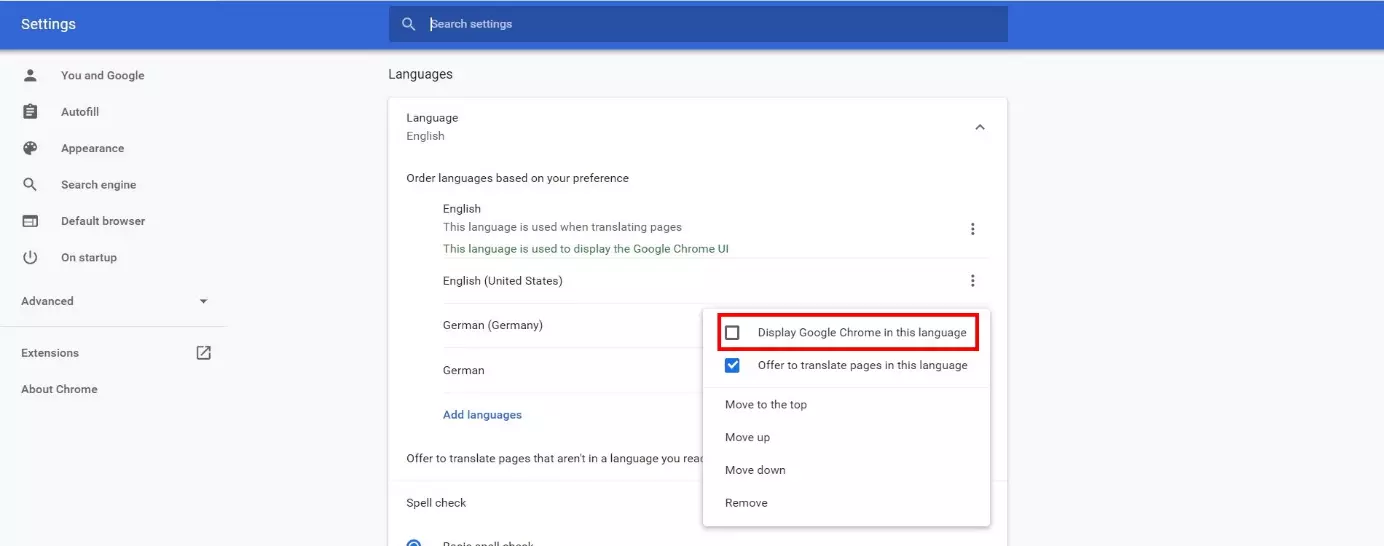
Step 3: Change Google Chrome language
The next step depends on whether your preferred language is already shown or not:
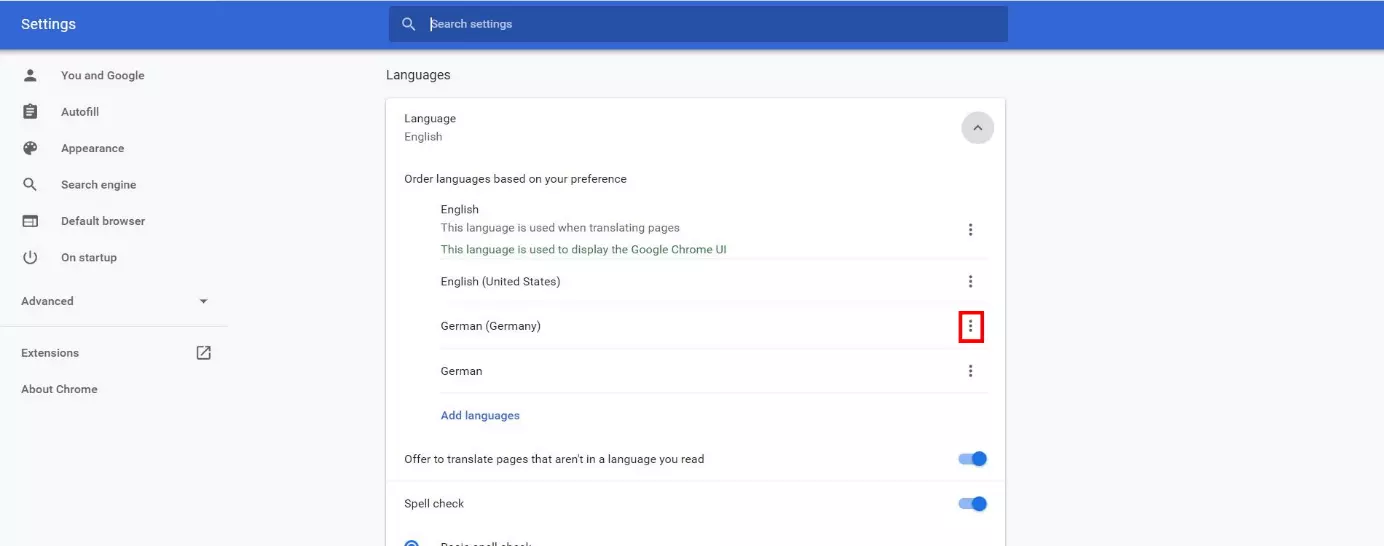
The preferred language is listed:
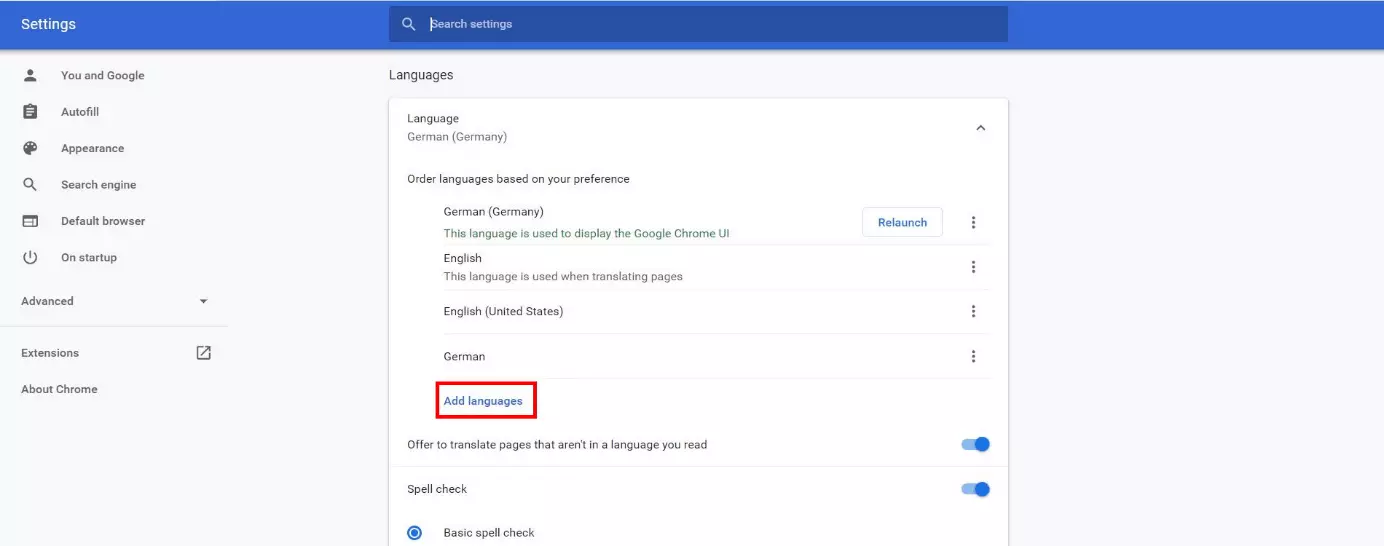
The preferred language is not listed:
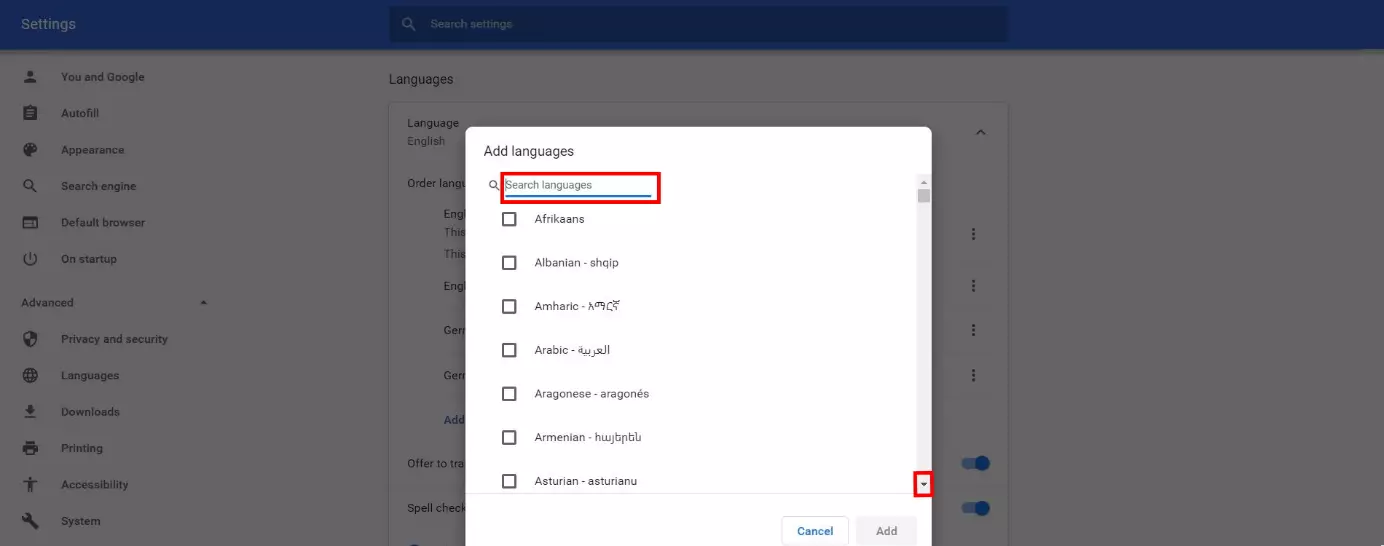
You’ll have two options in the selection menu that follows:
- Scroll through all available languages and select the preferred variant using a mouse click.
- Look for the language using the search function and select the relevant control box.
Then, click on “Add” to save the settings:
The desired language will now be shown in the list. To activate it, follow the step above for “The preferred language is listed.”
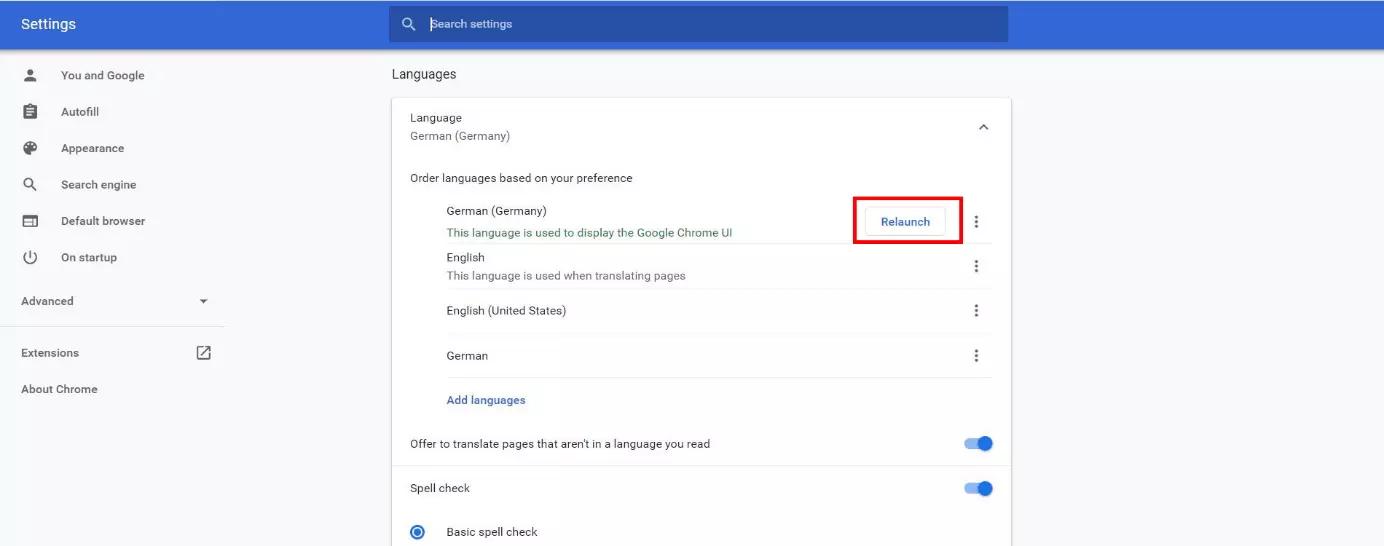
Step 4: Restart Chrome
Quick overview: changing the Chrome browser language
Here’s an overview of the key steps for changing the Chrome language:
- Open the menu item “Settings.”
- Expand the displayed settings and scroll down to the “Language” section.
- Choose the preferred language and select “Display Google Chrome in this language”.
- If the preferred language is not listed, select the option “Add languages.”
- Finally, click on “Restart”.
- After restarting the browser, the new language settings will be activated.
- Free Wildcard SSL for safer data transfers
- Free private registration for more privacy
- Free 2 GB email account


