How to host your own Conan Exiles server
Wander the Exiled Lands of Hyboria as a barbarian with your friends and fight off enemies and other dangers in Funcom’s survival game Conan Exiles. In multiplayer mode you get to face off against other players or collaborate with them as part of a group. To get going, you can either use one of the servers provided by the developer or the community, or you could set up your own Conan Exiles dedicated server. We explain how you can create a server and what you need to get started step by step.
Advantages of your own Conan Exiles server
Since 2017, Conan Exiles has enticed players worldwide. The survival game set among the fictional universe of Conan the Barbarian is a popular multiplayer game. You can compete against dozens other players or fight threats together with friends. When choosing a public server to play together, you won’t have any influence on the other players.
If, on the other hand, you create your own server, you can play Conan Exiles in the way that suits you and select your preferred players. With your own server, you also get to define details such as the craft, the avatars or the rules when fighting other players. This makes for a whole lot more fun when playing.
System requirement: What do you need for a Conan Exiles server?
Conan Exiles is a large-scale game with significant demands on a server. However, you won’t require a special graphics server. The server doesn’t represent the gaming environment, but functions purely on a command line level.
The minimum system requirements for a Conan Exiles server are:
- 3.0 GHz CPU
- 8 GB RAM
- 35 GB hard disk space
- Windows 7 or higher
However, these are only the essential requirements. If you wish to play together with many people on a server, you should plan for additional capacity.
It’s advisable to choose a server location that matches those of all players where possible. For example, if you and your friends live in the USA, you should select a data center based in the country. As a result, the connection to the server is shorter and therefore faster and the gaming experience is noticeably enhanced.
Processor performance
The manufacturer of the game recommends using the Intel Core 2 Duo 6850 as the lowest possible hardware configuration. Its 3.0 GHz CPU is sufficient for 10 players. If more people are playing on the same server, you will need to increase the processor performance. According to the manufacturer, you should plan at least 4.0 GHz for 70 or more players.
RAM
When it comes to RAM, the Conan Exiles server is less demanding. 8 GB is sufficient for a small group. For more players, 12 GB RAM should suffice.
Hard disk space
In terms of storage space, Conan Exiles is consistent. No matter how many players there are on the server, you are well-served with 35 GB. The memory space is mainly used for the game’s large map and its numerous graphics. You may wish to extend the memory if you have installed many mods. It’s best to use fast solid-state drive technology (SSD) when selecting storage. In principle, traditional HDD disks aren’t a problem, but with a server with SSD storage you can improve the performance slightly.
Rent hardware from IONOS: what’s the best option?
In theory, anyone can set up an additional computer at home and configure it as a server. However, this is only recommended to a limited extent. While the hardware requirements are not an issue, the bandwidth could be a problem. In a professional data center enough bandwidth is available (IONOS, for example, guarantees 400 Mbit/s) so that all players benefit from a good gaming experience.
Assigning an IP address is another difficulty with a home server. Many Internet providers regularly assign their users a new address, which interrupts the connection to the Conan Exiles server. This won’t happen with a server from IONOS.
With IONOS you can select from a range of different server variants. Each has a different advantage:
- Dedicated server: dedicated hardware
- Cloud server: shared server structure
- vServer: virtual server
Try out your VPS for 30 days. If you're not satisfied, you get your money back.
How do the IONOS servers differ?
Each server option has its advantages. With a dedicated server, you rent your own hardware in the data center. This offers excellent performance, and you gain full control but will need to manage some of the tasks yourself. A dedicated server is recommended for server professionals.
With a cloud server and the vServer you rent virtual resources. You won’t receive a fixed device because the server is accessible only to you. Instead, the load is distributed across different hardware. For most users, the difference between the two virtual options comes down to pricing. While you pay a monthly fixed sum for a vServer, the cloud server bills by the minute. You can add or cancel capacities at any time and only pay for what you use.
The term “dedicated server” isn’t always clearly defined. In the context of Conan Exiles, dedicated servers are mentioned. These are primarily understood to be the opposite of the game provider’s servers. In principle, it doesn’t matter whether the Conan Exiles server is dedicated hardware or a virtual solution in the cloud.
Three examples and the matching IONOS packages
The demands on a Conan Exiles server grow as the number of players increases. Here are three example scenarios and their appropriate IONOS solutions.
| Players | vServer | Dedicated server | |
| Up to 10 | IONOS Virtual Server Cloud XL (VPS XL) | IONOS Dedicated Server L-16 SSDorIONOS Dedicated Server AR6-32 SSD | |
| Up to 35 | IONOS Virtual Server Cloud XL (VPS XL) | IONOS Dedicated Server L-16 SSDorIONOS Dedicated Server AR6-32 SSD | |
| Up to 70 | IONOS Virtual Server Cloud RAM L (VPS RAM L) | IONOS Dedicated Server L-16 SSDorIONOS Dedicated Server AR6-32 SSD |
Make sure you select Windows as your operating system when configuring the server!
Create a Conan Exiles server: 5 steps to multiplayer gaming
Once you’ve selected a server package to suit your needs, you can install the Conan Exiles server. First, you need to establish a connection to the server.
We’re using a cloud server from IONOS in our example.
Thanks to free starting credit, you can test the IONOS cloud server for 1 month free of charge (or until the credit is used up) and experience the perfect combination of performance and security!
Step 1: Connection to the server
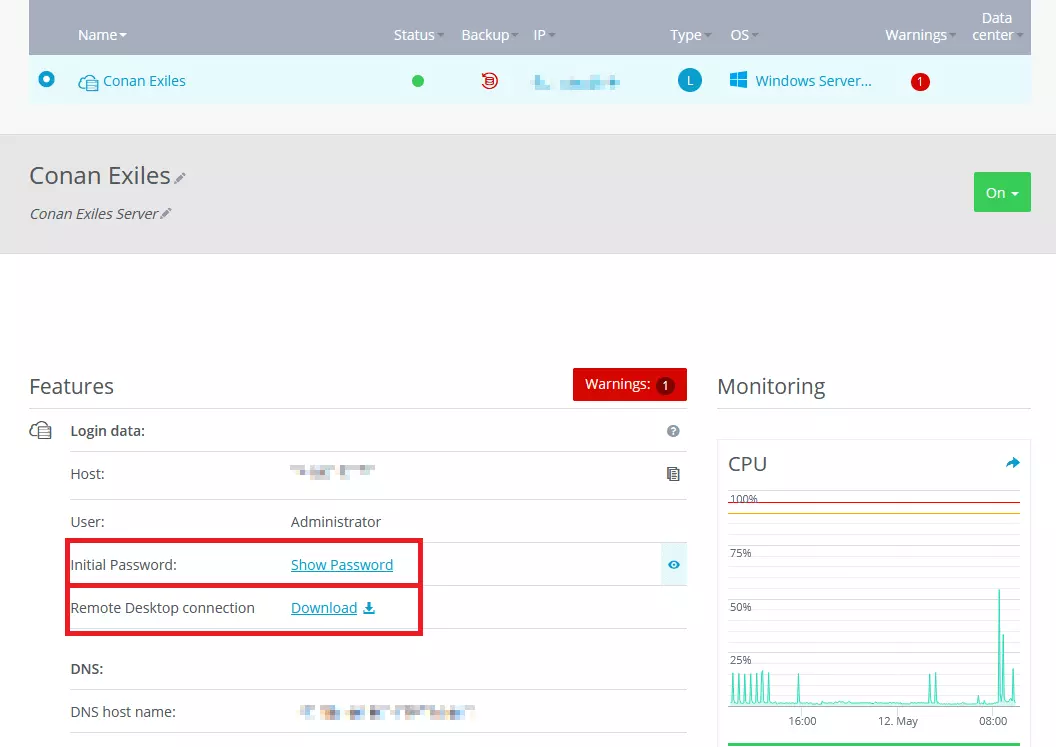
First, you’ll need to connect the remote desktop to your server. This allows you to control the server from your local computer. As an IONOS customer, log into the customer area. Then navigate to the server area (“Server & Cloud”) and select the appropriate package. The cloud panel will open.
You’ll find a download link for the remote desktop connection in the server settings. As a Windows user, you just need to run the file. The software required comes pre-installed on the operating system. The program will then ask for a password. This can be found in the server details above the download link. A prompt will ask you to agree to a certificate and then establish the connection. Because you’re using a Windows server, it can be operated in the same manner as you’re used to on a Windows desktop computer.
In addition to the pre-installed software, alternative remote desktop software for Mac and Linux is available.
Step 2: Release ports
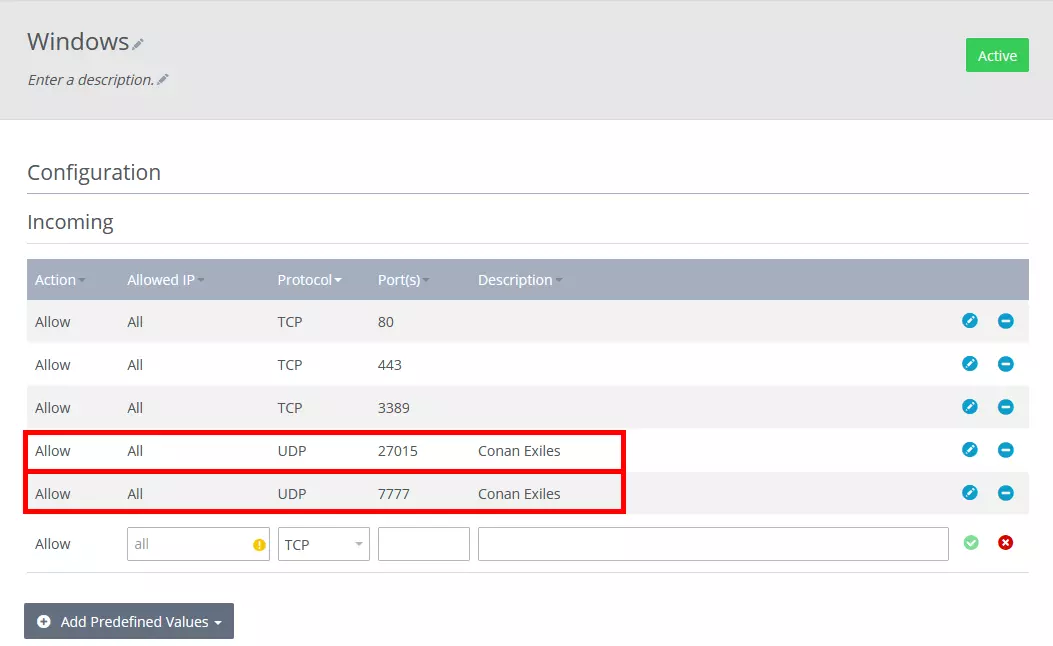
In principle, your server is protected by a firewall. TCP and UPD ports are closed by default to minimize the security risk. However, if you want to operate a gaming server, you need to create access for the communication between other players and the server to work. For Conan Exiles the UDP ports 27015 and 7777 have to be released.
To do this, select the “Firewall Policies” option in the “Network” area of the IONOS Cloud Panel. Enter the two named ports in the list. It is up to you whether and how you fill out the “Description”. However, it’s a good idea to enter a suitable name as a reminder of why the port was opened.
Step 3: Install SteamCMD
The SteamCMD program helps to create servers for games that are offered on the Steam gaming platform. Conan Exiles can be purchased here. Log on to your server, open the browser and download the program from the official Steam download site. Create a new folder for SteamCMD and extract the contents.
In theory, you can now launch and control SteamCMD via the Windows command line. It is easier, however, if you create a Batch file (.bat). To do this, open any text editor and write the following lines in the file:
@echo off
start "" steamcmd.exe +login anonymous +force_install_dir "C:\Conan-Exiles-Server" +app_update 443030 validate +quit
The first line specifies that no new batch file is created to collect all log data. The next line launches SteamCMD and automatically creates a new folder for the files on your Conan Exiles server. You can define the path for this yourself.
You can save the file in .txt format and select a name of your choice. Set Windows Explorer so that file extensions are also displayed (you can do this via the “View” tab) and then replace .txt with .bat. Now right-click on the file and launch it as an administrator. All the files you need for a Conan Exiles server will now be downloaded. You will then find the “ConanSandboxServer.exe” file in the folder. A double click on it launches the server.
Before you can play with others on your Conan Exiles server, you should adjust a few settings.
Step 4: Configure the server
There are two ways to adjust the settings for the server:
- Typically, changes are made to the different configuration files. It makes sense to become familiar with these to gain full control over your Conan Exiles server and understand its possibilities.
- The developer of the game now offers a software that lets you adjust the settings using a graphical interface.
In the following, we explain both methods in detail.
Configuration via different files
Settings for a Conan Exiles server are made across various files. First, go to the “StartServer.bat” batch file. You should find it in the same folder as the exe file for starting the server. Right-click on the file and choose Edit. The following code should already be in the file:
ConanSandboxServer.exe -logYou can use the code to run the file to start the server and view all occurrences. You should add the following parameters to the file:
ConanSandboxServer.exe -log -MaxPlayers=20 -Port=7777 -QueryPort=27015Now, you can make further changes. To do this, click through to “\ConanSandbox\Saved\Config\WindowsServer” in the server folder. (You may have to start the server once for the folder to be created.) Here, you’ll find the configuration file “ServerSettings.ini”. If you open this with a text editor, you can view various settings. Feel free to familiarize yourself with the information. Most of the entries are self-explanatory. Under “AdminPassword” you should set a secure password you use to identify yourself as an administrator. Create it in the file if it hasn’t been added yet.
The “Engines.ini” file is an important one. Insert two parameters below the item “[OnlineSubsystem]”:
[OnlineSubsystem]
ServerPassword=Password
ServerName=Server Name
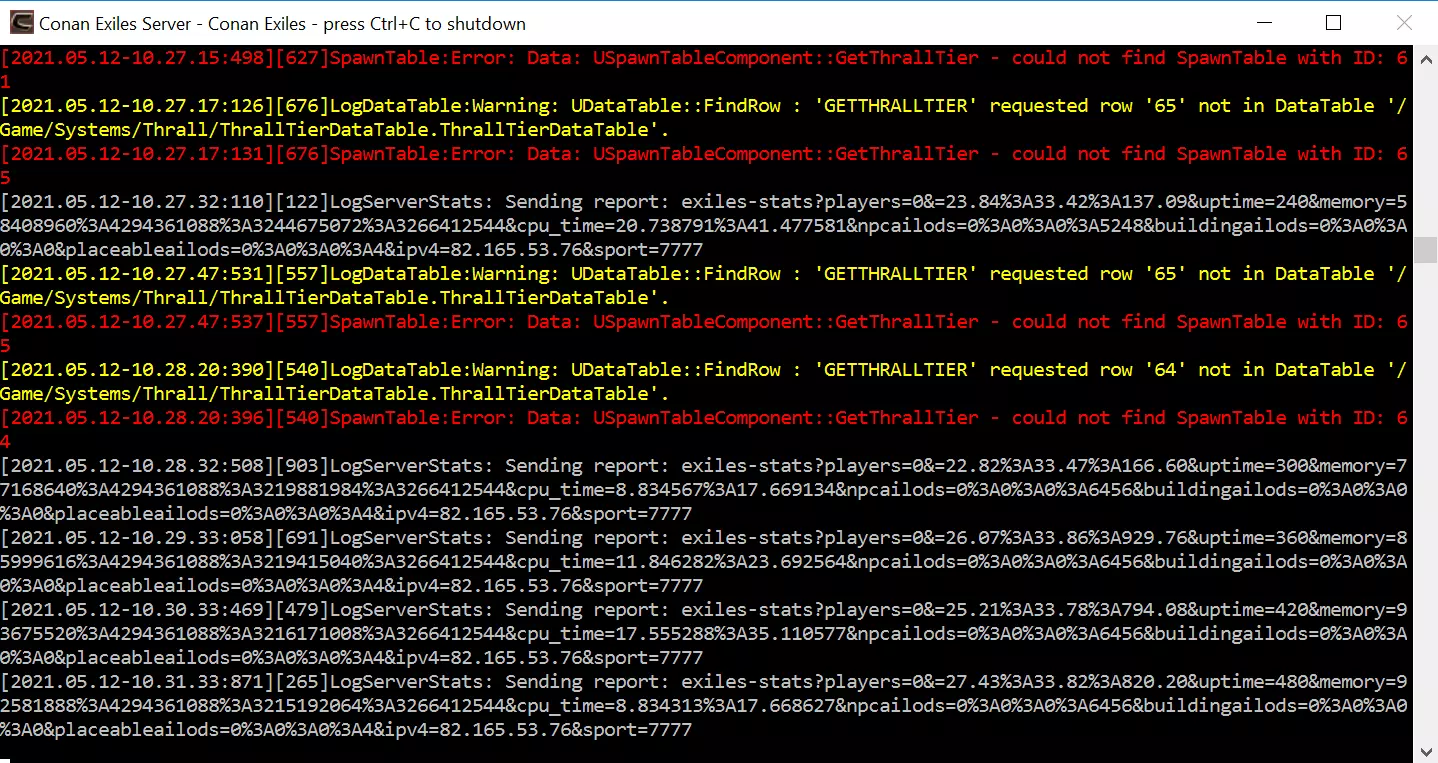
Insert a password and a name. The information is also important for your fellow players because it is the only way for them to join a game. Save the configuration file and launch the “StartServer.bat” file as an administrator. Your Conan Exiles server is now online.
If you also want to store a website on your server from where to publish information about your Conan Exiles server, you can use the domain as server name. With IONOS you can register domains cheap and fast!
Conan Exiles Dedicated Server Launcher
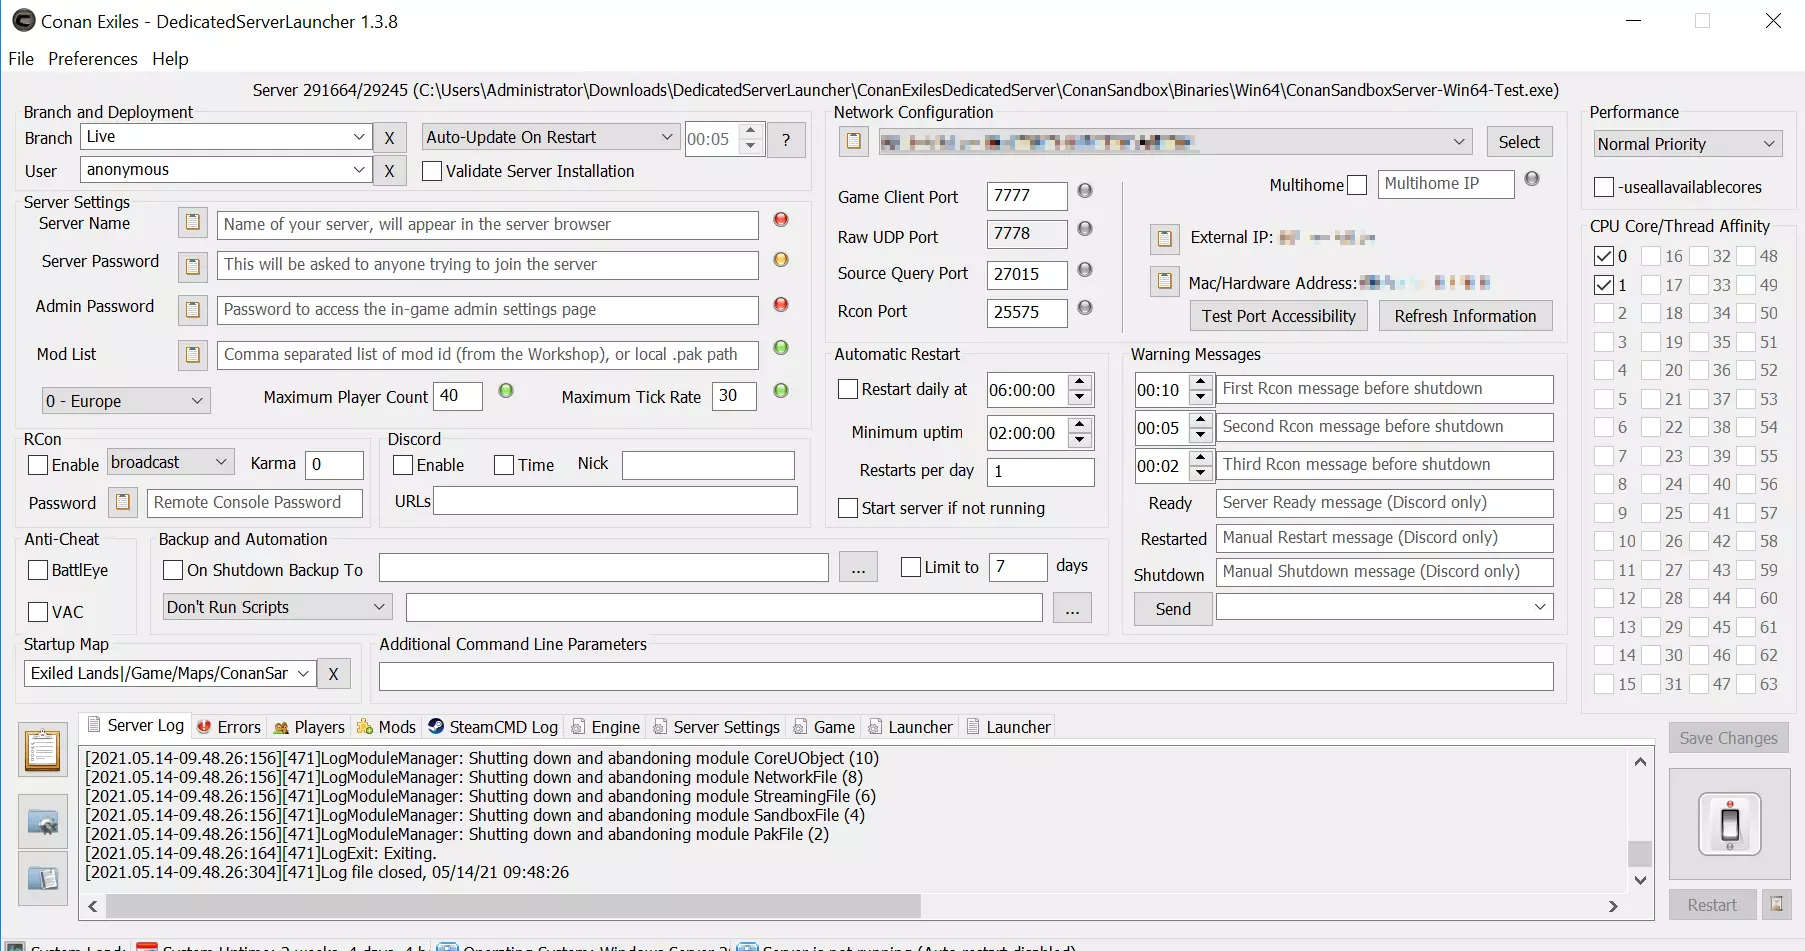
Funcom, the developer of the game, provides a Conan Exiles Dedicated Server Launcher in its forum.
Configuration is even easier this way. Download the file (we recommend the latest stable release) and run the program. You now have a graphical interface from where to adjust settings. The software then automatically enters the information in the correct files.
Upon first accessing it, the information below “Server Settings” should be of particular interest to you. From here, you define the name of the server and enter passwords for fellow players and for yourself as the administrator. In this area, you can also adjust the maximum number of players on the server. You might be interested in the backup option. To do this, specify a location on the server where you want to store your game world.
To start the server, click on the big button on the bottom right. If you are launching the server for the first time, the software will install a few more files. The server is then available online.
Step 5: Play on the server
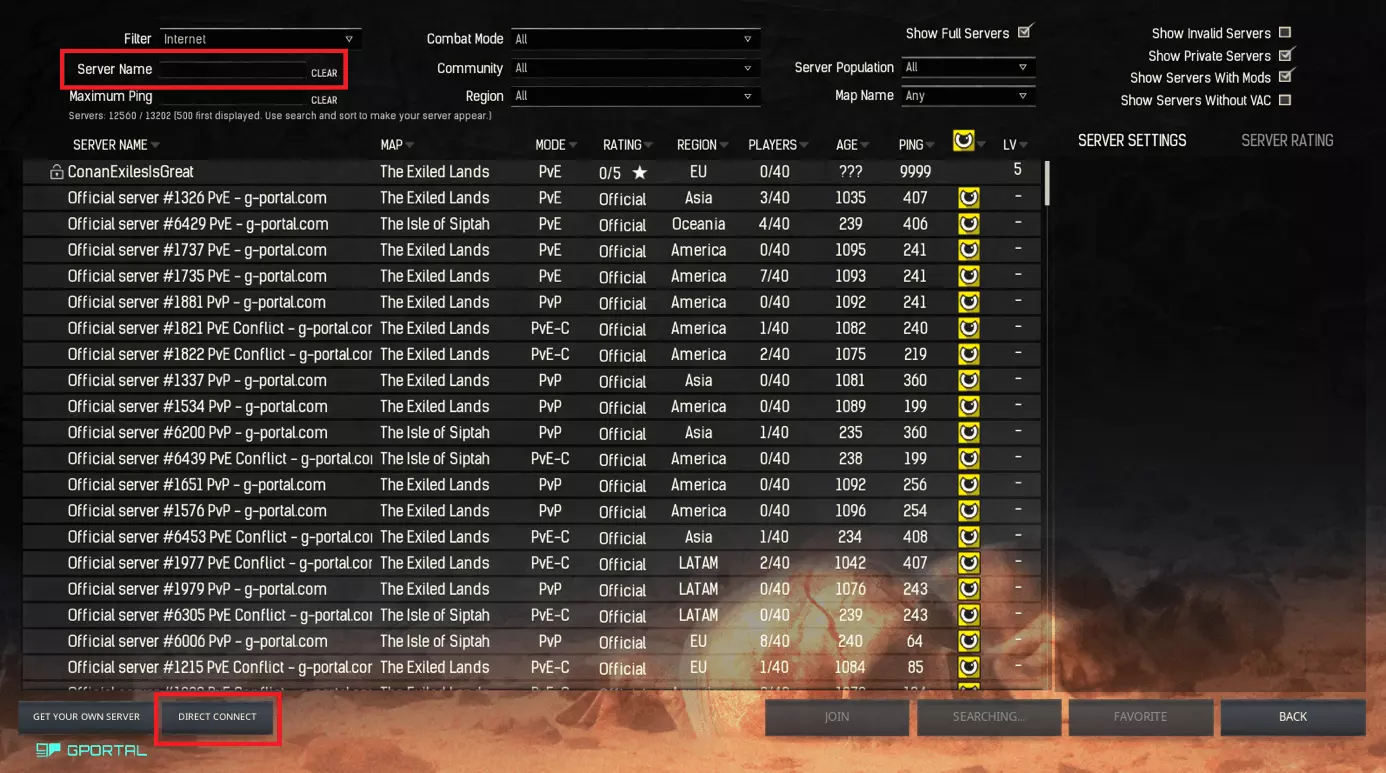
Launch Conan Exiles on your local computer and select the menu item “Play online”. A list of different servers will be visible. You can search for your server by name, but it may not be visible in the lists. It is safer to use the “direct connect” function. This allows you to enter the IP address and the port, then enter the password and connect to the server.
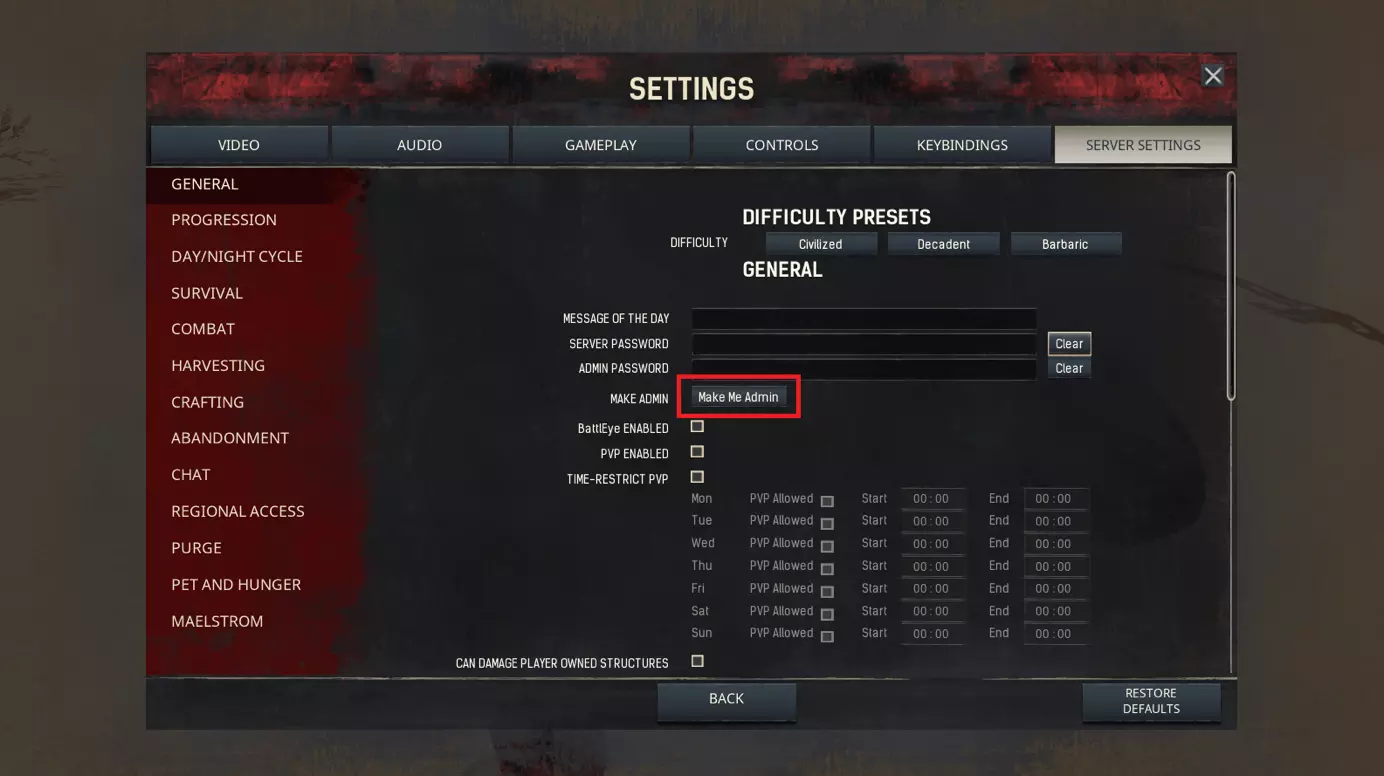
Once you’ve created the characters, you can commence gaming on the server. Share the password with friends to launch multiplayer mode. No more wandering the vast expanses all alone! By accessing the game this way, you’ll be a player like everyone else. You’ll need to tell the server that you are the administrator. Go to the settings (press the Esc key in-game) and switch to the “Server Settings” tab. Under “General” you will find the button “Make me admin”.
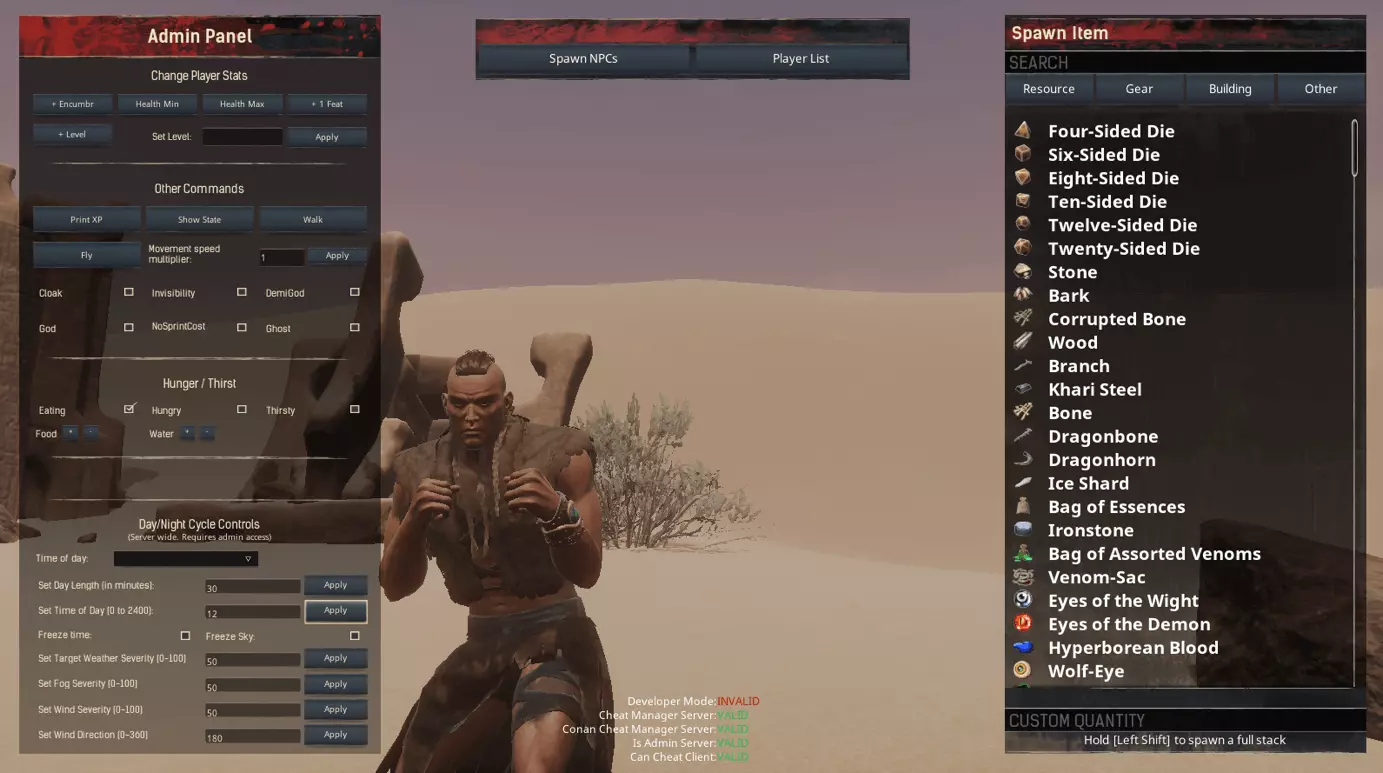
Once you click the button and enter your password, you can make changes to the server settings. In addition, you can now access the admin menu (also via the Esc key). This is useful to make objects or opponents appear, for example.
You can create your own Conan Exiles server online in a few simple steps. This gives you full control over the game for more multiplayer fun. Are you a fan of survival games? How about creating a Valheim server or a Rust server in no time with our instructions? Are you primarily interested in building games? Consider creating your own Minecraft server.
Make a statement with your own .gg domain and let the games begin. Register your own .gg domain now with IONOS.


