How to create an Astroneer server
Astroneer is a creative sandbox adventure game in which players explore alien planets as interstellar explorers, mine resources, build futuristic bases and uncover the secrets of the universe, either alone or with an Astroneer server in multiplayer.
- Dedicated enterprise hardware
- Configurable hardware equipment
- ISO-certified data centers
What are the requirements for an Astroneer server?
A dedicated Astroneer server should run stably in order to enable a smooth gaming experience in space for all players. The specific requirements for the server always depend on the actual number of players. To set up an Astroneer dedicated server, you should first make sure that the server you choose meets the minimum requirements mentioned.
- Processor: Quad-core processor with 2.4 GHz or more
- Memory (RAM): At least 4 GB (8 GB recommended)
- Storage space: 4 GB for the game + 10 GB for the operating system
- Network: Stable internet connection with at least 10 Mbps upload speed
- Operating system: Windows server 2016/2019/2022
If you opt for one of the IONOS server solutions, you’ll benefit from an excellent bandwidth of up to 1 Gbit/s.
The different server options for your Astroneer adventure
Before you can set up your own Astroneer server, you should think about which provider and which type of server is right for you. With so many different providers and plans, this decision can take some time. To give you an initial overview, we’ll show you which server variants you could choose from if you decide on IONOS as your provider:
- Dedicated server: An Astroneer dedicated server is ideal for larger groups or when maximum performance is required. The server resources are reserved specifically for you and your application purpose, which is reflected in the price for this server variant. Billing is based on the number of hours used, but is capped at a maximum amount.
- vServer/VPS: A vServer is a server solution that uses the principle of virtualization to provide you with hardware. This means the hardware is shared with other users, but as the end user, you won’t notice any difference. vServers are well suited for smaller groups of players and can be booked at a fixed monthly price.
Various game scenarios and the right IONOS plan
To help you choose the right server plan for you and your fellow players, we’ve outlined various Astroneer scenarios along with the corresponding IONOS plan.
| Number of players | Suitable vServer | Suitable dedicated server |
|---|---|---|
| Small team (2-4 players) | VPS Windows M | AR6-32 HDD |
| Medium team (5-8 players) | VPS Windows L | AR6-32 HDD |
| Large team (9-12 players) | VPS Windows XL | AR6-32 HDD |
The IONOS server tip for getting started
If you’re not yet sure where you want to go with your own Astroneer server, we recommend a VPS Windows M to get started. This allows you to test your own server in peace and at a low cost. If you need more players, you can easily switch to a different plan.
How to set up an Astroneer server
After selecting a provider and a suitable server plan, you can proceed with setting up your Astroneer server. The following instructions will guide you through the setup process, using an IONOS server with Windows Server 2022 as an example.
Step 1: Establish a remote connection to the server
The first step is to connect to your server. To do this, you can use a remote desktop connection, which can be easily set up in the cloud panel for IONOS servers. To do this, first log in by entering your individual access data.
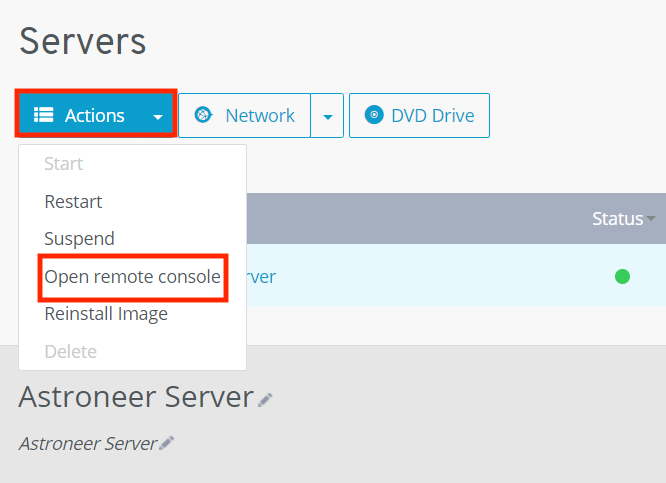
After you’ve logged in, navigate to the Server & Cloud section. There you’ll find an overview of all the server plans you’ve booked with IONOS. Select the server you’d like to use for your Astroneer server. Then click on the Options tab. In the drop-down menu that appears, you can open the remote console.
Step 2: Enable ports
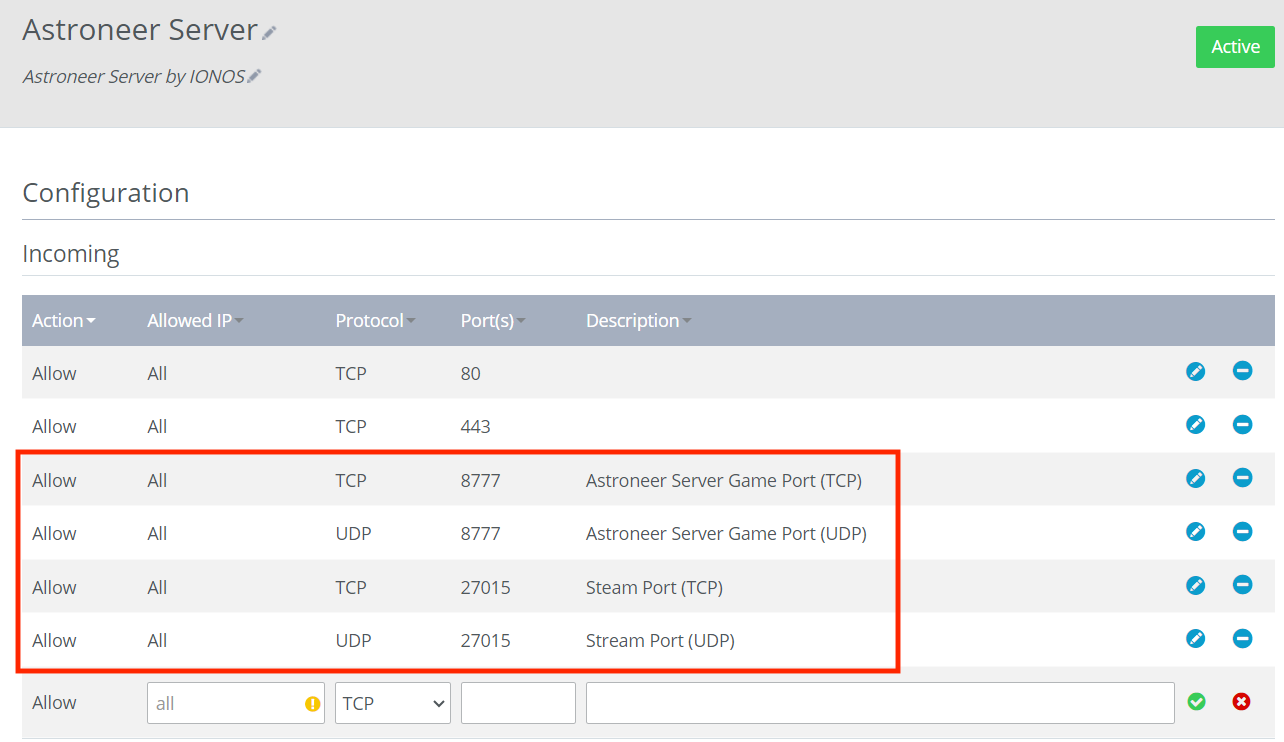
To ensure that you and your fellow players can connect to your Astroneer server without any problems, you need to enable the required ports. Astroneer uses the following ports by default:
- TCP/UDP 8777 (Game port)
- TCP/UDP 27015 (Steam port)
With IONOS servers, you can also easily set up port sharing via the cloud panel. To do this, navigate to Network in the menu on the left and click to open the Firewall policies submenu. Configure port sharing there by specifying the corresponding IP addresses, protocols and port numbers.
Step 3: Download and install SteamCMD
In the next step, you should install SteamCMD by downloading the installation files from the official SteamCMD website and then unpacking them into a folder (e.g., C:\SteamCMD).
Step 4: Run SteamCMD
Now open the command prompt of your server as the administrator and use the following command to navigate to the folder in which you’ve installed SteamCMD (we’ve named the folder “SteamCMD” as an example):
cd C:\SteamCMDOnce you’re in the correct folder, you can start SteamCMD by using the command below:
steamcmd
Step 5: Download Astroneer dedicated server
Use the following commands in your command line to log in to SteamCMD and then store all the necessary files for your Astroneer server in the folder named “AstroneerServer”. You can of course change the folder name.
force_install_dir C:\AstroneerServer
login anonymous
app_update 728470 validate
quit
Step 6: Configure the Astroneer server
Now navigate to the folder in which you downloaded the Astroneer server files in the previous step and locate the configuration file “AstroServerSettings.ini”. It’s usually located under the following file path: C:\AstroneerServer\Astro\Saved\Config\WindowsServer.
Open the configuration file with a text editor of your choice and add the following content. You can of course adjust the number of players and the name of your server as you wish. Then save the changes.
[ServerSettings]
Port=8777
ServerName=YourServerName
MaximumPlayerCount=8
OwnerGuid=<Your-Steam-64-ID>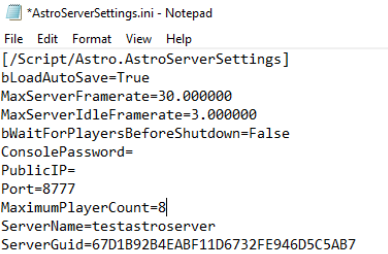
You can find your Steam 64 ID, for example, at steamid.io.
Step 7: Start the Astroneer server
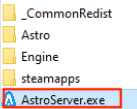
Now you can go online! Start your Astroneer server by clicking on the start script AstroServer.exe, which is located in your Astroneer server folder.
Step 8: Establish a connection
Now, your friends can connect to your Astroneer server using the server’s IP address and start your space adventure together. Simply open the game, enter the server IP address in the search, and join the fun!
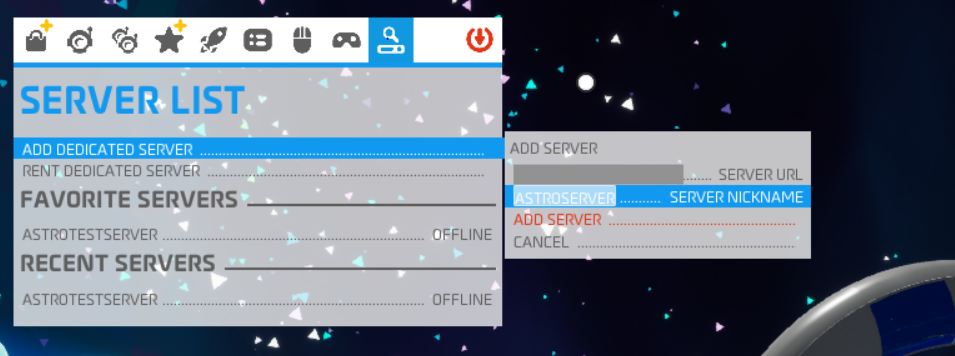
If required, you can also connect your Astroneer server to your own domain. To do this, register a domain and link the address to your Astroneer server.

