How to defrag a Windows 10 Hard Drive
If access to the hard disk slows down, this could be due to fragmentation. This is a common cause, at least with older storage media, which is why Windows includes its own program for defragmenting hard disks. External tools, that once were very popular, are no longer necessary for Windows 10 users. The included defragmentation tool is easy to find and access via the context menus in File Explorer. Here, we’ll show you how to defragment your disks in Windows 10.
- Store, share, and edit data easily
- Backed up and highly secure
- Sync with all devices
What is defragmentation?
The effective speed of a hard disk depends not only on the revolutions per minute (RPM) or data throughput rate in KB/s (kilobytes per second), but essentially on how the files are arranged on the hard disk. Ideally, all files are located one after the other, each as a closed block on the hard disk. When reading the data, the read head of the hard disk therefore only has to pass over the data block once in order to read the complete file. In practice, however, this ideal state exists only shortly after a new hard disk has been formatted in Windows i.e. on the operating system used.
When deleting files, gaps appear on the hard disk, which later have to be filled by other data fragments. That’s how, over time, many files are distributed in several single fragments on the hard disk. Access to the files remains seamless, but will take longer than usual. When defragmenting, all fragments of a file are searched for and saved as a coherent block. In doing so, the contents of the individual sectors must be physically read.
Defragmenting – here’s how it’s done
In most cases the feature to automatically defragment in Windows 10 is sufficient. However, if you want to manually defragment your hard disk, you can follow these steps:
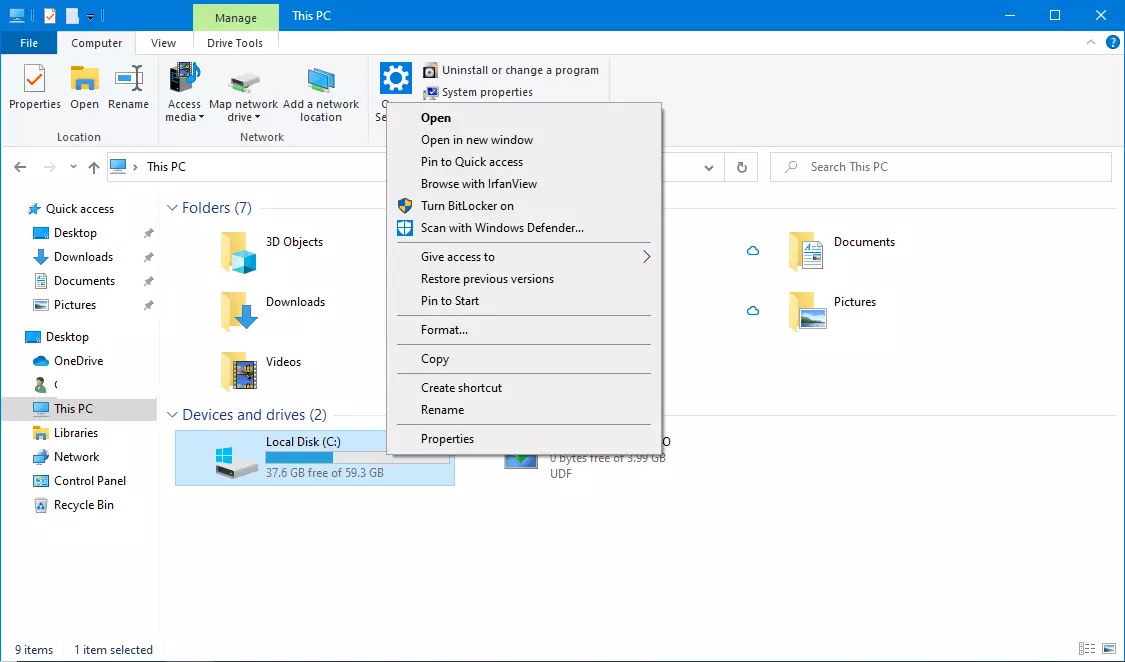
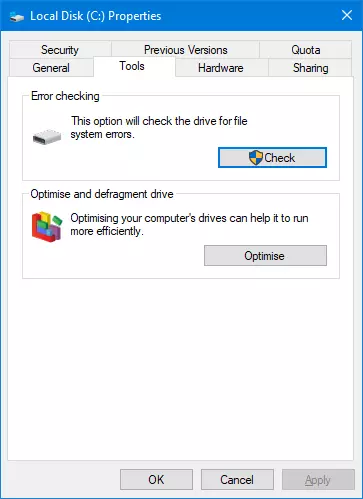
Step 1: Right-click the drive you want to defragment in Explorer and select “Properties” from the context menu.
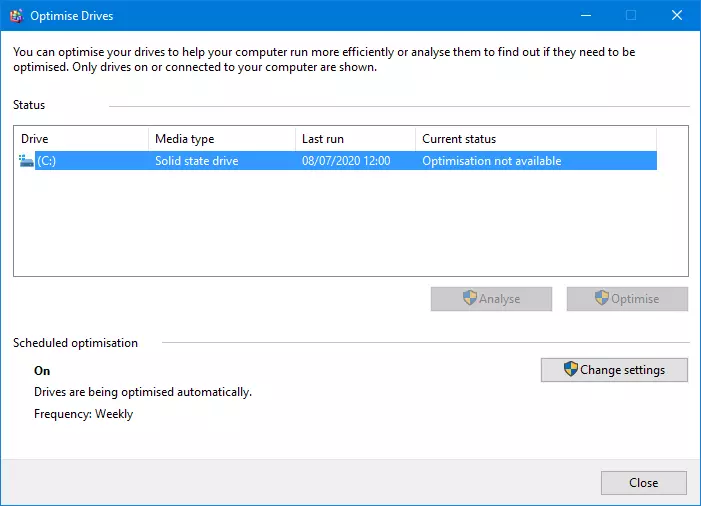
You can also launch defragmentation in Windows 10 by opening the Start menu and selecting “Defragment and optimize drives” from “Windows management programs”.
For more tips on how to speed up Windows 10, read our article “Speed up Windows 10: 8 tips for better performance”.
How long does defragmenting take?
How long a defragmentation takes mainly depends on the size and fill level of the hard disk. With automatic defragmentation, there is no loss of time. A complete defragmentation process can take several hours for large and very full hard disks. The file allocation table which holds the information on how individual files are addressed and the directories must be written back to the hard disk immediately after each change, which slows down the process considerably. A prerequisite for successful defragmentation is also that there is enough free space on the hard disk to temporarily store the data that is being moved.
Does defragmentation even make sense anymore?
Modern data systems no longer require manual defragmentation. Automatic defragmentation that works in the background is far more efficient.
SSD data carriers should not be defragmented anymore. In this case, defragmenting the drive can do more harm than good.
Automatic defragmentation
Windows schedules automatic defragmentation of all hard disks by default. Hard disks with automatic optimization are almost always displayed with a fragmentation of 0 percent.
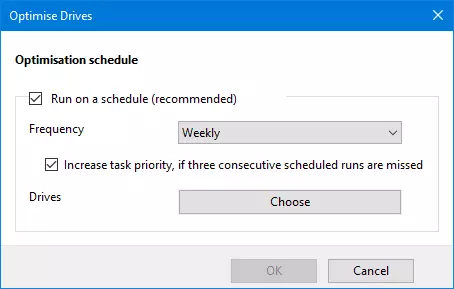
- To see and adjust the automatic optimization settings, click the “Change Settings” button in the “Optimize Drives” dialog box of the defragmentation program.
- In the “Frequency” section of the next window, set the frequency of optimization. “Monthly” is quite sufficient even for heavy users.
- When clicking on “Choose” you can select a drive that should be selected for automatic optimization. Activate this feature only for HDD storage and not for SSD.


