How to install a VNC Server on Windows
Installing a VNC server on Windows opens up numerous possibilities for efficient remote access to external devices. This allows you to control and manage your Windows PC from anywhere.
What is a VNC server on Windows used for?
A VNC server, short for Virtual Network Computing server, is a software solution that allows you to remotely control a computer over a network or the internet. The principle behind VNC is based on remote desktop technology, where the screen of a remote computer is displayed on another device. This is done by transferring the screen and input data between the VNC server on the target computer and a VNC viewer or client on the control device.
The main purpose of a VNC server on Windows is to remotely control and manage computers. This allows IT support teams to diagnose and fix problems on remote systems without having to be on site. Companies use VNC servers for the central organization of work environments and to support home office employees. A VNC server is also practical for personal use to access your own computer while on the move or to share your screen for presentations and training. Many VNC server options for Windows are free and offer a wide range of functions. This makes a VNC a budget-friendly solution for remote computer access and management.
These are the requirements for a VNC server on Windows
Before you can install and operate a VNC server on Windows, certain requirements must be met to ensure a successful and secure configuration:
- Operating system: The Windows PC on which the VNC server is to be installed should use at least Windows 7 or a newer version. Older versions may work, but they are not always compatible with the latest VNC server versions.
- VNC software: You need to select and install VNC server software. Popular options for Windows include TightVNC, RealVNC and UltraVNC. Each of these software solutions has its own installation instructions and features, so you should make sure to choose the version that suits your needs.
- Firewall installation: The Windows firewall or other security software must be configured to allow connections from the VNC server. As a rule, you should enable port 5900 for the VNC connection, unless you have configured a different port number.
- User accounts and authorizations: The VNC server requires administrative authorizations on the Windows PC in order to run properly.
In addition, you should implement security measures such as a strong password and encryption options to prevent unauthorized access to the VNC server.
Try out your VPS for 30 days. If you're not satisfied, you get your money back.
How to install TightVNC on Windows
TightVNC is an open-source software that can be downloaded and used free of charge. The VNC server is available for both Windows and Unix-based systems such as Linux. Below, we explain all the steps involved in setting up TightVNC.
Step 1: Download TightVNC software
To start installing TightVNC, first visit the official TightVNC website. Go to the download section and select the latest version of the TightVNC software that matches your system (32-bit or 64-bit). Click on the download link and save the installation file to your computer.
Step 2: Install TightVNC on Windows
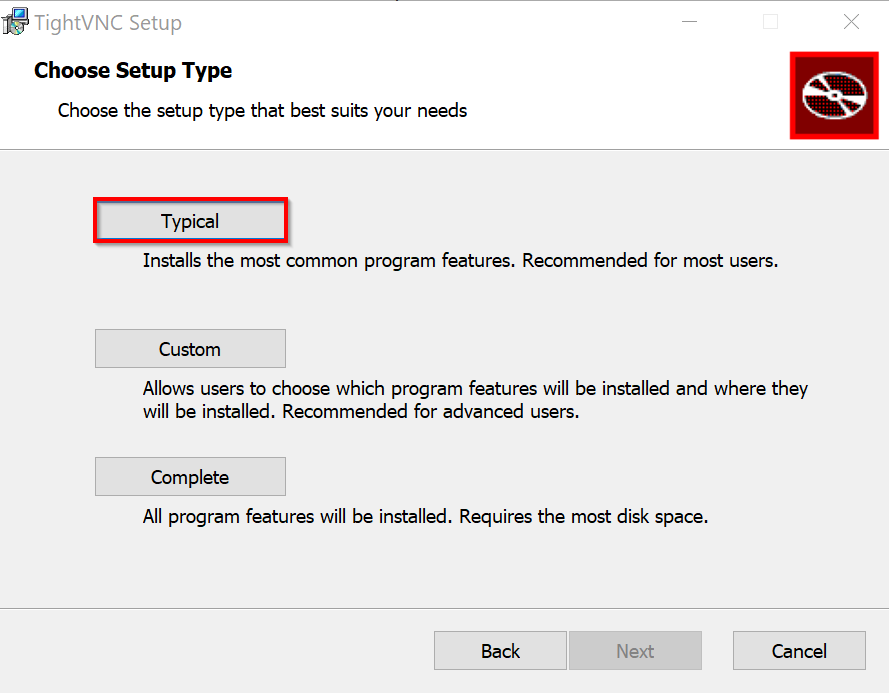
Double-click on the downloaded file to start the installation wizard. In the next window, you must read and accept the license agreement in order to continue. Now select the installation type. We recommend selecting Typical during setup to install both the VNC server and the viewer.

Check the box to run the TightVNC as System Service. Then click on Install to start the installation. The installation wizard will ask you to set a password for remote access. Confirm with Finish to close the wizard after completing the installation.
By default, TightVNC uses port 5900 for the connection. Make sure that this port is open in your firewall or adjust the port settings if you want to use a different port.
Step 3: Connect to the TightVNC server
To access the TightVNC server from another computer, you must install a VNC Viewer. Download a viewer of your choice or use the TightVNC Viewer. Open the VNC Viewer and enter the IP address of the Windows PC on which the TightVNC server is running in the connection field. If you have configured a different port, add this as well. After entering the IP address, you will be prompted to enter the password that you specified during server configuration. Enter the password and click “OK” to establish the connection.
How to install a RealVNC Server on Windows
RealVNC offers strong end-to-end encryption for all data transmissions as standard. This not only protects the connection itself, but also the transmitted data from unauthorized access. In addition, RealVNC enables two-factor authentication (2FA). Therefore, this VNC server is a popular choice for Windows and it’s also easy to install.
Step 1: Download the RealVNC software
Before you can install RealVNC on your Windows PC, you have to download the software from the official RealVNC website. Select the Windows version for RealVNC and click on the download button. RealVNC is chargeable, but there’s a 14-day free trial if you don’t have an account yet.
Step 2: Install the RealVNC server
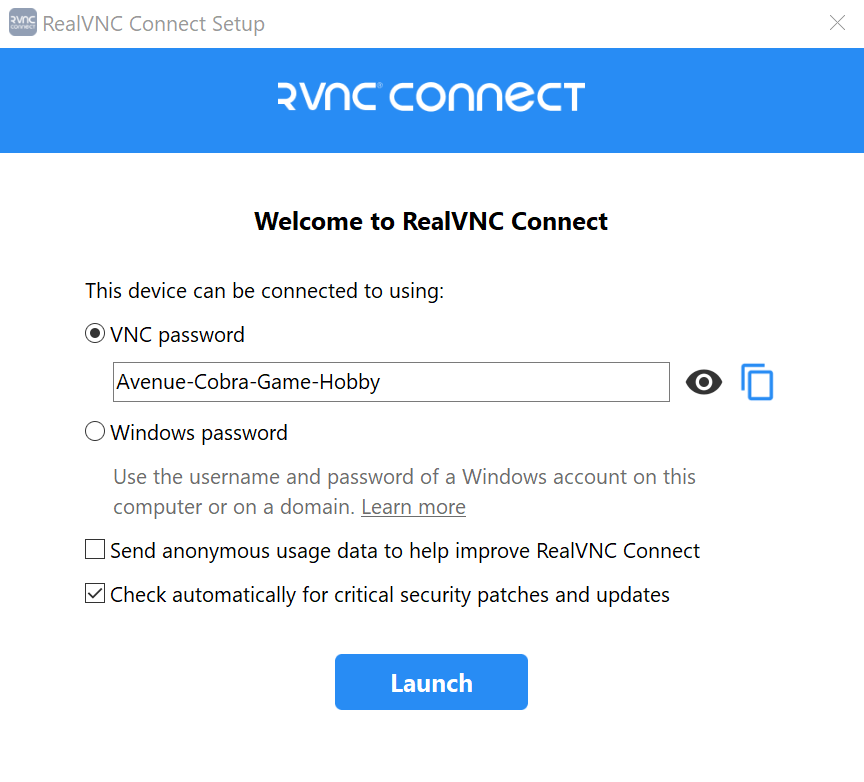
Start the installation by double clicking on the downloaded .exe file. The installation wizard will now guide you through the process. Your web browser will open automatically. Follow the instructions on the screen and then click on “Open” to return to the RealVNC Connect Setup App. Check the displayed settings and then click on “Launch”.

Now repeat the process on the device from which you want to access your Windows PC by downloading and setting up the RealVNC Connect Setup App on that device as well.
Step 3: Connect with the RealVNC server
In RealVNC Viewer you can access the remote computer you want to connect to by double clicking or tapping on it. Make sure that you use the RealVNC Viewer on a device other than the one on which the RealVNC server is running. Otherwise, you’ll see an endless view of windows because the image is mirrored from your own screen.
The first time you try to connect, RealVNC Viewer displays an identity verification screen. Here you can make sure that you really are connecting to the right computer. To do this, check the displayed password and signature and compare them with the information on the RealVNC server. RealVNC Viewer saves this identity to verify it for future connections. If there’s a discrepancy, you’ll receive a warning before the connection is established to protect you from possible security risks.
Step 4: Authentication
When you establish a connection to a remote computer, you will be asked to authenticate yourself so enter your password. If you selected the “Windows Password” option during setup, you must use the username and password of an account on the remote computer.
Also make sure that the users who are to connect remotely have the appropriate authorizations. By default, only members of the Administrator group are allowed to access the computer. If necessary, add users and session authorizations for the RealVNC server. Otherwise, you may have difficulty connecting to your computer. You can manage users and permissions in RealVNC Server in two ways: by customizing the RealVNC Server Permissions parameter or via the Options > Users & Permissions page. Use the user interface to add users and manage permissions.
How to install UltraVNC Server on Windows
In addition to standard features such as remote access and screen sharing, UltraVNC offers advanced features such as file transfer and chat functions that facilitate interaction and management of remote sessions. Installation can also be automated for multiple PCs.
Step 1: Download the UltraVNC installation files
First you need to download the appropriate version of UltraVNC for your version of Windows. To do this, visit the official UltraVNC download page. On this page, you’ll find the current versions of the UltraVNC installer. Select the appropriate installer for 32-bit or 64-bit Windows.
Step 2: Run the installer
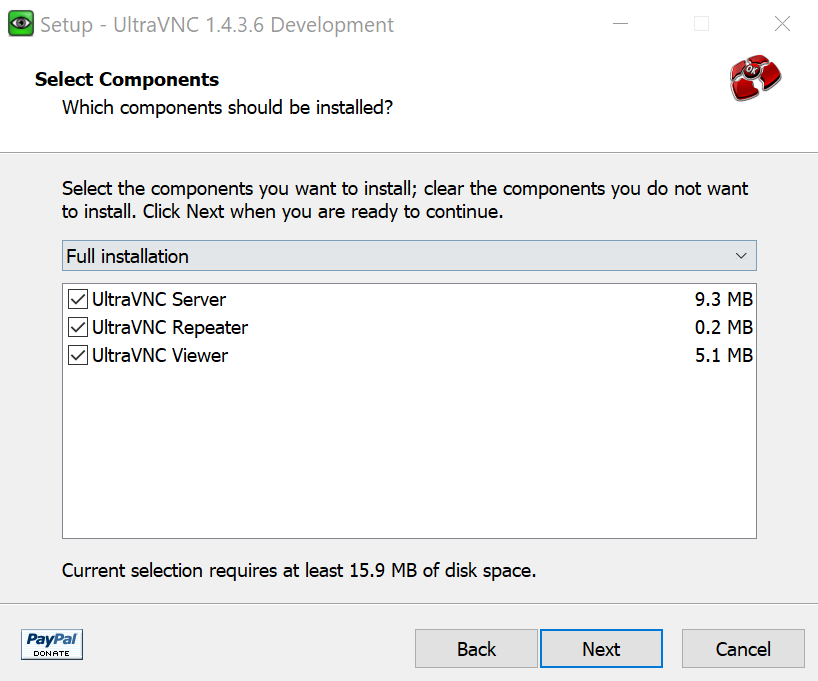
After starting the installation wizard, you’ll be asked to select your preferred language. Then click on “Next” in the welcome window of the installation wizard. On the next page, you must accept the license agreement to continue. Select “I accept the agreement” and click “Next” again. You can confirm the default settings in the information window and in the following windows. If necessary, change the desired installation directory. In the “Select Components” window, you can select “Full installation” to install both the UltraVNC Server and the UltraVNC Client.

Once the installation is complete, click “Finish” to exit the installation wizard.
Step 3: Configure the UltraVNC Server
Right click on the UltraVNC icon in the taskbar and select “Admin Properties”. This opens the UltraVNC Server configuration window. Go to the “Authentication” tab. Here you can change the VNC password and the view-only password. Make sure to use strong passwords to prevent unauthorized access.
In the “Incoming Connections” tab, you can change the ports for UltraVNC. Make sure that the ports are configured correctly, especially if you need specific ports for your network environment. Check if UltraVNC Server is present in the startup folder of your computer. If not, you’ll need to manually copy UltraVNC Server to this folder so that it starts automatically at system startup.
Step 4: Connect with the UltraVNC Server
Test the connection to your UltraVNC server from another computer to ensure that the configuration and passwords are working correctly. This helps to identify possible connection problems at an early stage. Also check that all desired functions of UltraVNC are working correctly. Check the remote administration functions and file transfer to ensure that no errors occur.
Step 5: Automate UltraVNC installation (optional)
If you need to install UltraVNC on a large number of computers, automating the installation process can save significant time and labor. By using command line parameters during setup, you can make the installation more efficient and consistent.
/dir="Dirname": This parameter is used to specify the installation directory for UltraVNC. For example, if you want to install the software inC:\Program Files\UltraVNC, you would enter the following command:
UltraVNC_1436_X64_Setup.exe /dir="C:\Program Files\UltraVNC"/no restart: Use this parameter to prevent the computer from restarting automatically after installation. In the past, it was sometimes necessary to restart after installation, but modern programs can often be installed without restarting./silent: This parameter ensures that no dialog boxes are displayed during the installation./very silent: If you use this parameter, the installation is carried out without any user interface. No windows are displayed and the installation runs completely in the background./loadinf="Filename": This parameter allows you to load a configuration file that is used during installation. This file contains all the settings you want to create during the installation and allows consistent configuration on all computers. To create such a configuration file, you can first run through the installation process with the parameter/saveinf="Filename". This saves the current installation options in an INI file, which you can then use on other computers.
An example command for loading a configuration file would be:
UltraVNC_1436_X64_Setup.exe /loadinf="C:\path\to\config.ini"/log: This parameter creates a log file in the Temp directory. This log file contains detailed information about the installation process, including any errors or warnings that occurred during the installation.
In our Digital Guide, you can also learn how to install a VNC server on Ubuntu 22.04.
- Dedicated enterprise hardware
- Configurable hardware equipment
- ISO-certified data centers

