
How to set up Ollama in Docker

Depending on what you want to do, the right server setup for Ollama can look very different. For simple chatbots, a larger VPS is usually enough. For agents, coding or very large models, you’ll typically need a GPU or even dedicated hardware. Ollama makes running large language models locally or on a server much easier by handling model management, startup and API access for you.
Try out your VPS for 30 days. If you're not satisfied, you get your money back.
What is Ollama?
Ollama is a tool that lets you run large language models like Gemma, Qwen, DeepSeek and other compatible models locally or on your own server. It gives you a simple command-line interface plus a REST-API so you can start models and connect them to your own apps. That means you’re not limited to chatting in the terminal. You can also use Ollama as a model backend for tools, assistants or development workflows.
One of Ollama’s main advantages is that you don’t have to rely on a third-party cloud service. Everything runs on your own infrastructure, which means requests stay local. Ollama takes care of loading the models and making them accessible via CLI or API. This is great for beginners as it means you can skip setting up a full inference stack and get started with just a few commands.
Ollama is often used purely as a model backend. It runs language models locally or on a server and makes them available via an API. On top of that, you can use agent frameworks like OpenClaw with Ollama to automate more complex workflows. In setups like this, Ollama handles the model inference, while OpenClaw manages things like tool usage, multi-step processes and automated actions.
Which server do you need for Ollama?
Before you start installing anything, take a moment to think about what you actually want to do with Ollama. Not every setup needs a GPU, but if you need faster responses, want to handle parallel requests or plan to run larger AI models, a basic setup won’t be enough anymore. Model size also plays a big role. As a rough guide, Ollama recommends at least 8 GB of RAM for 7B models, at least 16 GB of RAM for 13B models, and at least 64 GB of RAM for 70B models. Your GPU’s VRAM also matters. It affects how fast responses are generated, how large the context window can be, and generally how usable the model feels.
Scenario 1: Simple text generation, testing and small chatbots
If you’re intending to use Ollama just to experiment, generate simple texts or build small helper bots, a powerful VPS without a GPU is usually enough. You’ll mostly be working with smaller AI models, which need at least 8 GB of RAM. In practice, it’s better to have some headroom so the operating system, Docker and background processes don’t slow things down. This means a more realistic starting point is 16 GB of RAM. You should also plan for enough storage. Model files can quickly take up several gigabytes.
The main advantage of a VPS is that it’s affordable and quick to set up. The downside is performance. Compared to GPU-based systems, responses are noticeably slower. For learning, demos, or simple API endpoints, though, a VPS with 4 vCPUs, 16 GB RAM, and SSD storage is a solid starting point.
Scenario 2: Internal knowledge bots, small APIs and embeddings
If you plan to use Ollama for an internal knowledge base, retrieval-augmented generation or embeddings, the workload becomes more demanding. You’re no longer dealing with a single response, but with repeated API calls, background processing and longer runtimes. While this can still run on a CPU server or a large VPS, having more memory makes a noticeable difference. A setup with 16 to 32 GB of RAM runs much more smoothly.
If multiple users are accessing the system at the same time, you’ll likely get better results with more CPU cores or by switching to a GPU server. Ollama doesn’t just generate text, it can also create embeddings via its API, so you can use it to search through documents or build internal knowledge bases. For smaller teams or internal tools used only by a limited number of people, a large VPS or a small dedicated server without a GPU can still be enough, as long as you’re not expecting very fast response times. But if you want things to feel smooth and responsive for users, it’s worth considering a GPU even at this stage. As a rule of thumb: the more interactive your setup is and the more requests it needs to handle in parallel, the sooner a CPU-only server will run into performance issues.
Scenario 3: Coding assistants and responsive agents
If you intend to use Ollama for coding assistants, semi-autonomous agents or other interactive workflows, a GPU is pretty much a must. These setups depend heavily on fast responses and being able to work with larger context windows without slowing everything down. How much context you can use mainly depends on your available VRAM. For agents, web search, coding tools, or longer-running workflows, Ollama recommends a context window of at least 32,000 to 64,000 AI tokens.
At this point, a simple CPU-based VPS usually won’t cut it anymore. A better option is a GPU cloud server with a modern NVIDIA GPU, plus enough RAM and fast NVMe storage. With a setup like that, you can run mid-sized models without constant slowdowns, and multi-step agent workflows actually become usable. For more ambitious solo projects, prototypes or small teams, this is usually the sweet spot between cost and performance.
Scenario 4: In production with multiple users
If you want to use Ollama as a core part of a production system that multiple users rely on, the requirements change again. At this point, it’s not just about whether a model runs, but whether it runs reliably, consistently, and performs well under load. You’ll need enough RAM, a powerful GPU, and enough storage to manage several models. To keep everything running reliably under load, your system also needs enough resources to handle multiple parallel requests, as well as basic monitoring to track performance and detect issues. Since Ollama exposes models through an API, it works well as an internal model backend. But your setup needs to be designed for uptime and predictable performance.
In most cases, a high-performance GPU dedicated server or a professional GPU cloud server is the better choice over a small VPS. Typically, you’re looking at 64 GB of RAM or more, a strong NVIDIA GPU, and a clean setup where model files are stored persistently. For production use, it’s also important to make sure Docker and, if needed, the NVIDIA Container Toolkit are set up correctly so the GPU is actually available inside the Docker container.
Use case 5: Very large models and high-end inference
If you want to run very large models in the 70B range or above, you’re firmly in high-end territory. Ollama lists 64 GB of RAM as a rough minimum for 70B models. In practice, though, virtualized servers usually won’t cut it, especially if you expect fast responses or need to run multiple processes at the same time. For setups like this, a dedicated server with powerful GPU hardware is the more realistic option than a standard VPS.
In production setups, this typically means specialized GPU systems with a lot of VRAM, such as servers with NVIDIA A100 or NVIDIA H100 cards, or similar high-performance setups. This kind of hardware is expensive, but if you’re working with large models, long context windows, and demanding production workloads, there’s really no alternative.


Which server setup best meets your needs?
| Scenario | Recommended hardware | Cost (estimated) |
|---|---|---|
| Simple bots / API | VPS with 4 vCPU, 16 GB RAM, SSD | + |
| Internal knowledge bots and embeddings | Large VPS or small dedicated server with 16–32 GB RAM | + / ++ |
| Coding and agents | GPU cloud server with modern GPU | ++ |
| Production use (multiple users) | High-performance GPU cloud server or dedicated server with lots of RAM | ++ / +++ |
| High-end (70B+) | Dedicated server with A100/H100 or comparable high-end GPU | +++ |
Cost: + = low, ++ = medium, +++ = high
How to install Ollama on a server with Docker
In this section, we’ll walk you through how to install Ollama on a Linux server with Docker. If you’re new to this, using Ollama with Docker is a good option. Ollama runs inside a container, which means you don’t have to make as many manual changes to the host system. If you want to use Ollama with an NVIDIA GPU on Linux, you’ll also need the NVIDIA Container Toolkit so Docker can pass the GPU through to the container.
Step 1: Connect to your server
First, connect to your server over SSH. You’ll need the server’s IP address and a user account with sudo privileges.
ssh USERNAME@SERVER-IPIf this is your first time connecting, your system will usually ask you to confirm the host key. Type yes, then enter your password or use your SSH key. Once you’re connected, you’ll be in your server’s terminal and ready to start the setup.
Step 2: Update your system
Before installing Docker and Ollama, update your package lists and upgrade any existing packages. This ensures your system is running the latest security updates and package versions, which is especially important on a new server.
sudo apt update && sudo apt upgrade -yStep 3: Install Docker
On Ubuntu 24.04, the easiest way to install Docker is through the official APT repository. This sets up the required repository file automatically under /etc/apt/sources.list.d/docker.sources. This installation method works on Ubuntu 24.04 and supports common architectures like amd64 and arm64. Start by installing the required helper packages:
sudo apt install ca-certificates curl -yThen create the directory for the keyring:
sudo install -m 0755 -d /etc/apt/keyringsThen download the official Docker key:
sudo curl -fsSL https://download.docker.com/linux/ubuntu/gpg -o /etc/apt/keyrings/docker.asc
sudo chmod a+r /etc/apt/keyrings/docker.ascNow set up the Docker repository:
sudo tee /etc/apt/sources.list.d/docker.sources <<EOF
Types: deb
URIs: https://download.docker.com/linux/ubuntu
Suites: $(. /etc/os-release && echo "${UBUNTU_CODENAME:-$VERSION_CODENAME}")
Components: stable
Signed-By: /etc/apt/keyrings/docker.asc
EOFUpdate your package list again:
sudo apt updateThen install Docker Engine along with the Compose plugin:
sudo apt install docker-ce docker-ce-cli containerd.io docker-buildx-plugin docker-compose-plugin -yCheck that Docker is running:
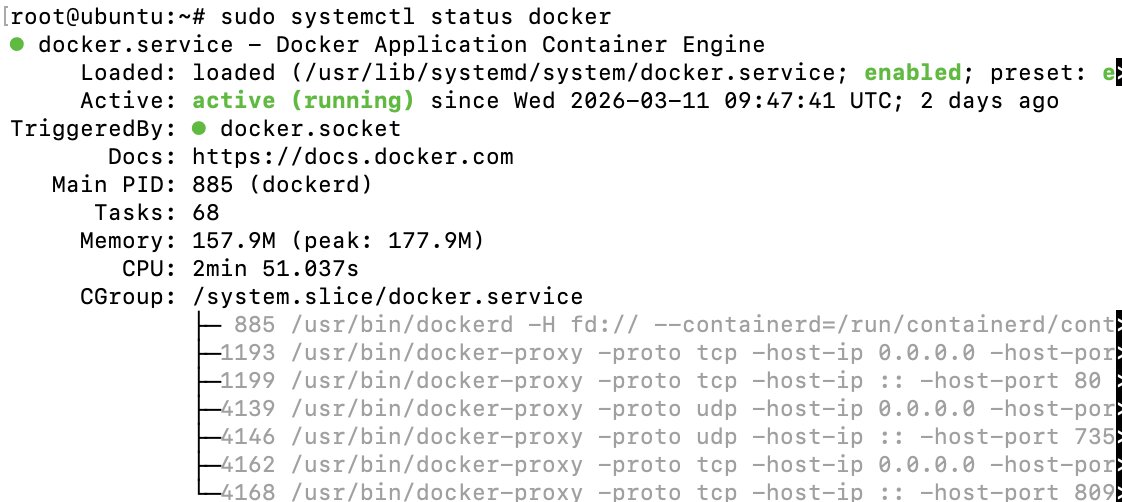
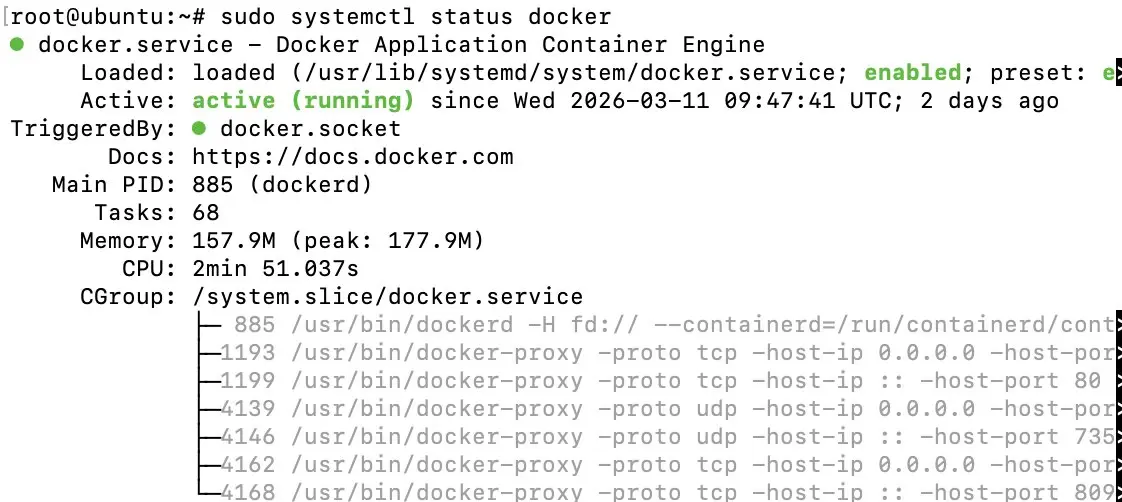
sudo systemctl status dockerYou should see “active (running),” which means everything is working.
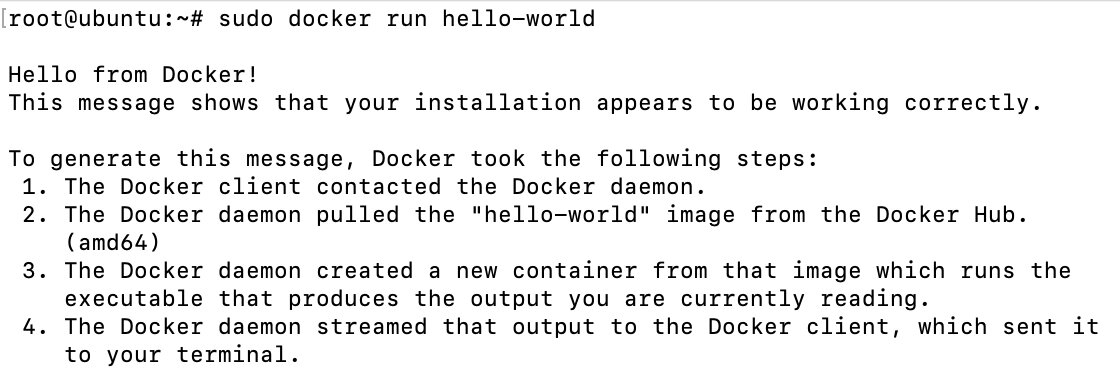
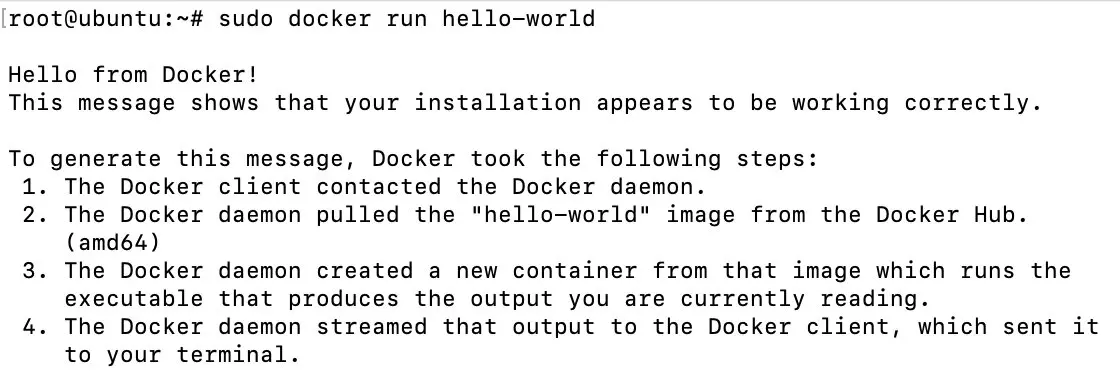
You can also run a quick test container:
sudo docker run hello-worldIf you see a confirmation message, Docker has been installed successfully.
Step 4 (Optional): Run Docker without sudo
By default, Docker runs with sudo on Linux. Use the following commands if you’d rather run it without sudo:
sudo groupadd docker
sudo usermod -aG docker $USER
newgrp dockerAfter that, you can test Docker works without sudo with:
docker run hello-worldStep 5: Install the NVIDIA Container Toolkit (for GPU setups)
You only need this step if your server has an NVIDIA GPU and you want Ollama to use it inside the Docker container. Start by installing the required packages:
sudo apt-get update && sudo apt-get install -y --no-install-recommends ca-certificates curl gnupg2Then add the NVIDIA repository:
curl -fsSL https://nvidia.github.io/libnvidia-container/gpgkey | sudo gpg --dearmor -o /usr/share/keyrings/nvidia-container-toolkit-keyring.gpg
curl -s -L https://nvidia.github.io/libnvidia-container/stable/deb/nvidia-container-toolkit.list | \
sed 's#deb https://#deb [signed-by=/usr/share/keyrings/nvidia-container-toolkit-keyring.gpg] https://#g' | \
sudo tee /etc/apt/sources.list.d/nvidia-container-toolkit.listThen update your package list again and install the toolkit:
sudo apt-get update
sudo apt-get install -y nvidia-container-toolkitNow configure Docker to use the NVIDIA runtime:
sudo nvidia-ctk runtime configure --runtime=docker
sudo systemctl restart dockerIf your GPU drivers are installed correctly, Docker can now access the GPU from inside the container.
Step 6: Start the Ollama container
Now you can start Ollama as a Docker container. The official image is called ollama/ollama. If you’re running on CPU only, use this command:
sudo docker run -d \
-v ollama:/root/.ollama \
-p 11434:11434 \
--name ollama \
ollama/ollamaIf you’re using an NVIDIA GPU and have already completed Step 5, use this instead:
sudo docker run -d \
--gpus=all \
-v ollama:/root/.ollama \
-p 11434:11434 \
--name ollama \
ollama/ollamaStep 7: Check if the container is running
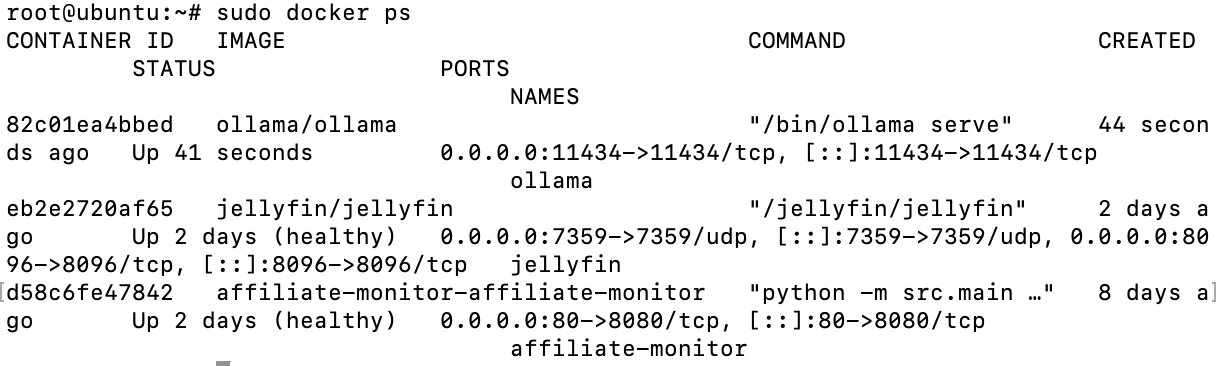
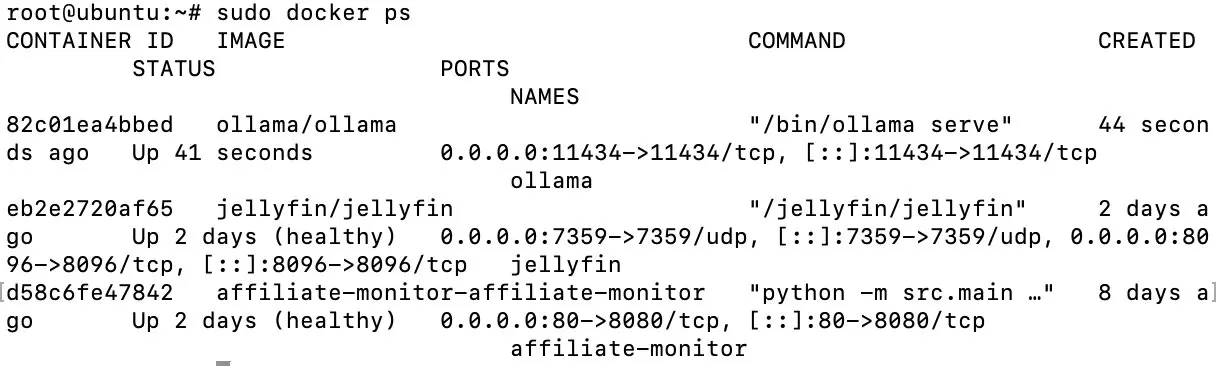
Run the following command to check that the container started correctly:
sudo docker psYou should see a container named ollama in the output. You should also see that port 11434 is exposed. That’s the port Ollama will use to provide its API.
Step 8: Download and run your first model
With the container up and running, you can launch your first model. The official Docker image uses a docker exec command to run the Ollama directly inside the container.
sudo docker exec -it ollama ollama run llama3The first time you run this, Ollama will download the model. Depending on the model size and your server connection, this can take a while. After that, the command opens an interactive console where you can start asking questions right away.
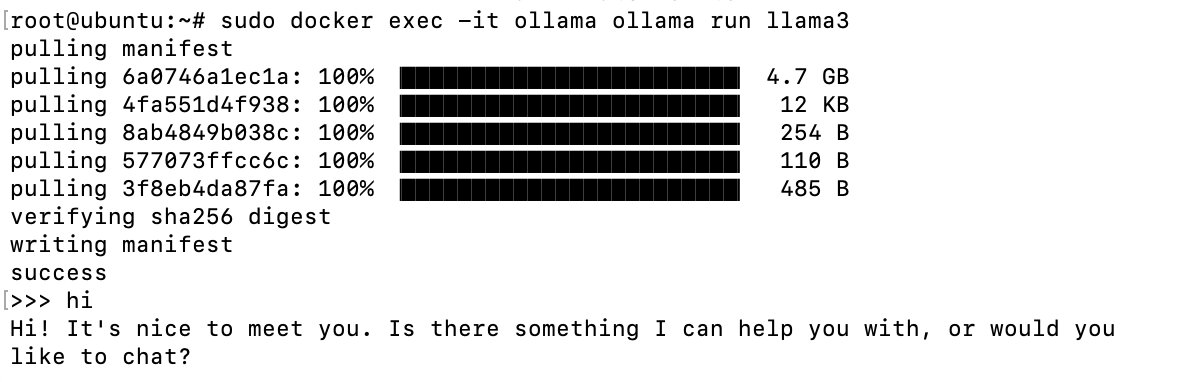
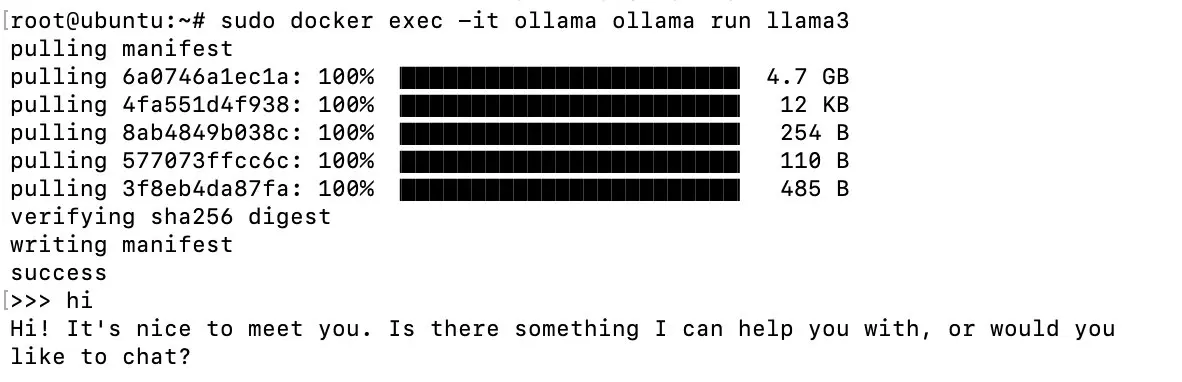
If you’d like to try a different model instead of Llama3, just replace the model name in the command. You can find out which models are available in the Ollama library. Current models include Gemma 3, Qwen3, DeepSeek-R1, among others.
Step 9: Test the Ollama API
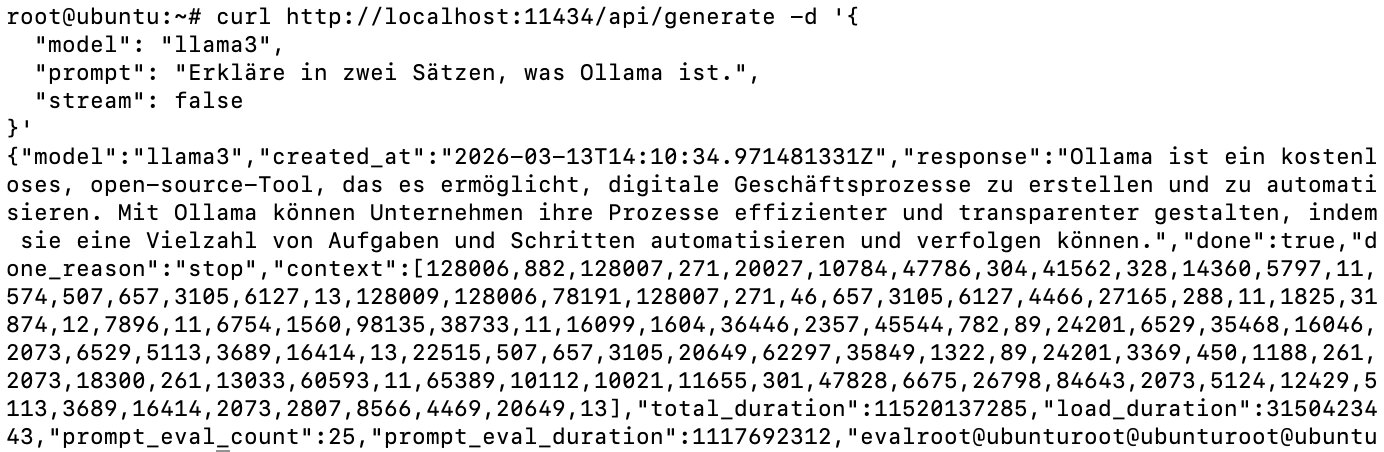
Once Ollama is running, it automatically exposes an API. By default, it’s available at http://localhost:11434/api. You can test it directly on the server using curl.
Here’s a straightforward example:
curl http://localhost:11434/api/generate -d '{
"model": "gemma3",
"prompt": "Explain what Ollama is in two sentences.",
"stream": false
}'If everything is working, you’ll get a JSON response or streamed output from the model. This tells you the container is running and the API is also accessible.
Step 10 (Optional): Use Docker Compose
If you plan to keep your Ollama server running, Docker Compose is often easier to manage than a long docker run command. It lets you store your configuration in a file and adjust it later if needed. Start by creating a directory for your setup:
mkdir -p ~/ollama
cd ~/ollamaThen create a file called compose.yaml. Here we’re using nano, but any text editor will work:
nano compose.yamlFor a CPU-based setup, add the following:
services:
  ollama:
    image: ollama/ollama
    container_name: ollama
    ports:
      - "11434:11434"
    volumes:
      - ollama:/root/.ollama
    restart: unless-stopped

volumes:
ollama:If you’re using an NVIDIA GPU, you can add a GPU configuration depending on your Docker setup. For beginners, using docker run --gpus=all is often simpler since Compose configurations can vary between Docker versions. The key thing is making sure Docker is set up correctly so it can use the NVIDIA runtime.
Now start the service:
sudo docker compose up -d

Then check the status again:
sudo docker compose ps

Step 11: Important notes for real-world use
If you plan to use Ollama in production or to make it available to other devices on your network, don’t expose it to the internet without thinking it through. By default, Ollama uses port 11434. In the Docker setup shown here, the API is published on the host with -p 11434:11434. Depending on your network and firewall settings, this can make it accessible from outside your network as well. If you want to restrict access to the server itself, bind the port to 127.0.0.1 instead, for example with -p 127.0.0.1:11434:11434, and adjust your firewall rules accordingly.
You should also keep storage in mind. Models are stored locally and can take up a lot of space. Even the base installation can use several gigabytes, and model files can be much larger. The same applies to Linux: make sure you have enough disk space available. Ollama also adjusts the default context length based on your GPU memory. This means for longer contexts, agents or coding workflows, available VRAM size also matters.
Reviewer

Christian Heldmaier
Christian Heldmaier is an experienced online marketing and SEO specialist from Karlsruhe. He has been working as an SEO Manager at IONOS since July 2020.