Install fonts on a Mac
Every Mac comes preinstalled with a selection of fonts. But sometimes the available choices don’t fit your project. You can download new fonts via websites like What The Font and use them in text-editing or image editing applications within a few minutes after installation. No IT expertise necessary to install fonts on your Mac! Learn how to quickly add the fonts you need with this tutorial.
- Simple registration
- Premium TLDs at great prices
- 24/7 personal consultant included
- Free privacy protection for eligible domains
How to install new fonts on a Mac with Font Book
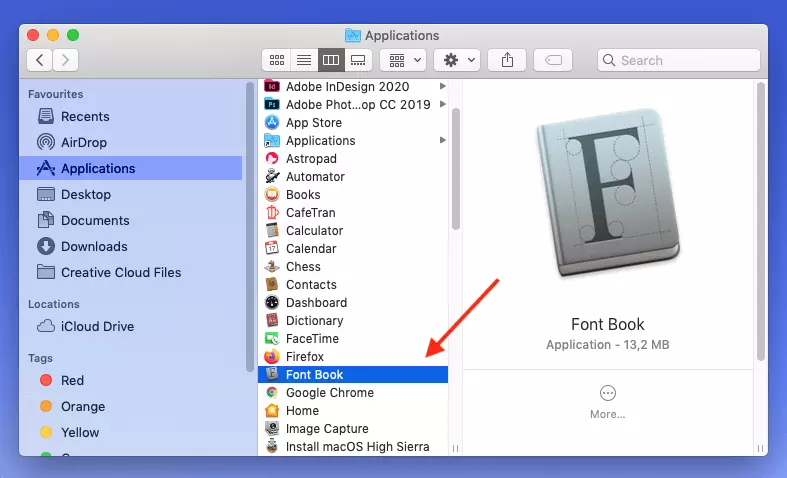
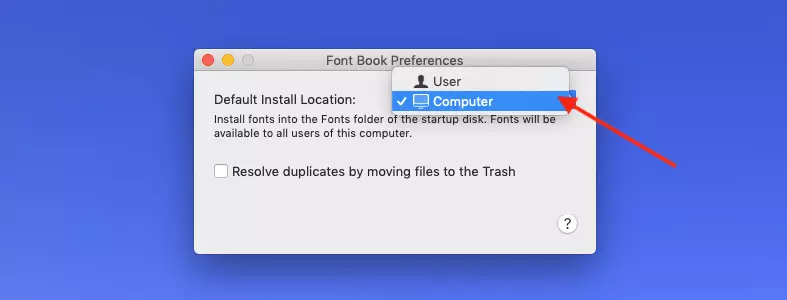
The easiest way to install new fonts on your Mac is by using Font Book. Font Book is an application that comes pre-installed on every Mac to help manage fonts. It lets you install fonts on your Mac to be used by your account only, all accounts, or the entire network. Read on to find out the steps for each of the three scenarios.
Install font for individual users
Step 1: Open the “Finder” on your Mac and find the folder with the downloaded font. This is usually located in the “Downloads” folder.
Step 2: Open the folder and then click the file with “.ttf” or “.ttc”, or “.otf” extension.
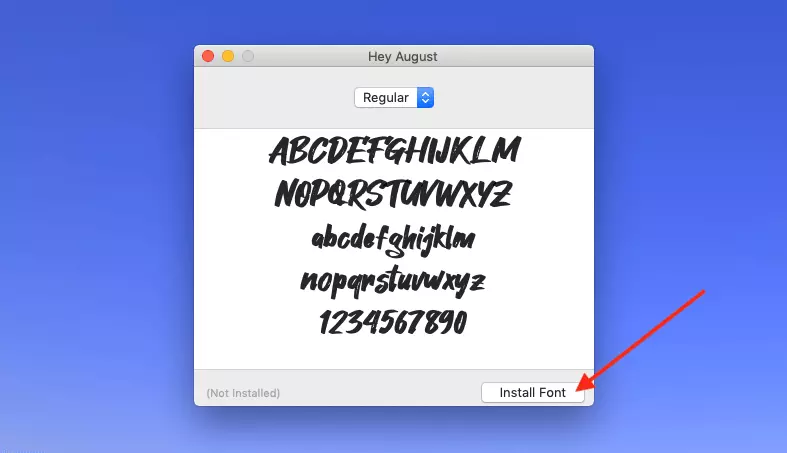
Step 3: A pop-up for the respective font will appear. Click on “Install Font”.
Install font for all users
Step 4: Open the folder with the downloaded font and click on the file with the extension “.ttf” or “.ttc” or “.otf”.
Step 5: A pop-up window for the respective font will appear. Click “Install” so that all users of your Mac can use the font.
Install font for the entire network
Step 1: If you’re a network administrator and wish to install new Mac fonts that are accessible to all network users, first make a copy of the font folder.
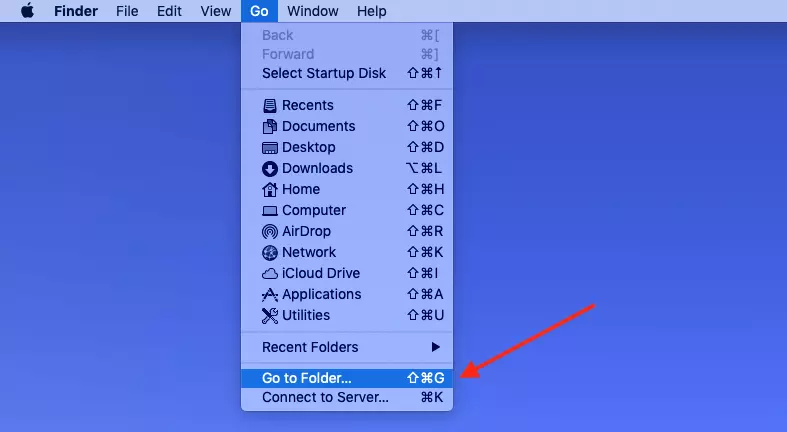
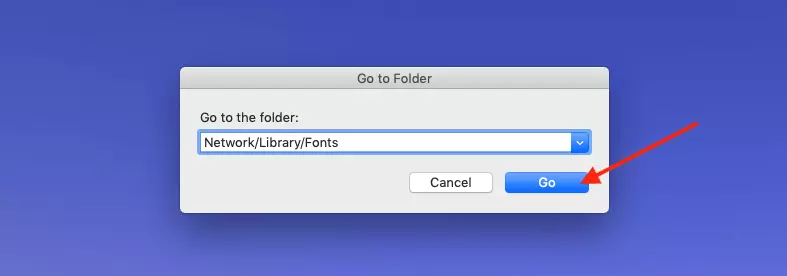
Step 2: In the Finder, click “Go” and “Go to Folder…” from the top navigation panel on your desktop. If you prefer Mac shortcuts, enter the key combination [Cmd] + [Shift] + [G].
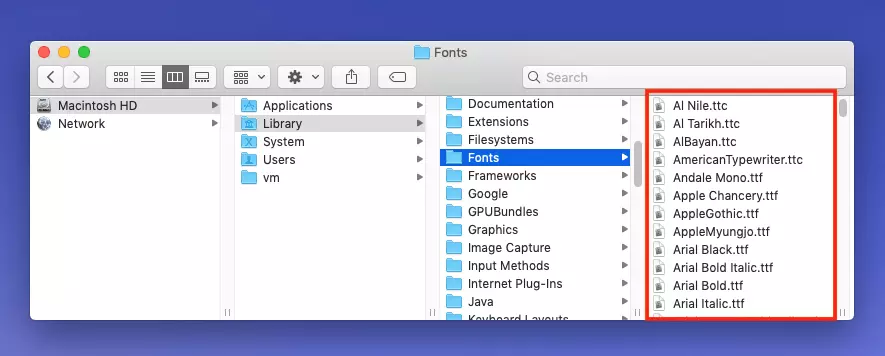
Step 4: In the final step, simply paste the copied fonts into the folder.
If your Mac is slow to respond to commands, it may be due to a cluttered hard drive. Move large files into the secure HiDrive cloud storage from IONOS to free up your hard drive.
Manually install fonts
You don’t have to use the Font Book to install a font on your Mac. Instead, you can proceed manually. To do this, follow the steps below:
Step 1: Open the Finder and click “Go” and “Go To Folder…” in the top navigation bar on your desktop.
Step 2: Type “/Library/Fonts” in the pop-up window and click “Go”.
Step 3: Once the Fonts folder opens, add the unzipped font file (using the copy-paste function or drag-and-drop method).
Fonts available online are compatible with all major operating systems. This means that fonts for installation on Windows are also suitable for installing on macOS.
Preview of installed fonts
As a font collection grows, it can be challenging to keep track of it. If you regularly install new fonts, it may be worth creating a Mac folder to group your fonts into different categories. You can quickly preview installed fonts in the following manner.
Step 1: Launch “Font Book”.
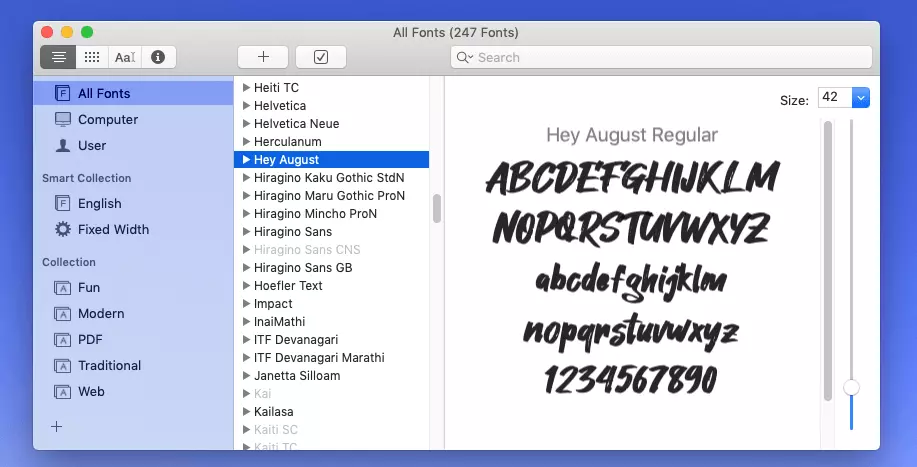
Step 2: Click on the respective font you want to preview.
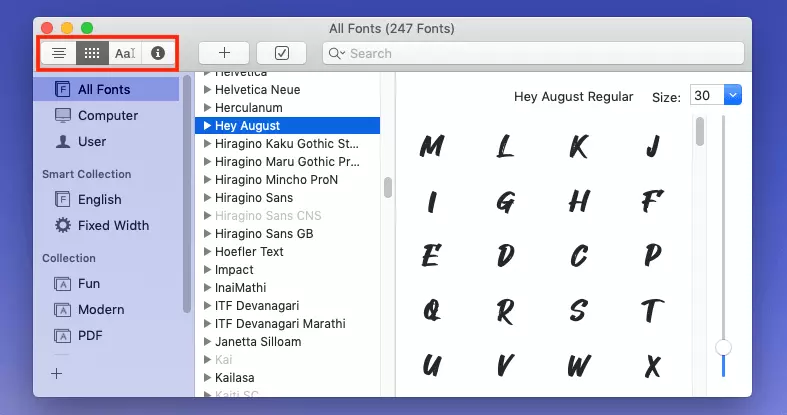
Step 3: The preview appears in the right half of the window. To change it, click on one of the options at the top left.
Mac: Disable or remove font
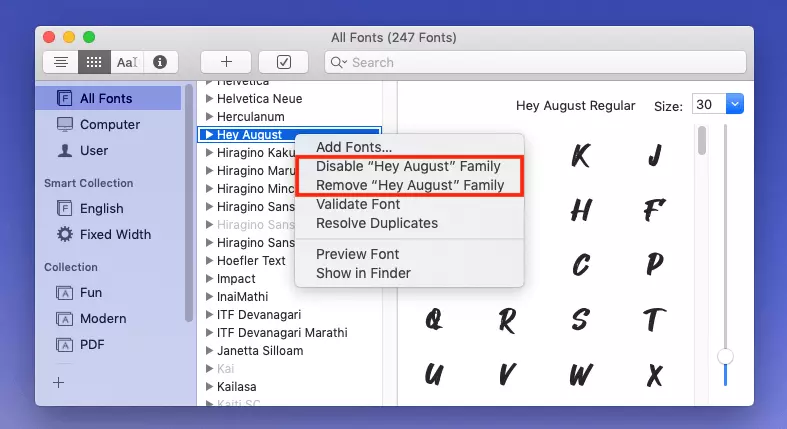
Much like you can install new fonts, you can deactivate or remove them if you no longer need them. If you deactivate a font, it remains on your system, but is no longer displayed in applications or the Font Book. With uninstall, you remove the font permanently. Here's how:
- Open “Font Book”.
- Select the fonts to disable or remove.
- Right-click for a dropdown to appear.
- Click on “Disable [font] Family” or “Remove [font] Family”.
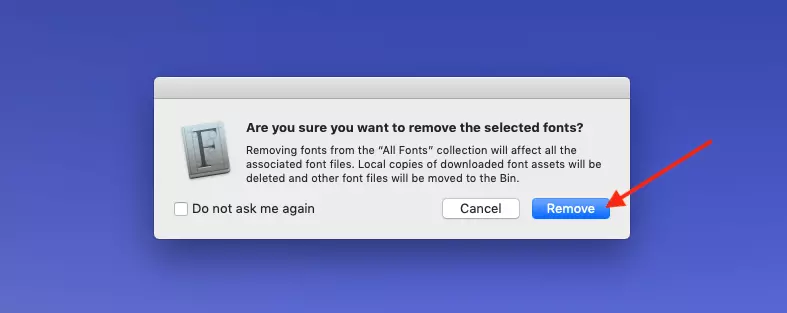
- If you selected the “Remove” option, a pop-up window appears to confirm your selection.
Protect your downloaded fonts and all other files by regularly creating a Mac backup or use MyDefender from IONOS to back up all data automatically for added convenience.


