How to schedule a shutdown in Windows 11
Windows 11 allows users to schedule their PC’s shutdown at a certain time or after a certain period of inactivity. Scheduling shutdowns not only saves energy, but it also ensures that your PC is protected from unauthorized access when you are away from your computer. The function is particularly useful for overnight updates or if you are taking a break from work.
What are different ways to schedule a shutdown in Windows 11?
Scheduling your PC’s shutdown means that your Windows system will switch off at a certain time or after a set period of time. Unless you have specified for it to do otherwise, your system will shut down completely. You should be aware that unsaved files or settings may be lost when your computer shuts down. It is important to save everything before leaving your computer. If you’re wondering how to schedule a shutdown in Windows 10, the instructions for Windows 11 are quite similar:
Use Command Prompt
Step 1: Open the Run menu using the windows shortcut [Windows] + [R]. Enter the CMD command “cmd” and confirm with [Ctrl] + [Shift] + [Enter] to open the dialog with administrator rights.
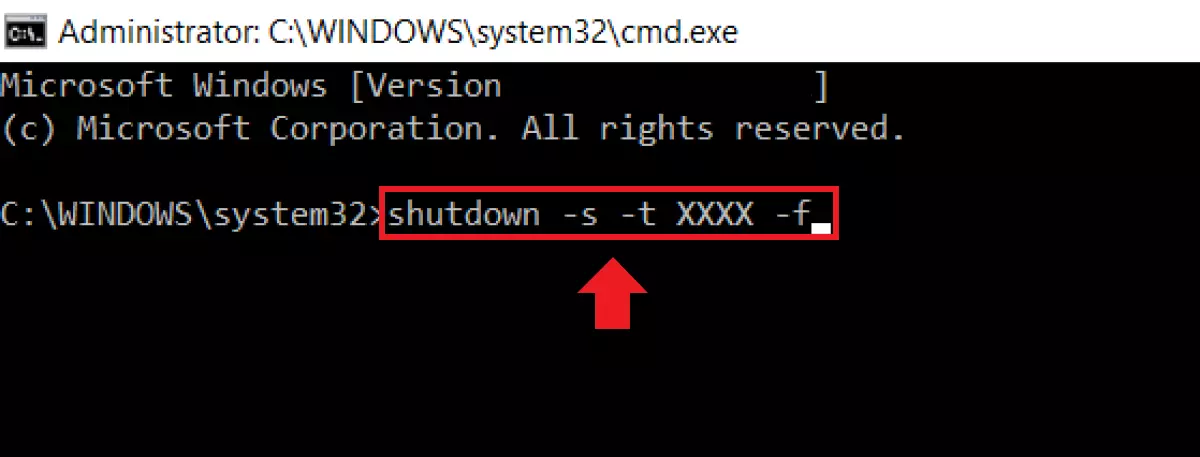
Step 2: Enter the command “shutdown -s -t XXXX -f” in the terminal window. “XXXX” is a placeholder for the number of seconds after which your computer should shut down. For example, enter “shutdown -s -t 3600 -f” if you want your PC to shut down after 3,600 seconds, or one hour, of inactivity. If you want your PC to restart after a specified period of time, replace the “-s” with “-r” in the command. If you want to define a time for the shutdown, use the command “at time shutdown /s”. Use the time parameter to specify the exact time, for example, “at 23:30 shutdown /s”.
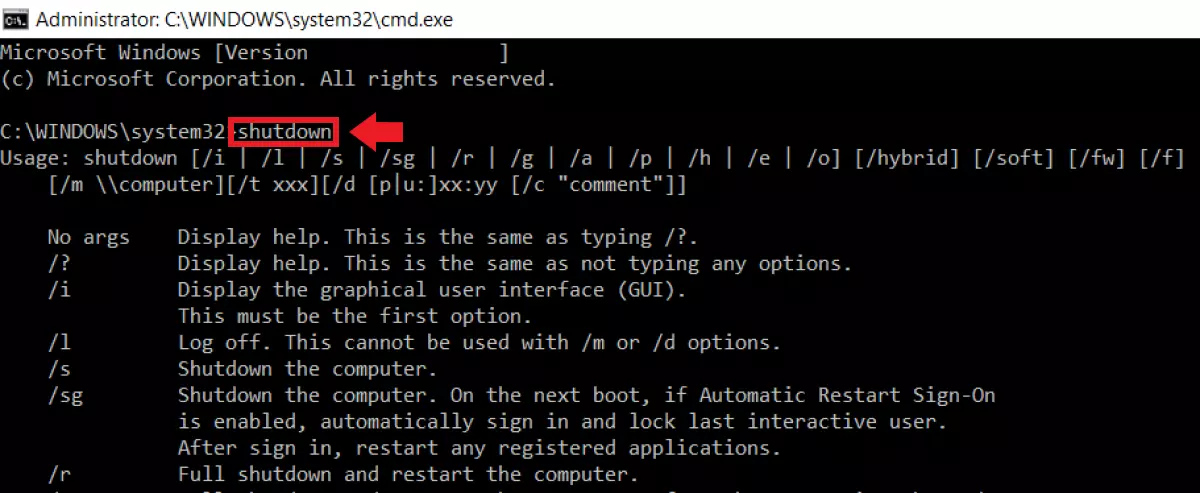
The shutdown command has several custom settings. Simply type “shutdown” and press [Enter] to view these. The settings for restarting your PC, force quitting applications, and activating the hibernating mode in Windows 11 are available here.
Use the Windows search bar
Step 1: The Windows search bar is a handy shortcut if you don’t want to use the Run dialog. Enter “shutdown -s -f -t (time)” in the Windows search bar in the taskbar. The placeholder “(time)” is used to indicate the amount of time before your PC should shut down. For example, “shutdown -s -f -t 3600” specifies that the PC will shut down after one hour of inactivity. Keep in mind, you should save all files and changes before a shutdown is due to take place.
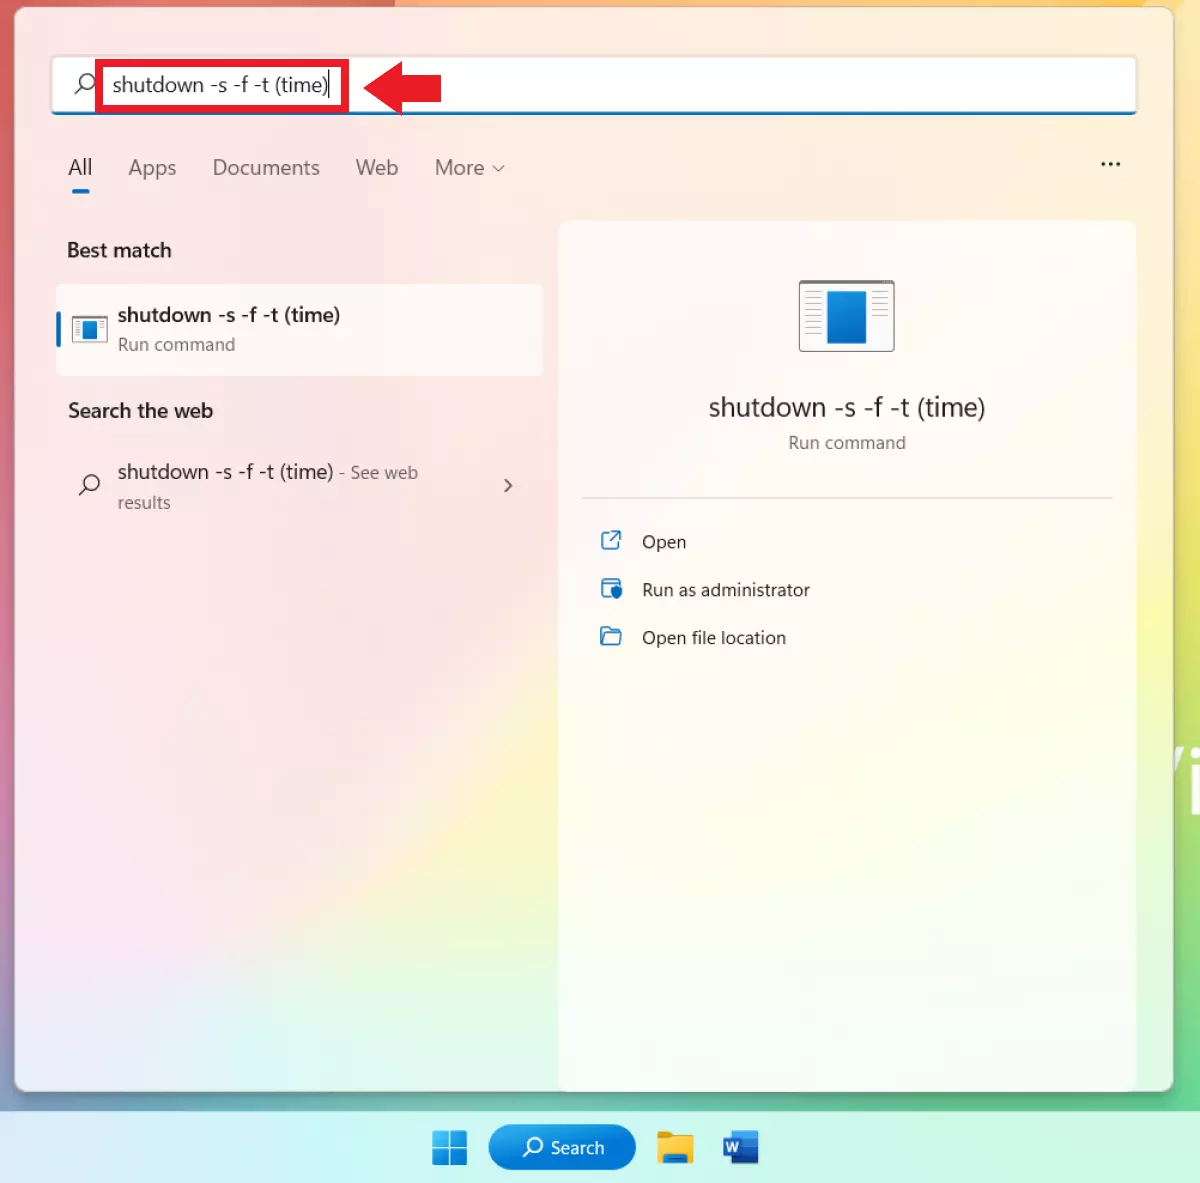
Step 2: The command “shutdown -a” is used to stop the shutdown command. Enter this in the search bar and press [Enter].
Use Windows Power Options
The Power Options menu is the first place to go if you want to make Windows 11 faster, schedule a system shutdown, or edit settings for startup programs in Windows 11.
Step 1: Enter “Edit Power Plan” into the Windows search bar and then select it.
Step 2: Go to Change advanced power settings in the menu window.
Step 3: Click Sleep in the Power Options menu. Then click on Hibernate after in the dropdown menu. You’ll find On battery and Plugged in listed here. You can set the time in minutes and your computer will shut down after being inactive for the specified amount of time.
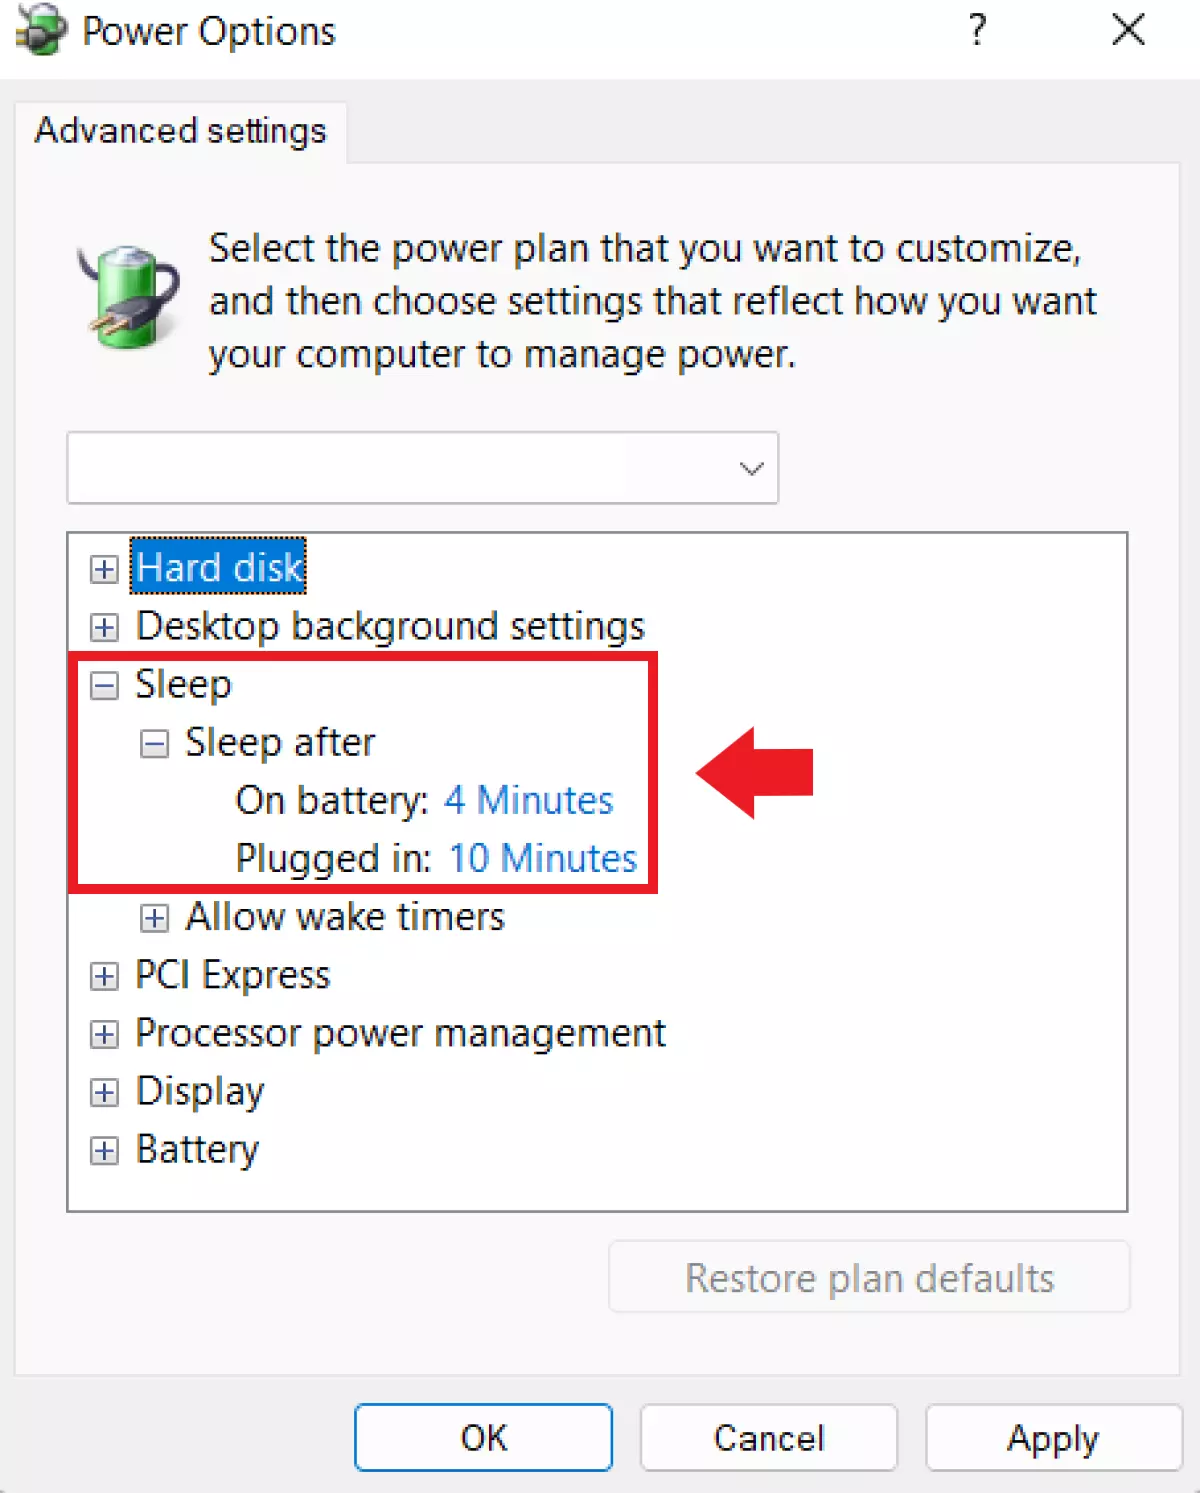
Step 4: Click OK to confirm the changes.
Use Windows Task Scheduler
You may want your computer to shut down at a certain time or after a period of inactivity. The Windows Task Scheduler allows you to specify the exact time your computer should shut down every day.
Step 1: Type “Task Scheduler” into the Windows search bar.
Step 2: Click on Create Task… in the menu which is found on the right side of the window.
Step 3: Go to the General tab and give the task a name. Check the boxes next to Run only when user is logged on and Run with highest privileges. Select Windows 11 in the Configure for dropdown menu.
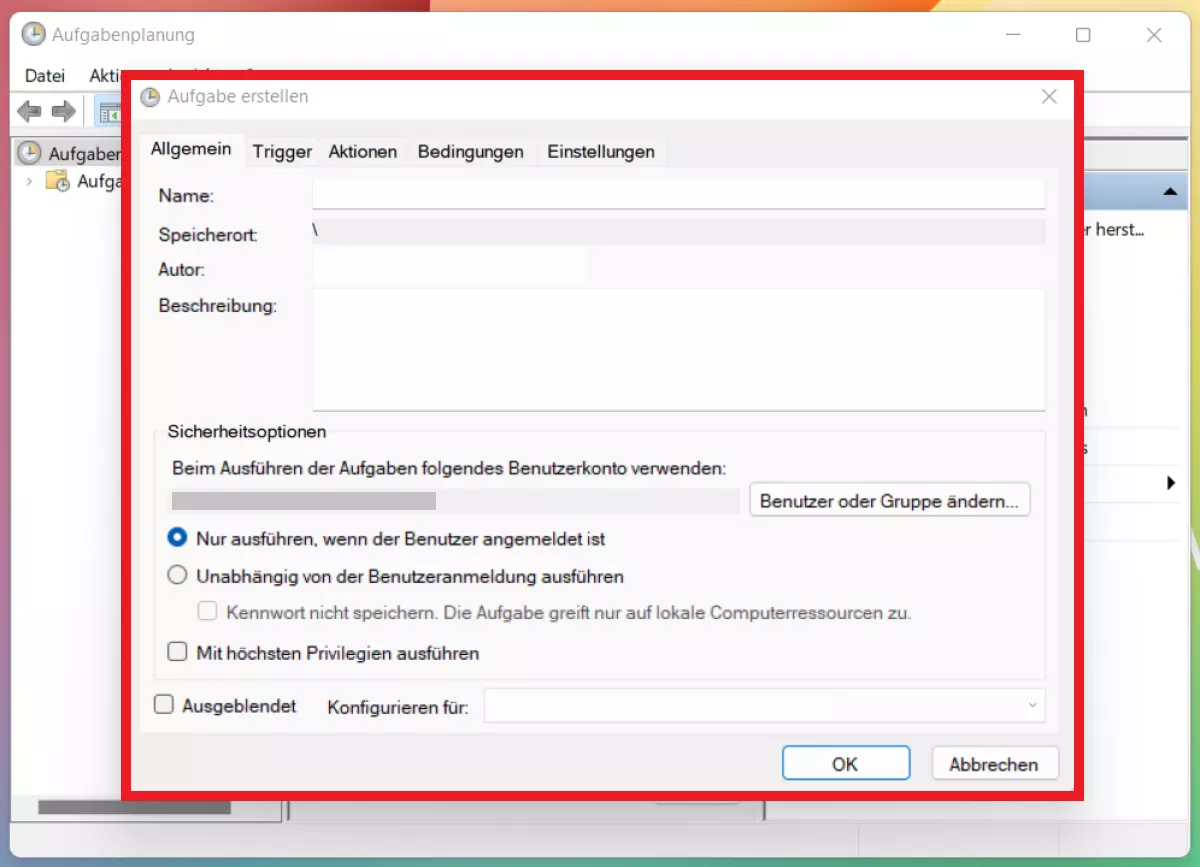
Step 4: Go to the Triggers tab. Click on New….
Step 5: Select On a Schedule under Begin the task. You can decide in Settings whether the task should be completed One time, Daily, Weekly or Monthly. You can also choose when the task should start and whether it should be limited to a certain period of time.
Step 6: Check the Enabled box and confirm with OK.
Step 7: Now, you need to choose the type of task. Go to the Actions tab and click New…. The menu window New Action will appear. Select Start a program. Enter the command “shutdown” in the Program/script field. Under Add arguments, enter “/S /F” and confirm with OK.
Step 8: Finally, specify the conditions under which the task should take place. Go to the Conditions tab and activate the Start the task only if the computer is idle for option. Enter the time after which the task should be triggered. You should also activate the option Stop if the computer ceases to be idle and Restart if the idle state resumes. Confirm with OK.

