How to create a shortcut on desktop (Windows 10 and Windows 11)
Whether with a simple right-click on the desktop, with the [Windows] key, or in the browser – in Windows you can create shortcuts to important programs, files, and pages in just a few steps.
- Simple registration
- Premium TLDs at great prices
- 24/7 personal consultant included
- Free privacy protection for eligible domains
Quick guide: create a desktop shortcut
For files:
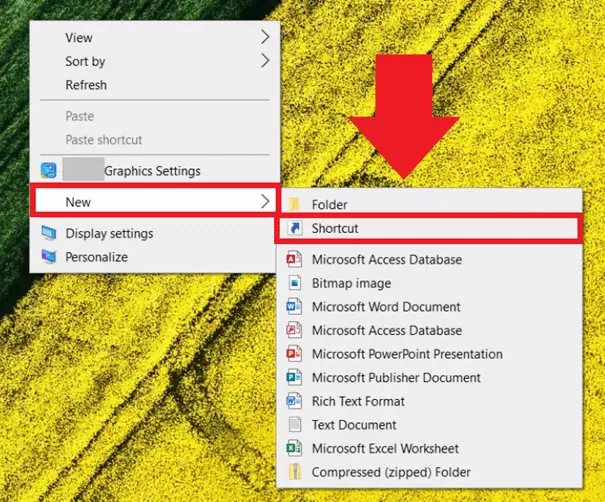
- Right-click on the desktop.
- Go to “New” then “Shortcut”.
- Type a name or go to the search bar.
- Select a file and confirm the shortcut.
For programs:
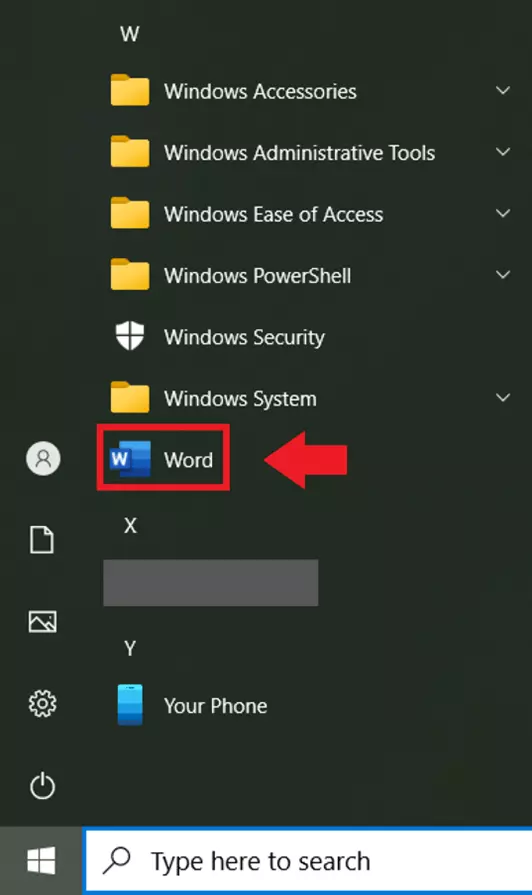
- Press the [Windows] key.
- Search for the program you are looking for.
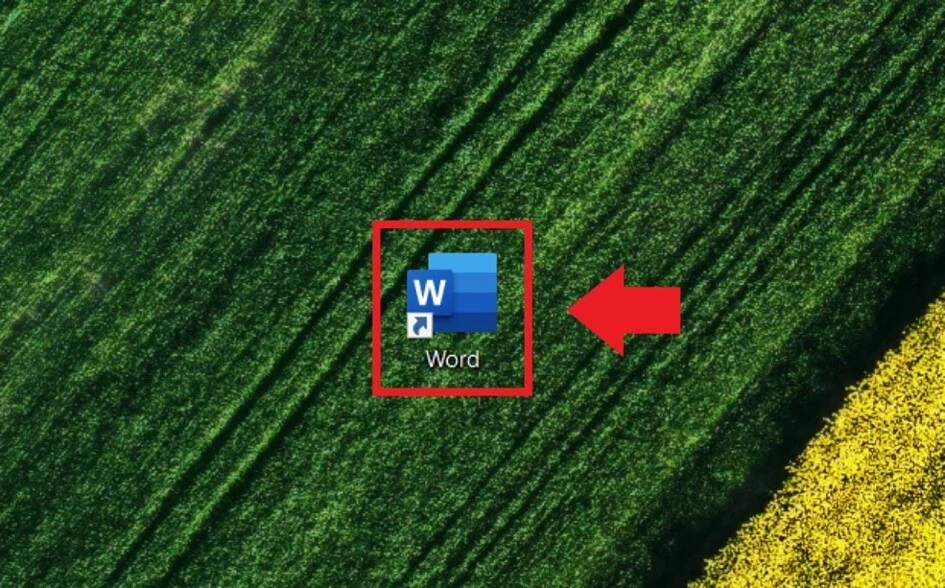
- Pull the program symbol onto the desktop.
For websites:
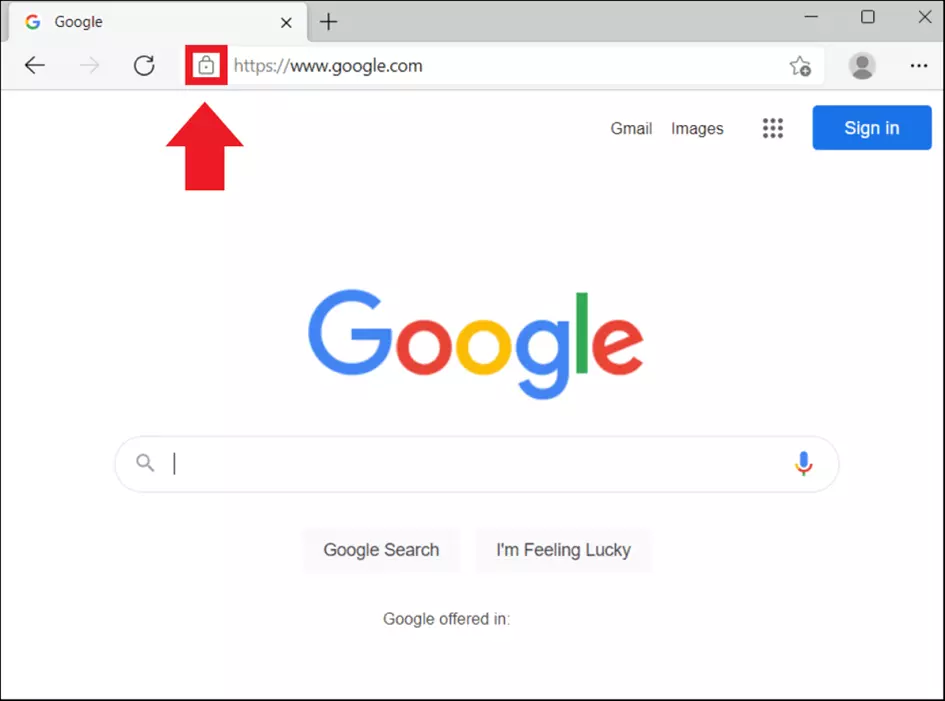
- Open the page in your browser.
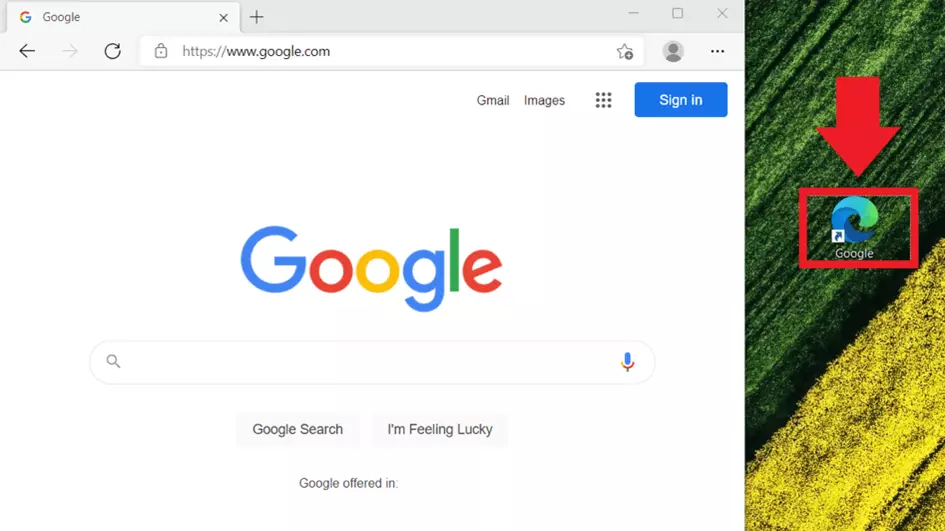
- Click on the lock symbol next to the URL.
- Pull the website shortcut onto your desktop.
What can you shortcut to from your desktop?
Desktop shortcuts are small icons on your desktop that let you to double-click to open the file, web page, or program of your choice. Shortcuts can be created for basically anything:
- For a program you use regularly
- For a file you are currently working with
- For a website you visit frequently
- For a game you are playing
You can also create a shortcut for Windows 10 God Mode, which lets you find all the Control Panel settings in one convenient list. The number of possible shortcuts is basically limited only by the size of the desktop. However, it’s advisable to structure shortcuts clearly and not to overload the desktop.
Windows 10 and Windows 11: create shortcuts
In the following tutorial we’ll show you how to create a shortcut on desktop for a file, a program, and a website in Windows 10 and Windows 11.
Creating a file shortcut (using a text file as an example)
Step 3: If you know the location of the file, enter the appropriate keyword in the search bar. Alternatively, click on “Browse” to find its location.
Step 4: Click on the file you want to link to and confirm with “OK”. The file path now appears in the menu. Click on “Next”.
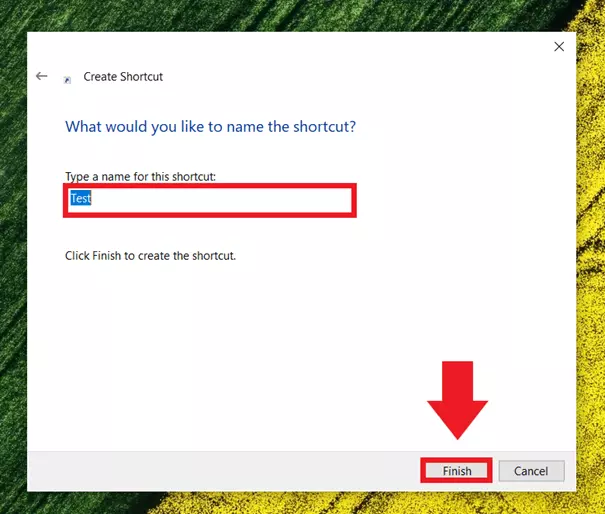
Step 5: In the next window, enter a name for the shortcut or accept the name of the file. Click on “Finish” to create the desktop shortcut.
