How to change your WordPress Username and Password
Learn how to change your WordPress username and password from the web-based WordPress admin page, or directly in the database.
- Create & customize your site with AI tools made for everyone
- 3x faster: SSD, caching & more
- Daily security scans, DDoS protection & 99.98% uptime
WordPress password security
Learn some of the steps you can take to improve your WordPress password security, which can help prevent your site from being hacked.
Don't use "Admin" as a username
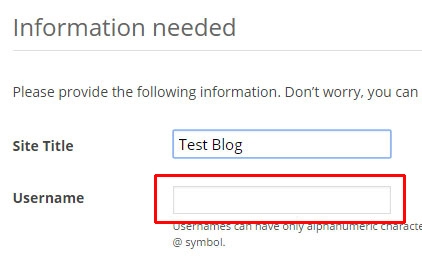
When you install WordPress, it will ask you to set the username for the main administrative login. Do not choose “admin.” This is the most common administrative username for WordPress blogs, and the one which is targeted by malware and hackers.
Regardless of what username you choose here, you can set it to be displayed as anything you like on your blog. If you want posts to show as being authored by “Admin,” you can set that as the Display Name on the Edit Profile page later.
Forcing a strong password
Don’t choose a weak password like “password” or “123.” When you set the password for a WordPress user, the profile editor includes a strong password generator for you. Be sure to use a password which the editor rates as “Strong.”
If you have other users on your blog, you can force everyone to use a strong password with the Force Strong Passwords plug-in.
Limiting the login attempts
By limiting the number of failed login attempts, you can prevent scripts from trying thousands of passwords in an attempt to find one that fits. This can compromise your blog if you have not set a secure password, and the flood of login attempts can seriously impact your web server’s performance.
The best way to do this is to install and use a plugin like Limit Login Attempts or Wordfence.
Securing the WordPress password file
The WordPress password storage for the login passwords is fairly secure. The passwords are encrypted and stored in the WordPress MySQL database.
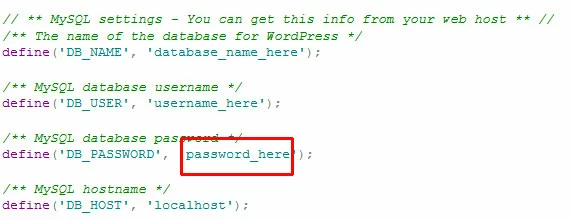
However, the password for the WordPress MySQL database itself is stored in the wp-config.php file in plain text.
To help prevent people from stealing and potentially using this password, you can block access to it in a .htaccess file in your document root. Add this section to the file:
<files wp-config.php>
order allow,deny
deny from all
</files>
Then restart Apache for the changes to take effect.
Consider using two-factor authentication
Two-factor authentication is extremely secure. To log in to your WordPress blog you will need to enter both your username and password, and a code from your smartphone.
Before setting up two-factor authentication, you will need to balance your desire for security with the hassle of adding an extra step to the login process.
Also, not everyone has a smartphone, and those who do have smartphones may not have them available when they are trying to log in to the blog. For example, some workplaces and school campuses block the use of smartphones on their property.
To enable two-factor authentication for your blog, you can use a plugin like Wordfence, which provides many additional security features.
Editing users on the web admin panel
Begin by logging into your blog at the admin page:
http://example.com/wp-admin/
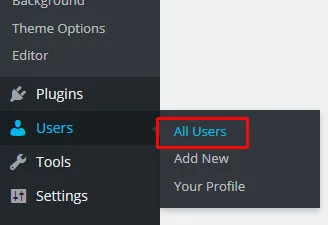
Go to Users -> All Users
Click Edit below the username you want to edit.
Changing the WordPress Nickname/Display Name
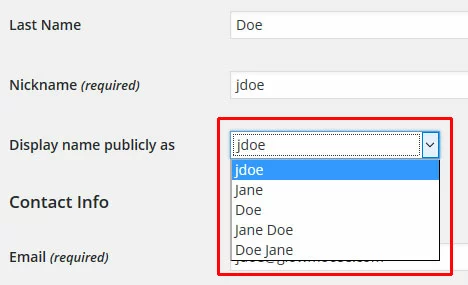
To change the WordPress display name, first set a Nickname. Enter the name you want displayed in the Nickname field.
Choose this new nickname from the Display name publicly as drop-down menu.
Then click the blue Update button at the bottom of the page. This button will say either Update Profile or Update User, depending on whether you are editing your own or another user's account.
Changing the WordPress Username/Login Name
If you are proficient with MySQL, you can change the WordPress username (login name) directly in the database using the IONOS phpMyAdmin interface. Be sure to create a backup of your database before you begin.
An easier and safer way to change the username is to create a new user, give it Administrative privileges, then delete the old user.
First, create a backup of your WordPress database, as mistakes here can be costly. Follow the steps in this article to back up your WordPress database.
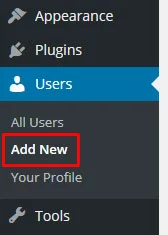
Next, return to your WordPress admin panel. Go to Users -> Add New to create a new user.
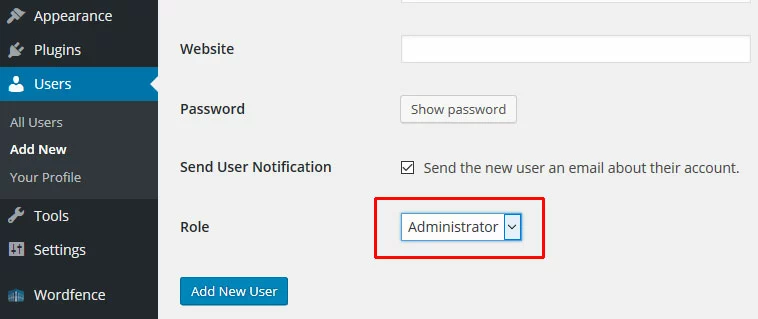
Be sure to set the user’s Role to Administrator.
Log out of WordPress and log in as this new user. Before you proceed, make sure that you are able to log in, and that you have access to all areas of your WordPress admin panel.
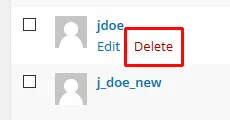
Next, delete the old user. Go to Users -> All Users.
Click Delete below the old username.
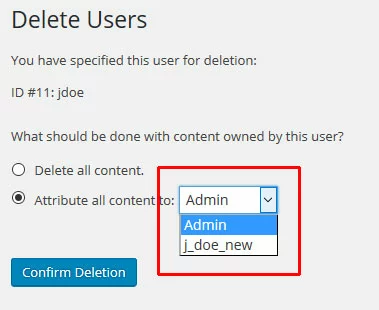
WordPress will ask what you want to do with the content (including posts, pages, and comments) owned by this user. Click Attribute all content to: and select the new username from the drop-down menu.
Resetting a lost WordPress password
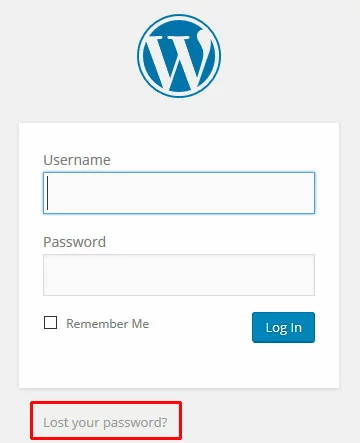
If either you or one of your users has lost their WordPress password, WordPress can reset it and email the new one. Go to the login page at http://example.com/wp-login.php and click Lost your password?
The page will prompt you to enter either your username or your email address. The new password will be emailed to the address that is set for the username.
Resetting a lost WordPress password if it cannot be emailed
If you do not have access to the email address for your WordPress account, or there is some other reason that the standard password recovery won’t work, you can change your password directly in the MySQL database from the command line.
Warning: This procedure is risky. Create a backup of your WordPress database first.
The most common reason for this problem is that the email address for the account is no longer valid.
For any user other than the admin user, you can log in to WordPress and update that user’s password. But if you lose your admin password and cannot use the “lost password” reset, you will have to edit the database directly.
- 99.9% uptime
- PHP 8.3 with JIT compiler
- SSL, DDoS protection, and backups
Backing up the database
Editing your WordPress database directly can damage the database if done incorrectly. Before you begin, back up your database.
Connect vi SSH to your server and create a backup copy of your database from the command line. In the following example, the database is called "mydatabase":
mysqldump –u root –p mydatabase > mydatabase.sqlYou will be prompted to enter the MySQL user’s root password. Your backup file (dumpfile.sql) will be created.
Changing the WordPress admin password in the database
Log in to MySQL and use your WordPress database with the command:
mysql –u root –p mydatabaseYou will be prompted to enter the MySQL user’s root password.
To update the admin user's password, you will need the login name - not the display name. If you need to find this information, you can display all login names with the command:
select user_login from wp_users;Next, update the password of the admin user (called “adminuser” in this example) with the command:
This will update the password with an MD5 hash for security reasons.
update wp_users set user_pass = MD5('new_password') where user_login = "adminuser";Changing your WordPress password
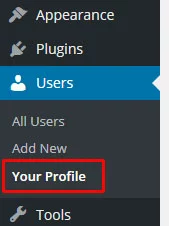
To change the WordPress password for your login, go to Users -> Your Profile.
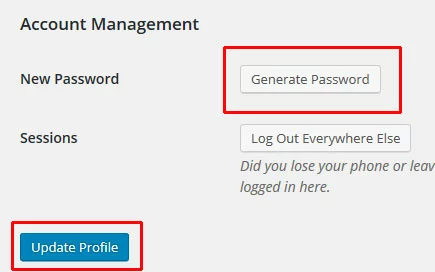
Click Generate Password.
This will generate a new password for the account. Make a note of the new password, then change the password by clicking Update Profile.
Changing the password for a different WordPress user
To change a different user’s password, go to Users -> All Users.
Click the Edit link below the user’s name.
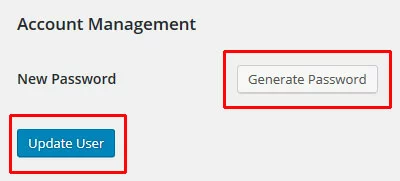
Click Generate Password.
This will generate a new password for their account. Change their password by clicking Update User.
Caution: Be sure their email address is correct before clicking Update User. This is the email address where WordPress will send the new password.
Be sure their email address is correct before clicking Update User. This is the email address where WordPress will send the new password.


