How to set up a Starbound dedicated server
The popular indie game Starbound has been on the market since 2016, but is as popular today as it has ever been. This is not least thanks to continuous innovations and developments in the game. In multiplayer mode as in single player mode, players can tackle a series of quests in outer space. With your own Starbound server, you can start an adventure for yourself and your friends with ease (and less lag).
Starbound server from IONOS: The options compared
Of course, you can host your Starbound server on your own computer. Besides the high operating costs that come with private hosting, the performance of your own computer is often a problem for many players. This is because you cannot easily adjust the server capacities to an increased number of players in this case. Therefore, it is worthwhile considering professional providers like IONOS.
The offers from IONOS includes several variants of servers:
- Dedicated Server: The hardware is 100% dedicated to your application purpose, you don’t have to share the resources.
- vServer (Virtual Private Server): You can access virtualized server environments.
- Cloud Server: you can access virtualized server environments and constantly adapt them to your needs.
Wondering what the term “dedicated server” means exactly? In our article “Shared Hosting vs. Dedicated Hosting” we’ve explained the differences between dedicated and shared server resources.
Differences between the IONOS server models at a glance
The differences between the individual server models available at IONOS lie primarily in the pricing structure and the way in which resources are made available to you.
If you want to rent a Starbound dedicated server from IONOS, you will be assigned hardware that is 100 percent dedicated to your purpose. This strong performance has a price impact; however, thanks to per-minute billing, you don’t pay more than you used in server performance.
Both the cloud and vServer are virtualized server solutions. However, unlike the vServer, the cloud server is billed by the minute and can be scaled at any time. With the vServer, billing is based on a fixed monthly amount.
Starbound server: Example cases and the right IONOS plans
For each of the presented server models, there are various plans that are differently suited for different use cases of your Starbound server. The following table provides a brief overview of different Starbound scenarios and the appropriate plans for each server model:
| Recommended vServer | Recommended Dedicated Server | |||
| Starbound server for 2-4 players | IONOS VPS Server L | IONOS Dedicated Server L-16 HDDorIONOS Dedicated Server AR6-32 HDD | ||
| Starbound server for 4-8 players | IONOS VPS Server XL | IONOS Dedicated Server L-16 HDDorIONOS Dedicated Server AR6-32 HDD | ||
| Starbound server for more than 8 ends | IONOS VPS Server XL RAM | IONOS Dedicated Server IX8-64 HDDorIONOS Dedicated Server AR6-32 HDD |
When there are significantly more than eight players, the minimum requirements presented here may no longer be enough, so individual adjustments to your Starbound server configuration may be necessary.
Create a Starbound server: Step by step to your own server
Once you have decided on a server configuration, you still need to select a suitable operating system. For a Starbound dedicated server, the Microsoft server system Windows Server and the Linux system Ubuntu are equally suitable, so the choice is yours.
In the following tutorial, we will show you how to create your own Starbound server and play the indie game together with your friends. The server system used is Windows Server 2016.
Try out your VPS for 30 days. If you're not satisfied, you get your money back.
Step 1: Connect to the server
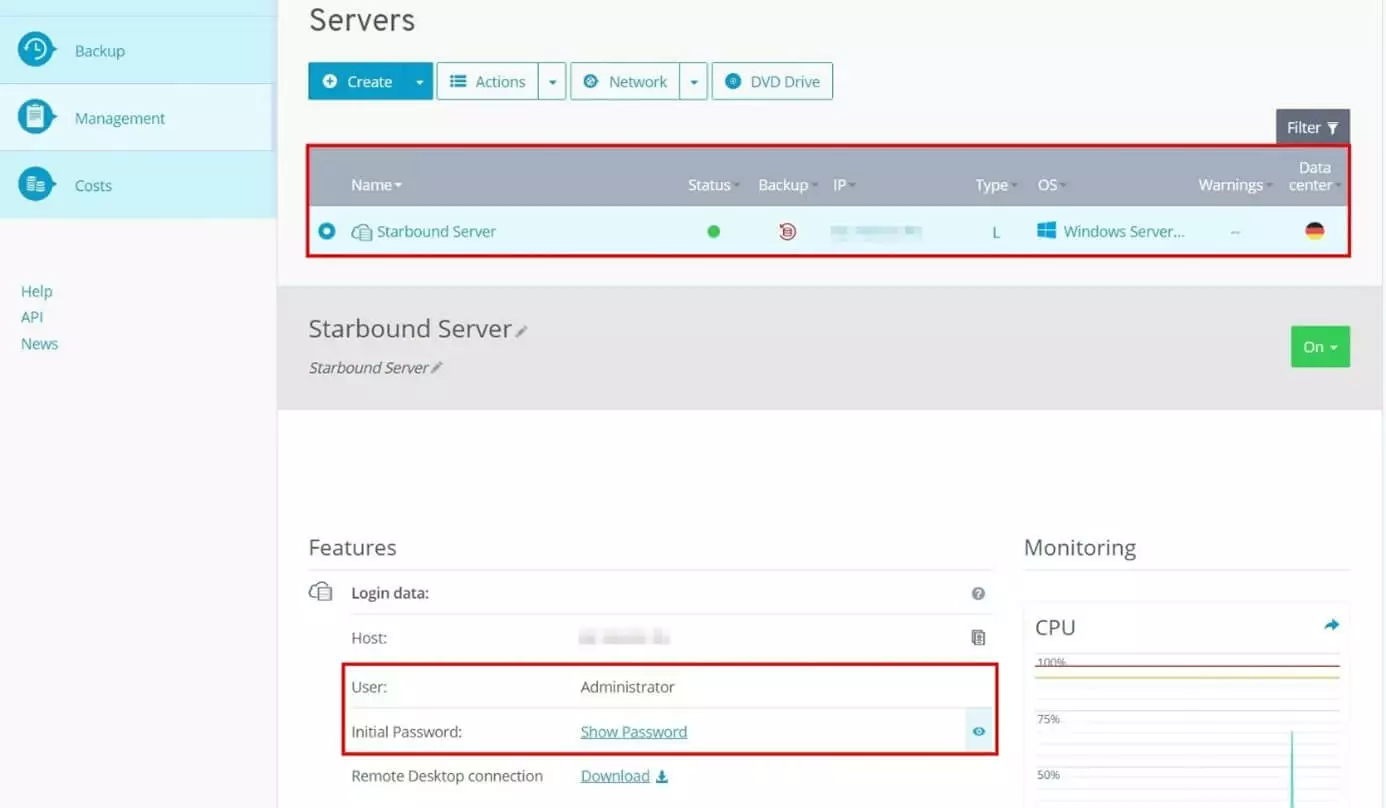
In the first step you establish a remote connection with the server. If you have chosen one of the IONOS server solutions, you can easily set up this connection via the Cloud Panel. To do this, first log in to the IONOS login page with your individual account data. Clicking on the category “Server & Cloud” will take you to an overview page with the plans you have. Select the server solution you have booked for your Starbound server.
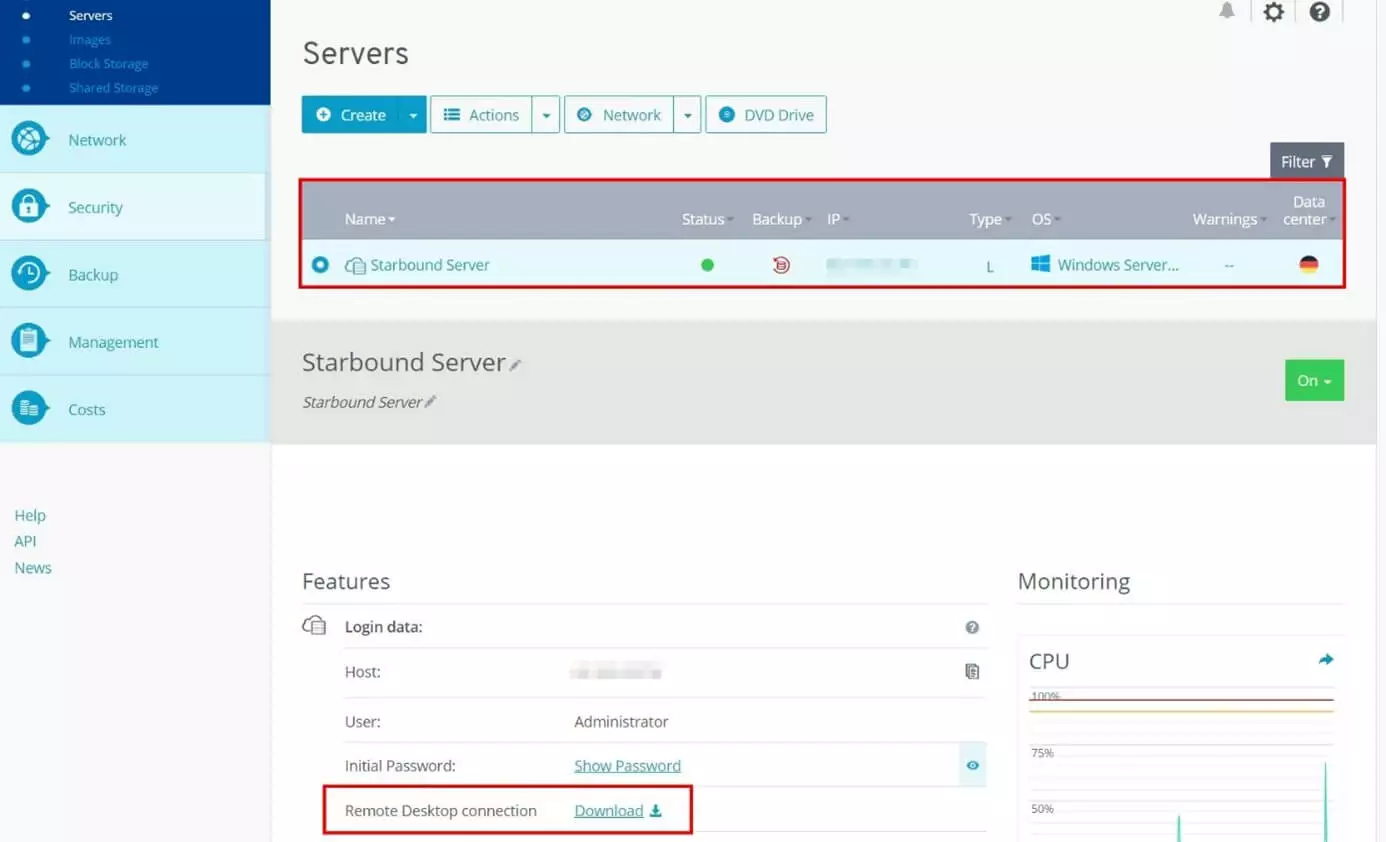
The start page for your server package will then open. Under the item “Access data” you will find the entry “Remote Desktop connection” with an associated download link.
Download the remote desktop connection. In the following dialog, select “Connect” to begin setting up your Starbound server.
Afterwards, you will be prompted to enter your login information in a dialog box. If you have not yet stored any individual data, you will find the default credentials in the Cloud Panel under the keywords “User” and “Initial Password”.
When you connect to your server for the first time, you will receive a security warning on Windows because the certificate of your Starbound server has not been trusted yet. By clicking on “OK” you can continue with the setup. If you also click the checkbox next to “Do not ask for connections with this computer again”, you will prevent dialog boxes like this in the future.
After you have logged in with your credentials, the server will open.
Step 2: Install Starbound server using Steam
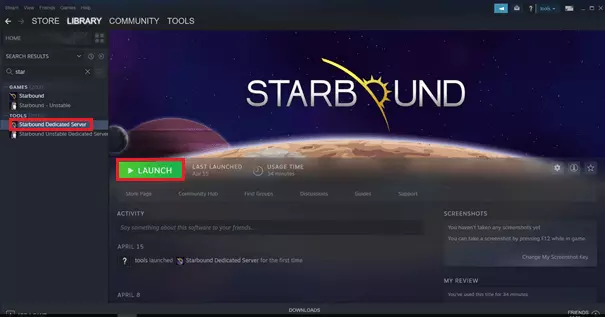
The software you need to set up your Starbound server can also be found on Steam. First, download the Steam client to the server as well and then log in with your Steam credentials. Once you are logged into Steam, you can use the “Search” field in your game library to find the appropriate dedicated server software. To do this, simply type “Starbound” into the search box. Under the “Tools” item you will find the appropriate “Starbound Dedicated Server” application. Install it by clicking on the list entry.
Step 3: Enable port
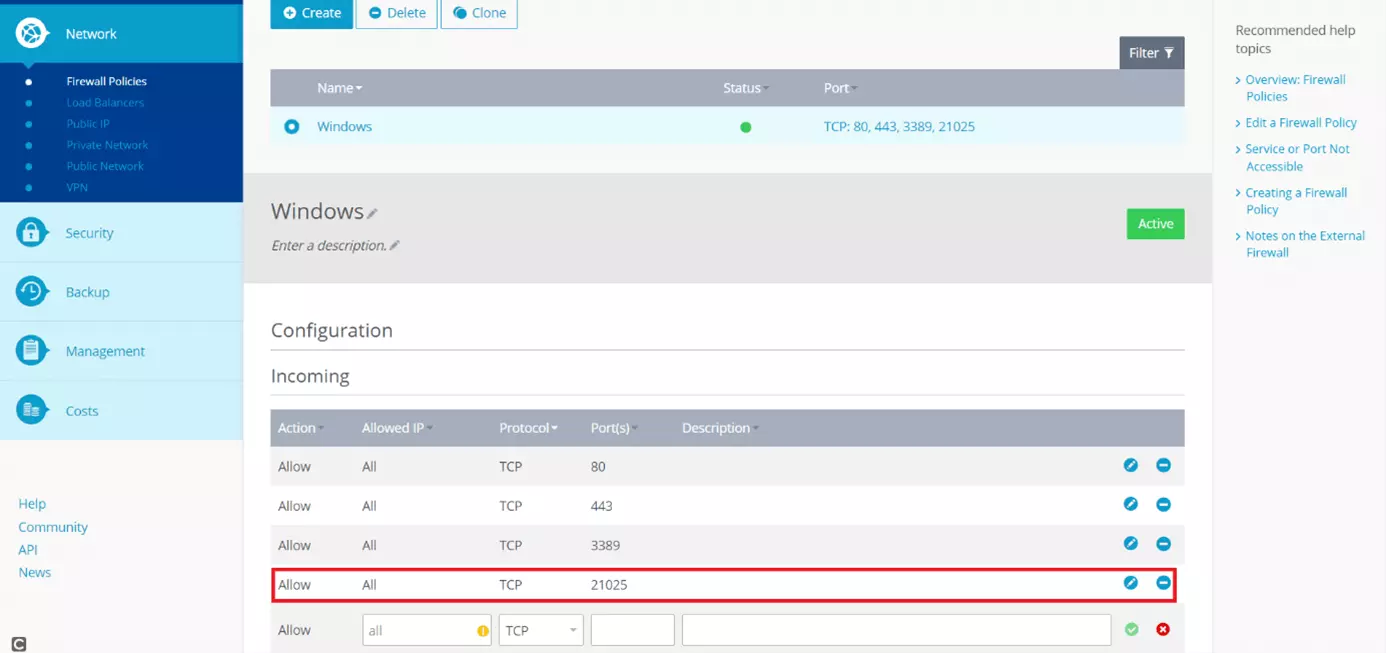
In order for the Starbound server to run, you still need to enable port 21025 in the IONOS Cloud Panel. To do this, click on “Network” and then on “Firewall Policies”. Create a new configuration under the “Incoming” tab by first selecting TCP under “Protocol” and then entering the port number 21025. Confirm the new rule by clicking on the blue checkmark icon on the right.
Step 4: Configure Starbound’s Options
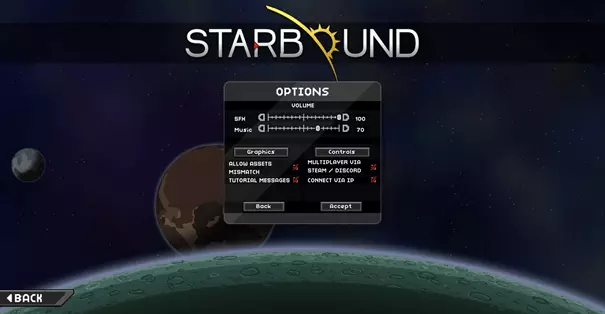
Now open Starbound. After the game has loaded, select the “Options” tab in the menu. A window opens in which you can make individual settings. Click the checkboxes to allow both the connection via IP (“Connect via IP”) and the use of different game assets (“Allow assets mismatch”). Click on “Accept” to confirm the changes you have made.
Step 5: Start your Starbound server
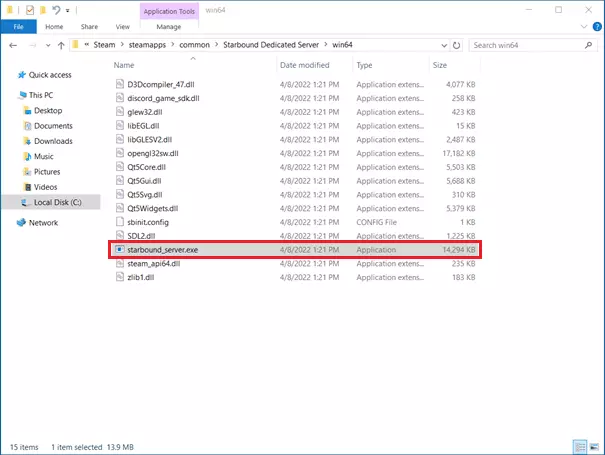
In the next step, start the Starbound server. The executable file for this is usually located in the data path C:\Program Files (x86)\Steam\steamapps\common\Starbound Dedicated Server\win64\starbound_server.exe. It is worth creating a desktop shortcut by right-clicking on the program and then clicking on the “Create shortcut” option. This way you can select your server directly from your desktop.
Step 6: Connect to the server
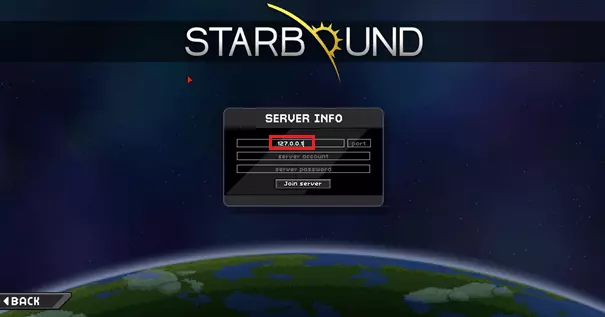
In a final step, you and your friends connect to your server. This is easily done by clicking on “Join game” in the Starbound menu. You can first create or select a character and then enter the IP address of your server. For testing purposes, you can also enter the IP address of localhost, 127.0.0.1, as the server host. If you have not made any other settings in the advanced configuration settings of your Starbound Dedicated Server, you can leave the fields for account name and password blank. Click on “Join server”, and you’ll do just that: You’ll join your Starbound server and the game will load.
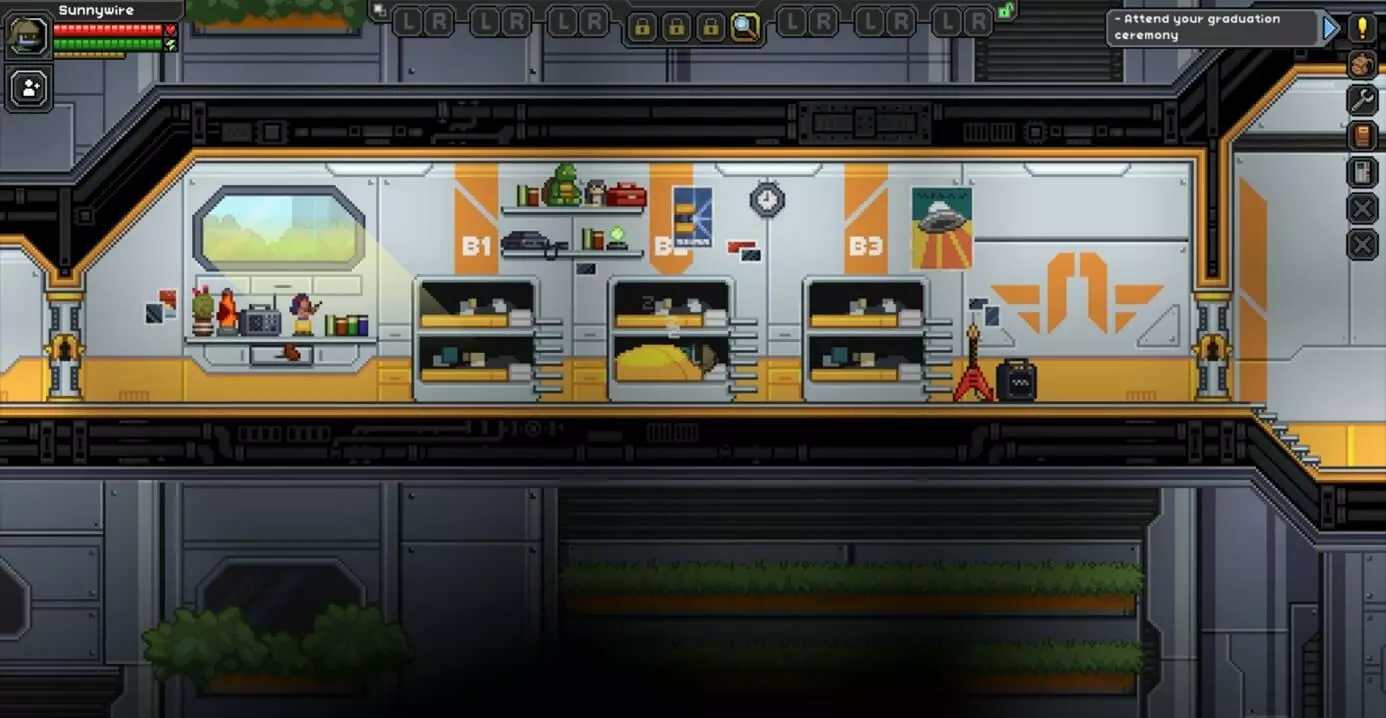
Step 7: The adventure begins!
Make a statement with your own .gg domain and let the games begin. Register your own .gg domain now with IONOS.


