

How to stream on Twitch with PC, PS4 or XboX One

If you love video games and want to share your gaming experience with other gamers, then you probably already know about Twitch. With 15 million active users every day, and live video from more than two million different players a month, the streaming platform is the undisputed number one in the gaming world. However, Twitch’s range of functions goes far beyond streaming video games: the service, which was bought by Amazon for almost a billion dollars in 2014, has long become a social setting for professional streamers and simple computer game enthusiasts. The prerequisites needed to stream on Twitch and how to set up your own channel are explained in this Twitch stream tutorial.
What kind of content is Twitch suitable for?
First and foremost, Twitch is considered the first choice for PC video game fans, PlayStation, Xbox, and Nintendo console fans. As a result, most of the monthly broadcast transmissions are streams for these formats. There are no genre restrictions on Twitch, which means you have freedom of choice as both a viewer and a streamer. Of course, streaming a game that is already popular is a good idea if you want to get as many users as possible interested in, and viewing your content.
A large proportion of Twitch’s regular traffic are streaming channels that are otherwise characterized by direct references to video games. For example, many game developers operate their own channels, as well as magazine publishers that deal with gaming topics, gaming hardware, etc. Twitch streams e-sport events including interviews, panel discussions, etc. Gaming conventions are also becoming increasingly popular to stream.
 To display this video, third-party cookies are required. You can access and change your cookie settings here.
Although Twitch’s focus is on gaming, the platform is becoming more popular among users with other interests too. Content categories like IRL (in-real-life), creative, fitness, or music provide space for topics beyond the computer world – whether politics, cooking, health, crafts, fashion, or music. A more detailed overview of the development and importance of streaming on Twitch is available in our basic article on “What is Twitch?”.
Twitch streaming: technical requirements
Before you set up your own Twitch channel and select streaming settings for your videos, you first need to make a good technical framework. When it comes to hardware, there are three basic areas to consider:
- System performance: Broadcasting a twitch stream consumes additional system resources, so you need to be sure you have enough computing power. For example, Twitch recommends at least one Intel Core i5-4670 or a comparable AMD model and eight gigabytes of RAM for streaming PC games. The operating system requires at least Windows 7. You do not have to go into a lot of detail with gaming consoles - as long as you know the system is correct - since their hardware setup is often predefined. Checking that the version you have is supported by the streaming platform is usually sufficient.
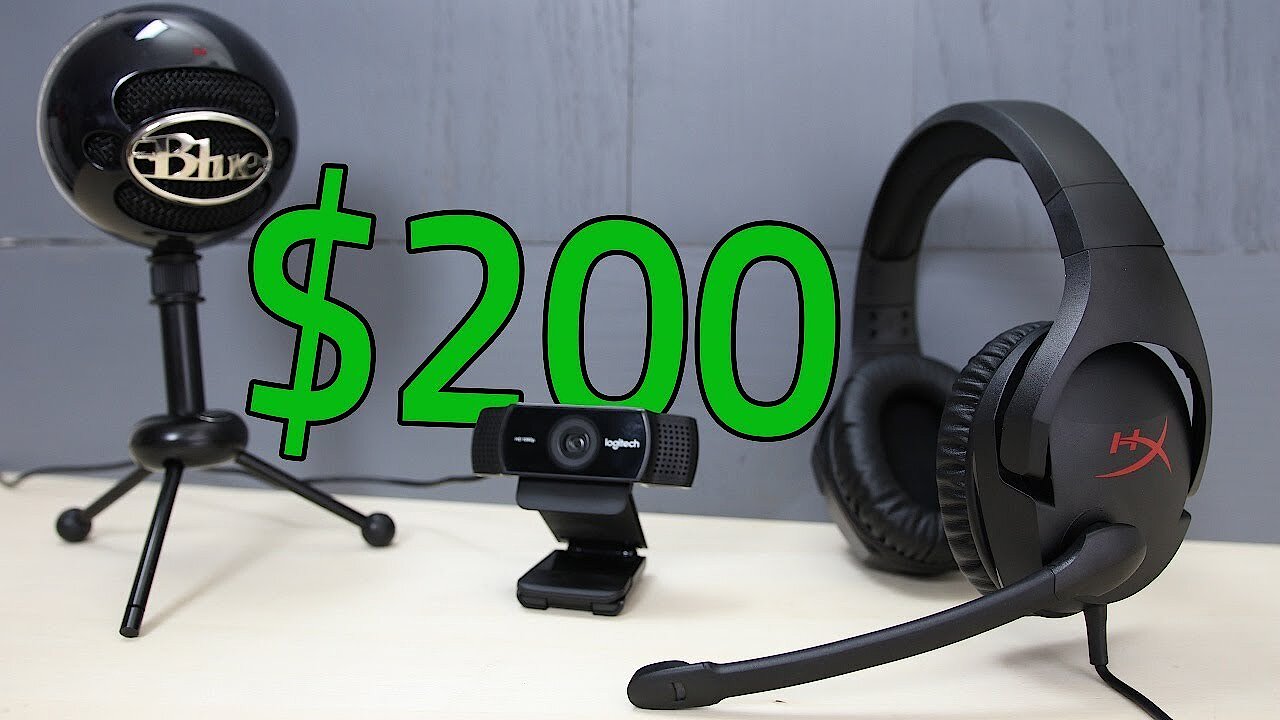
- Webcam: In principle, you can stream or upload content that does not feature a person visually. It is not necessary to make yourself visible to the audience when recording live. However, there are hardly any successful channels on Twitch that do not feature the physical person playing. When they are visible, the streamer’s emotions are much clearer when the audience can immediately see you and can react to you. Corresponding webcams that deliver HD-quality images are already available in the low double-digit dollar range.
- Microphone: Although the most important component of a live video – particularly when it comes to video games – is picture quality, you should not underestimate the importance of decent sound quality. Music as a background for streamed Twitch content is not uncommon, but using it all the time can quickly lead to boredom among the audience. With your own audio commentary, you can give your channel a little extra something and you can use a simple headset microphone to record it. However, if you want to go for something of a higher standard, we recommend using a stand-alone USB microphone.
 To display this video, third-party cookies are required. You can access and change your cookie settings here.
You also need to have enough bandwidth on an existing Internet connection. Otherwise, your Twitch stream will run very haltingly, or not transmit to potential viewers at all.
Streaming on Twitch: how it works
Once you have the hardware you need, you can start setting up your Twitch account and linking to the streaming software (also called broadcasting software). In the latter scenario, you can choose between different options like Bebo, Gameshow, or XSplit Gamecaster by OBS studio used in this switch stream tutorial. For a listing of the most common tools, visit the official Twitch page.
Step 1: install streaming software
Start by choosing a streaming software and then visit their website to download the installation files. The OBS studio used in this tutorial is available to download for free from obsproject.com. This open source program, whose source code can be extended and customized by anyone, runs with Windows, macOS, and Linux. Just select the appropriate version you need and start the installation process by double-clicking the file or shell command after downloading.


Step 2: creating a Twitch account
The next step is to create a user account with Twitch. To do this, go to the Twitch homepage and select the register button located at the top right of the navigation bar. The registration, which only requires a username, password, and valid e-mail address, is free of charge. There is also an option to choose a paid Prime subscription, which links the platform to Amazon’s Prime offer, among other things. After entering your information, you will receive a confirmation e-mail, including a verification link. Click on this link to complete the registration.


Step 3: setting up your Twitch channel
Once you have completed the registration progress, you can log in with your newly-created Twitch account and start designing your personal video channel. To do this, open the settings in the user menu by clicking on the triangle symbol in the navigation bar. This will take you to your profile menu, where you can set the display name (which can be the same as your username) and the profile picture for your Twitch channel, and submit up to 300 characters of personal biography or channel information.
 lenetstanShutterstock
To configure your Twitch channel, go to the ‘channel’ and ‘videos’ tab. There you can change basic settings in these four areas:
- Channel design: Under the menu option ‘channel design’, you have the option to create a banner that will be visible to Twitch users when your channel is offline. Click on ‘browse’ and upload the desired image file by specifying the storage location and confirming the selection. For the entire player to be filled by the banner, you will need an aspect ratio of 16: 9.
- Automatic hosting: Twitch offers the ability to host other streamer’s broadcasts on your channel. By doing this, you can provide your followers with content when you are offline. The hosting feature also offers the option to view someone else’s stream and provide your own audio commentary for your viewers. Enable automatic hosting if you want to automatically send out foreign channels when they are online. The desired channels are defined by the ‘host list’ (random or priority order).
- Parental controls: If you are streaming content that is inappropriate for younger viewers, you will need to tag your channel accordingly by selecting ‘adult content’.
- Chat: Twitch automatically helps you moderate your channel chat. The AutoMod examines viewers’ comments for inappropriate expressions, swear words, or racist remarks, and filters out anything illicit. You can set the filter level from 0 (only blocks phrases and terms defined by you) to rule 4 (highly moderated by the AutoMod). In addition, you can select that only confirmed Twitch users may leave comments. Clicking ‘block links’ will automatically delete posted URLs unless they come from you, moderators, or admins.


Step 4: configuring you Twitch channel
After you have created the basis for your channel in the previous step, you can now focus on your channel design. You will find the dashboard in the user menu. As well as being able to post messages to your chat feed, the overview menu also provides you with access to viewer statistics and a list of all your viewers. However, an important tool for configuring your channel is the ‘stream information’ section of the menu, which allows you to change settings in the following five areas:
| Title | Your title tells the twitch community in 140 characters what your channel is all about. Use keywords that will come up easily in searches, making your channel easy to find. |
|---|---|
| Live update | Your followers will receive a notification as soon as you begin broadcasting (if they have selected to receive these updates). |
| Game/category | Assign your channel to a category on Twitch, so that you are visible to users browsing that category. Alternatively, you can list your channel in the category for the game you are playing. |
| Communities | You have the option of specifying up to three communities whose members’ broadcasts you are willing to stream. |
| Language | Specify the language of your Twitch stream. You can also restrict comment and chat language settings by selecting ‘restrict language’. |
Step 5: linking broadcasting software to Twitch
To set up the final settings necessary for a live broadcast, start OBS Studio (or whichever streaming software you have decided to use). In the settings menu, look for the term ‘stream’ after which you can begin configuring it to your Twitch channel.


You can leave the default settings for your stream and platform, as well as the automatic server selection – OBS always selects the Twitch server best suited to your streaming activities. The setting ‘Stream Key’ is particularly important, as it establishes the connection between the streaming software and your channel. To be able to enter this key, you will need to return to the Twitch dashboard and open your settings.


Select ‘Stream Key’ and then ‘Show Key’. The following dialog box will pop up and inform you not to share your key with others (not even Twitch employees, moderators, or admins). If you close the message box by clicking on ‘I understand’, Twitch provides you with the key that you can then copy-and-paste into the corresponding line in OBS Studio. With ‘Apply’ you can save the entry, and your link is complete.
It is possible to automatically record your Twitch streams. To do this, just check the ‘Save previous transfers’ checkbox in the stream key menu. Your transfers will be archived for up to 14 days as VOD (video on demand). Twitch transfers from partners and prime users can be stored for up to 60 days.
Step 6: start your Twitch channel
Starting a stream on Twitch is easy. In the OBS studio interface, right click on the ‘sources’ box and add the desired recording devices(S) (video game, window, browser, etc.).


Click on the ‘Studio Mode’ button to preview. You can use this to align all the elements perfectly, as long as you use several transmission components, like recording game scenes in combination with a webcam recording of yourself. If you are happy with this setup, you can begin streaming by clicking the ‘Start Streaming’ button. If you want to stop streaming, click ‘Stop Streaming’.


How to stream on Twitch with a PS4
If you want to showcase Twitch PS4 games in your stream, you do not need separate broadcasting software, just the Twitch app. These can be found in the PlayStation Store. Simply use the search function and enter “Twitch” in the search bar, and then download it. Once you have installed the application, there are just a few steps left to go through to get your console hooked up to the streaming platform:
- Begin playing the game you want to stream.
- Press the SHARE button on your PS4 controller, and select ‘Transfer Game’ from the pop-up menu.
- In the next window, select Twitch as your chosen streaming platform
- You will be asked to log into Twitch or create a new account if you don’t yet have one.
- After logging in, you will get access to the broadcasting menu, where you can then configure your Twitch stream. Among other things, it is possible to activate the live recording with the PlayStation camera and the sound transmission through the microphone. Additionally, you can decide whether the viewers’ comments are displayed in the screen (in this case, the game will play in the minimized window).
- Finally, set the title and quality for the stream on Twitch and start the broadcast by selecting ‘Start Livestream’.
To stop the stream, just press the Share button again and select ‘Stop Transmission’.
How to stream Xbox One games on Twitch
Xbox One has its own Twitch app, which means that you do not need specialized software to stream it. You can download this app for free from the Xbox store. You can find the app by searching for Twitch in the search bar on the app. You can then download the app and follow these steps to start streaming on Twitch with your Xbox One:
- Log into a PC or mobile device with your Twitch account. If you do not already have an account, then make one first.
- Once you are logged into the streaming platform with another device, open the Twitch app on your Xbox One and press the ‘Login’ button.
- You will be prompted to go to the http://twitch.tv/activate link on the external device and enter the six-digit code that the Twitch app will present to you on the game console.
- The Twitch account is now linked to your Xbox Live account. Be sure to set your Xbox Live status to ‘online’ to stream (otherwise your twitch stream will be hidden from other users). Also, check your Xbox’s general settings to allow other users to see your online status.
- To configure your stream, press ‘Transfer’ and then ‘Next’. Twitch automatically runs a performance test on first launch to determine the optimal bitrate for your broadcasting. In the next few steps, you can activate the Kinect camera and the microphone.
- Finally, give your Twitch stream an expressive title before selecting the desired game and putting the stream online using the ‘Start Transfer’ button.
If you use the voice control feature of your Xbox, you can easily start your stream using the ‘Xbox Transfer’ command. If you want to switch off the Twitch stream later, the words “Finish Xbox Transmission” will do the job.
Reviewer

Christian Heldmaier
Christian Heldmaier is an experienced online marketing and SEO specialist from Karlsruhe. He has been working as an SEO Manager at IONOS since July 2020.