How to insert Excel into Word
Creating a table in Excel gives you many more options than a simple table in Word. However, you can insert an Excel spreadsheet into a Word file or link the two documents. We’ll explain the difference between these two methods and show how you can easily import and use your Excel projects in Word.
The instructions apply to Microsoft 365 and Excel versions 2021, 2019 and 2016.
Quick guide on how to insert Excel in Word
The following quick guide shows you how to insert an Excel table into a Word file:
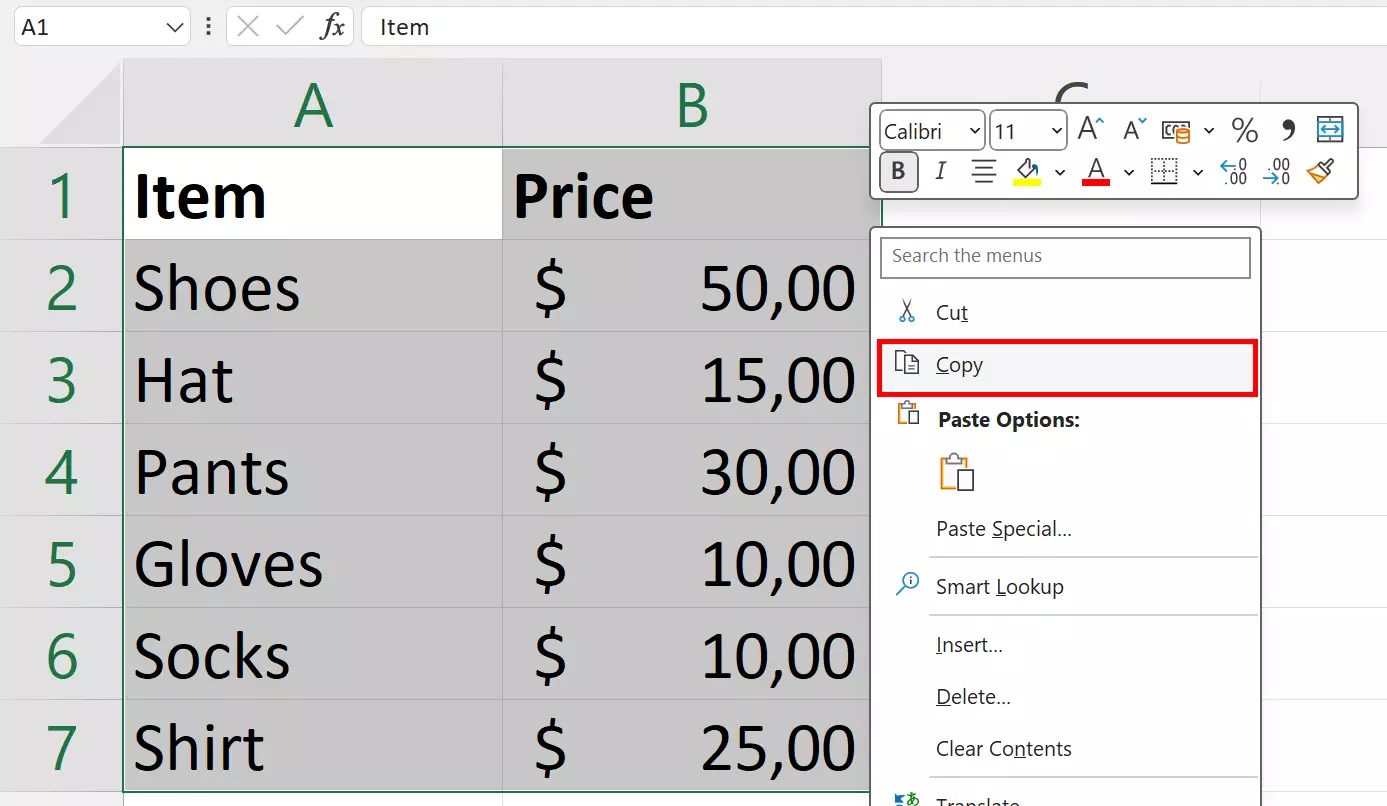
- Copy your Excel table to the clipboard by right-clicking and selecting Copy.
- Place the cursor at the desired position in your Word document.
- Paste the table by right-clicking and selecting Paste.
What is the difference between linking or inserting Excel in Word?
You can either link (embed) an Excel spreadsheet in Word or simply copy it into Word.
Inserting your Excel table into Word using copy and paste is quick and easy. The disadvantage is that if you want to customize the Excel table in your Word document later on, you can only use the commands available in Word.
If you want to continue using Excel functions to edit your spreadsheet, you should link Excel to Word. This way you ensure that changes in your original Excel file are automatically inserted and updated in Word.
Some Excel files contain sensitive information that should not be changed or overwritten. If you work with other people on a spreadsheet, errors can sometimes occur. For cases like this, it is a good idea to activate Excel write protection or track changes in Excel.
How to insert (copy) an Excel file into Word step by step
Inserting your Excel spreadsheet into Word using copy and paste is the easiest way to connect the two data sources. To do this, follow these simple steps:
- Open your Excel worksheet and use the cursor to select the entire spreadsheet or the area that you want to insert into your Word document.
- Copy the selected area either by right-clicking and choosing Copy or by pressing [Ctrl] + [C] in Windows or [cmd] + [C] in MacOS.
- Open your Word document and position the cursor in the place where you want to insert the Excel table on the page. Paste the copied area either by right-clicking and choosing Paste or by pressing [Ctrl] + [V] in Windows or [cmd] + [V] in macOS.
Keyboard shortcuts speed up your work. If you want to improve your workflow, it’s worth learning the most important Word shortcuts and Excel shortcuts.
- Store, share, and edit data easily
- Backed up and highly secure
- Sync with all devices
How to link (embed) an Excel spreadsheet in Word
Embedding an Excel spreadsheet in Word requires a few additional steps. However, by linking directly to your Excel data, any later changes will be automatically updated in the embedded version in the Word document.
- First, open your Excel file and select the entire worksheet or the area that you want to insert into your Word document.
- Then copy the selected area by right-clicking and choosing Copy or by using the appropriate keyboard shortcut.

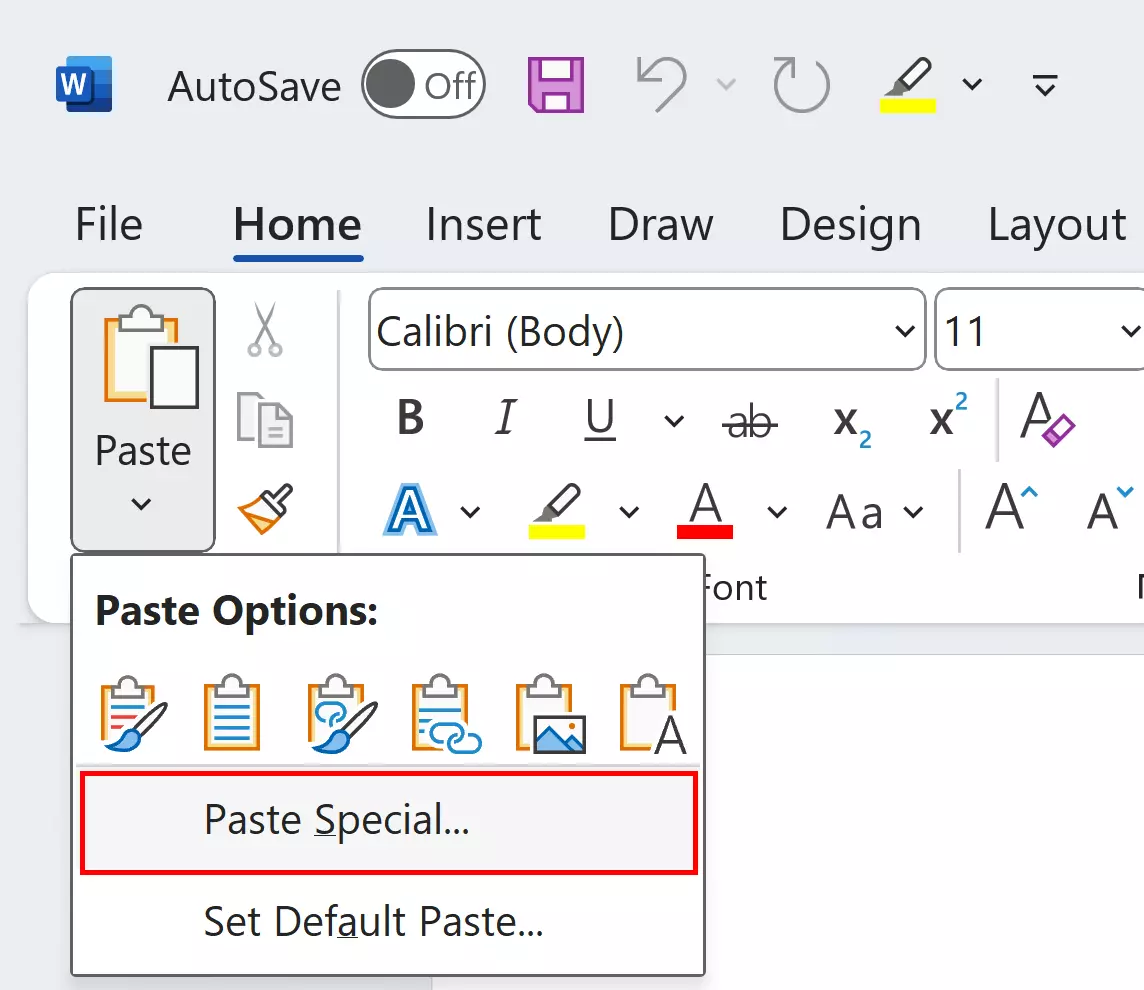
- In the Word document, move the cursor to where you want to insert the Excel spreadsheet. In the Home tab, choose Paste and select Paste Special….

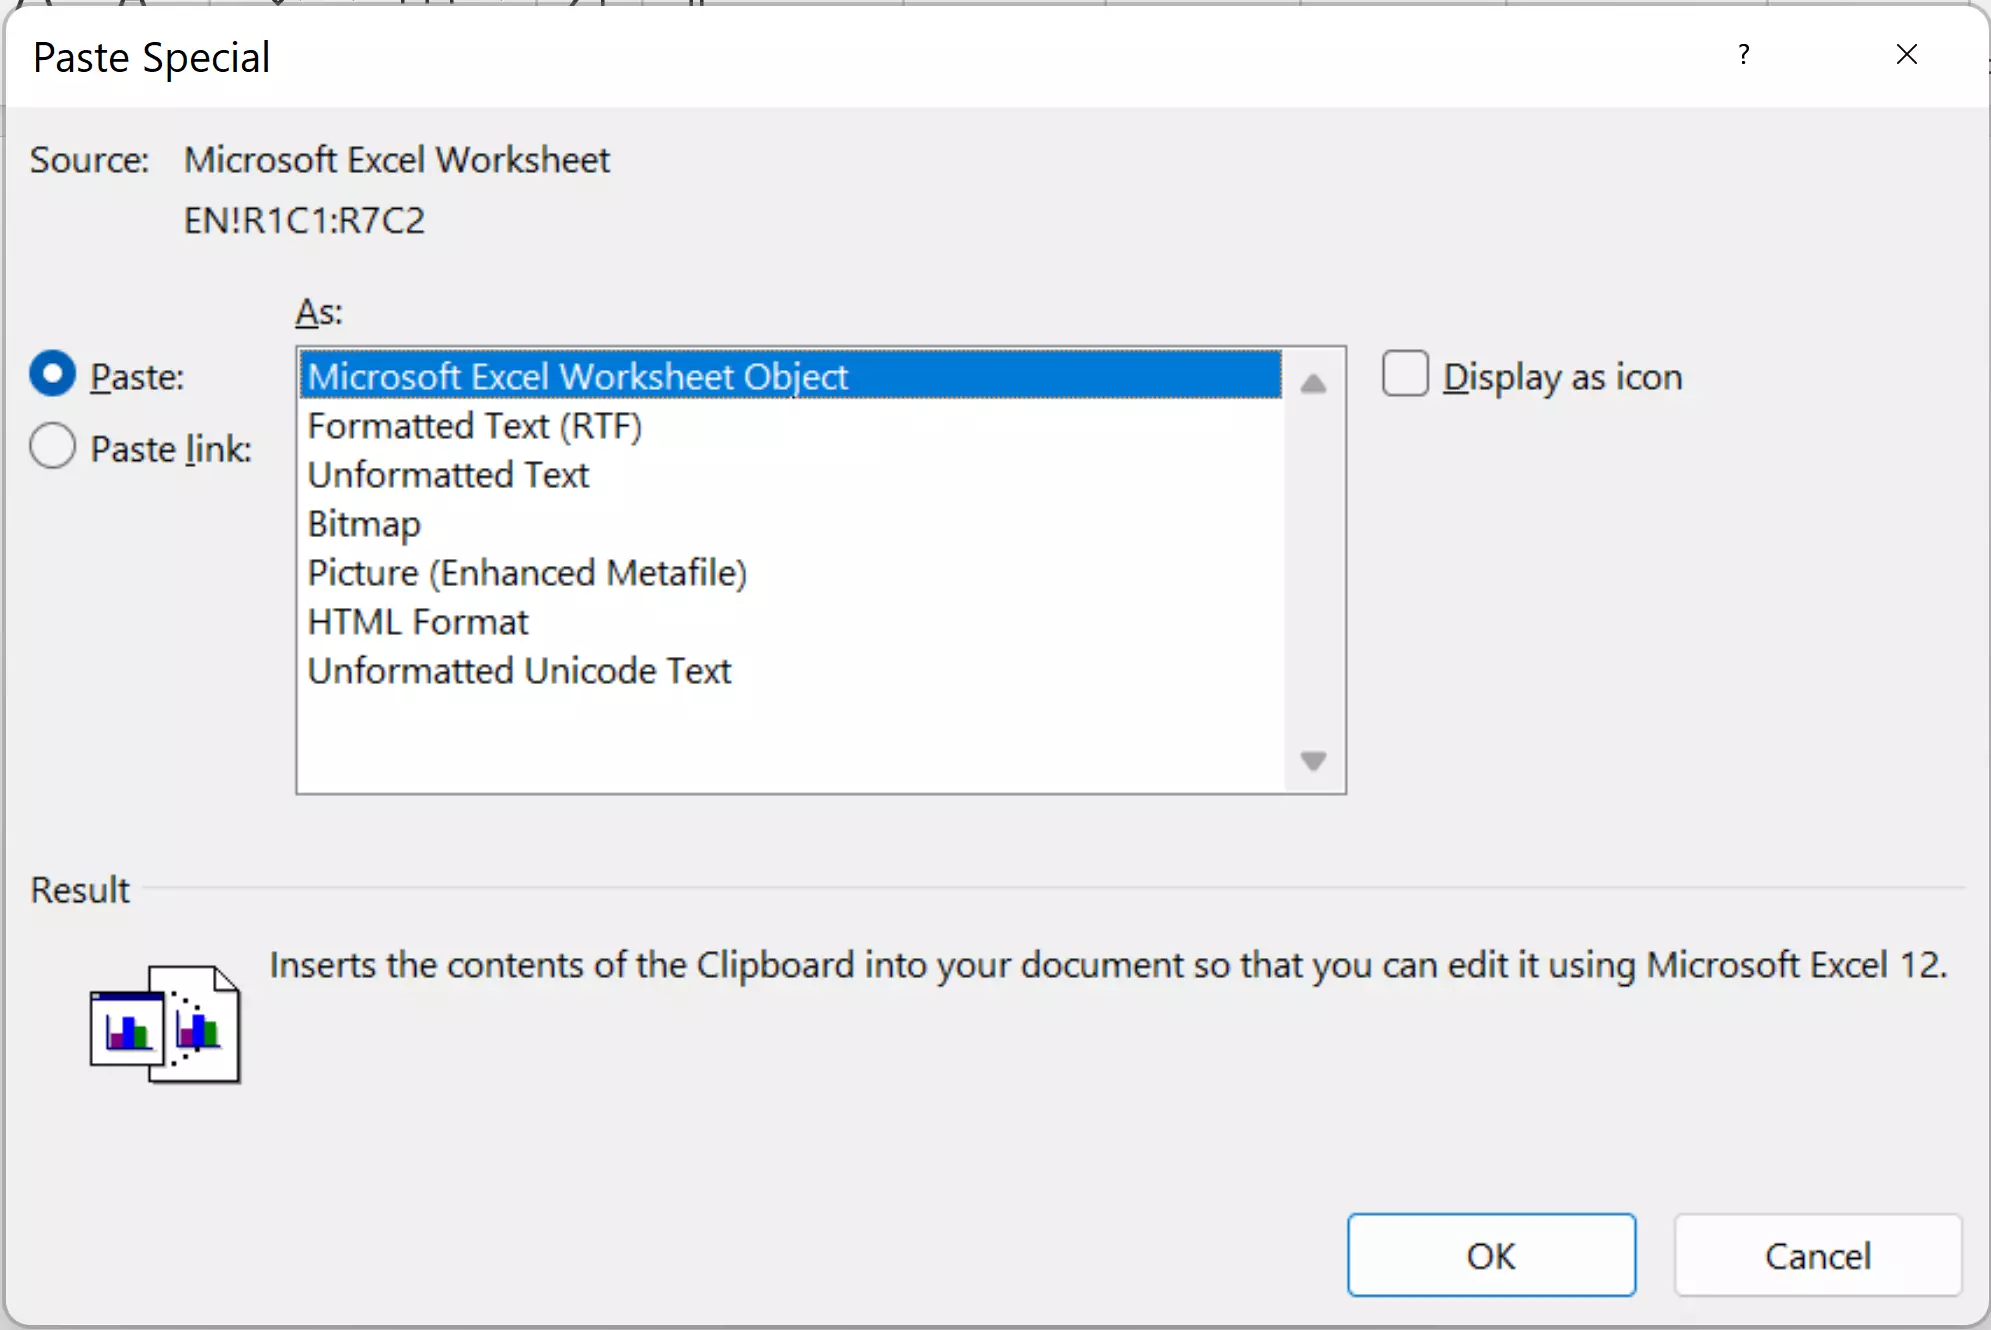
- In the dialog box that appears, select the Paste link option. In the list on the right, select Microsoft Excel Worksheet Object at the top. Confirm your selection by choosing OK. Your Excel worksheet will now be inserted and linked.

- Store, share, and edit data easily
- Backed up and highly secure
- Sync with all devices
Are changes made to a linked table in Word transferred to Excel?
By linking your Excel spreadsheet in Word, you ensure that changes in your Excel table are automatically transferred to your Word document and displayed there. However, the changes you make to the table in Word are not automatically transferred to the Excel spreadsheet. So always remember to copy these changes to the linked original document. The same applies if you link an Excel table in PowerPoint or insert a Word document into PowerPoint.
In some Excel spreadsheets, ascending numbering can significantly increase the clarity of the document. In a separate article, you can learn how to automatically number rows in Excel.

