How to set up a WordPress staging site
More than 60 percent of all websites worldwide use the WordPress content management system (CMS). It is free, easy to install and use, and continues to be developed by a large and active community. In principle, editors can maintain content with only MS Word skills. Almost any conceivable website task can be handled by the around 60,000 plugins that are available.
But even experienced programmers have had a website suddenly stop working after installing WordPress or updating a plugin: a blank screen, a login area missing, or a broken website. This doesn’t have to happen. You can create a test environment that lets you test any possible changes to your heart’s content, without fear of errors or time pressure, and without the risk of breaking a meticulously crafted website. We show you how to create such a test environment in our WordPress staging tutorial.
Manually setting up a WordPress test environment
When a WordPress website runs smoothly, it’s generally a good idea to create two backup files. This is also recommended before carrying out any kind of update.
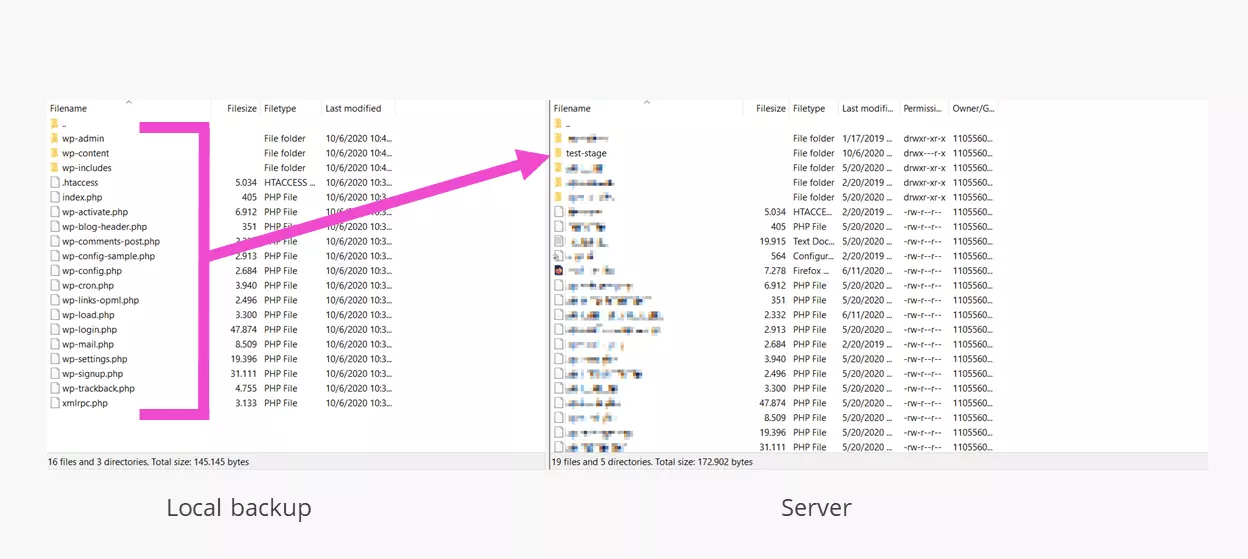
Back up all the files of your installation in a local directory. This typically encompasses three folders as well as around 20 files, the .htaccess file, and a WordPress favicon you may have set. The data can be transferred using a FTP client such as FileZilla or in your webspace admin area with your provider or via web FTP.
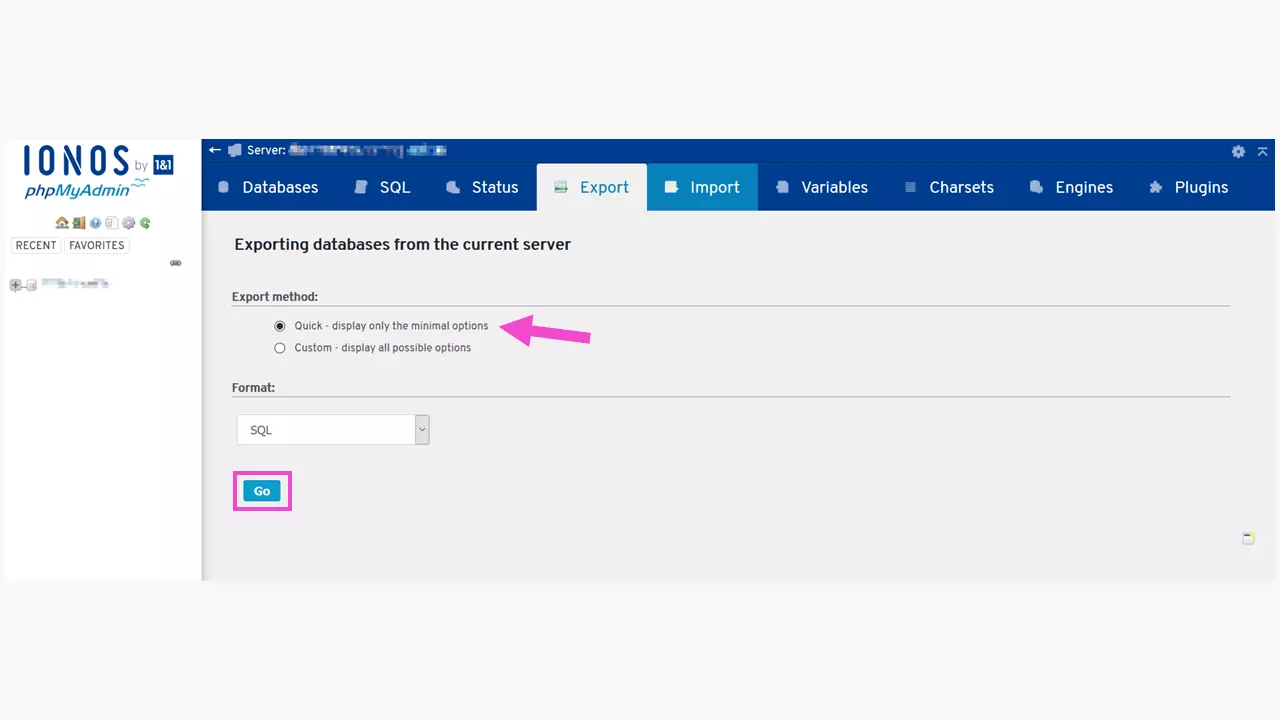
Then log into your provider’s administration interface and export the WordPress database as a backup file. The file name usually comprises the database name, and sometimes a date, with the ending “.sql”.
These two backups will allow you to restore your website in the event of a crash caused by WordPress version updates or the installed plugins. At the same time, you have all you need for a WordPress test environment. Now follow the steps below:
- Create a subdirectory for your WordPress staging environment on the web server. You can do this in your provider’s administration area under “Use webspace” or by using an FTP client like FileZilla. Here, for example, the directory is called www.exampledomain.com/test-stage.
- Then, you’ll need a new (empty) database for the cloned website. After this has been created by your provider, note down the access data shown.
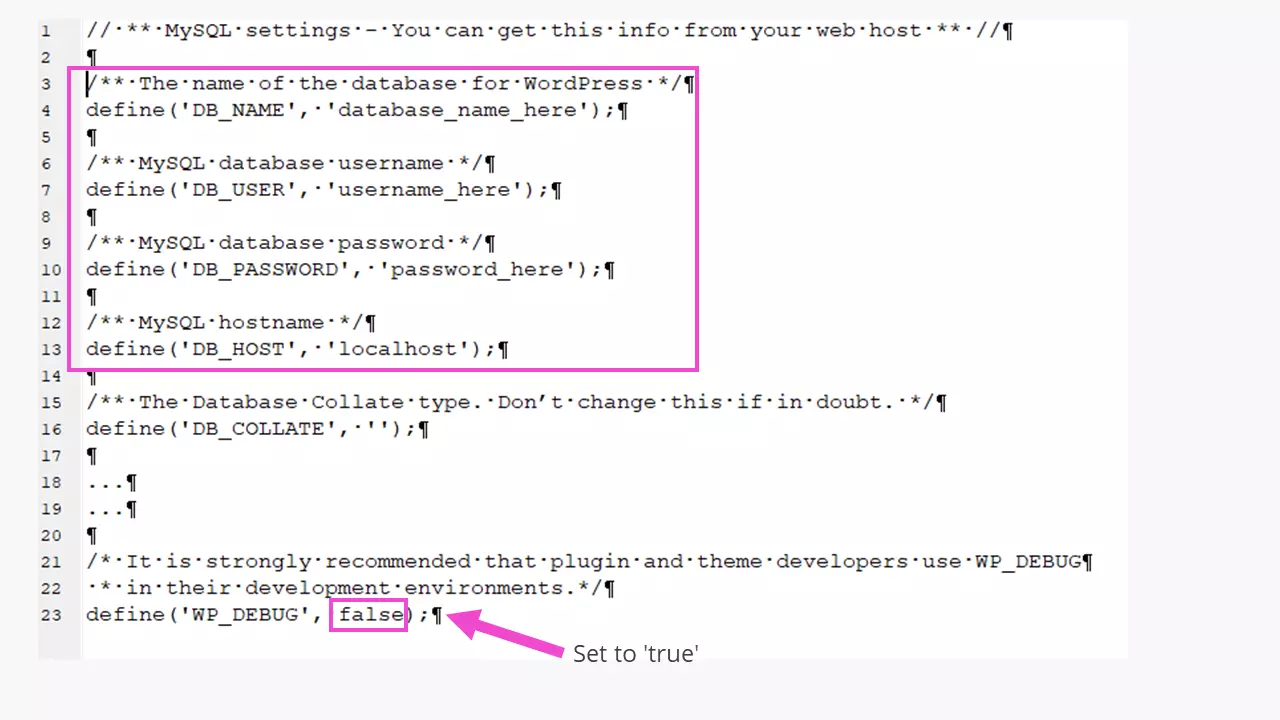
- Open the locally stored file wp-config-sample.php in an editor and enter the access data for the newly created database:
When working in the WordPress staging environment, it’s also strongly recommended that you activate debug mode:
define( 'WP_DEBUG', true );The WordPress staging site has a different address than the live website. This has to be noted by using the following two code lines in the file wp-config.php:
define('WP_SITEURL', 'https://exampledomain.ca/test-stage');
define('WP_HOME', 'https://exampledomain.ca/test-stage');
Anyone familiar with MySQL can manually change these two entries at a later stage directly in the newly created database. If a subdomain has been chosen, it replaces this entry.
The file wp-config-sample.php is saved as wp-config-test.php, so that the wp-config.php of the backup file is not overwritten. Next, the wp-config-test.php file is uploaded to the “\test-stage” directory via FTP and renamed as wp-config-php, allowing WordPress to integrate this file with the correct name into the test environment.
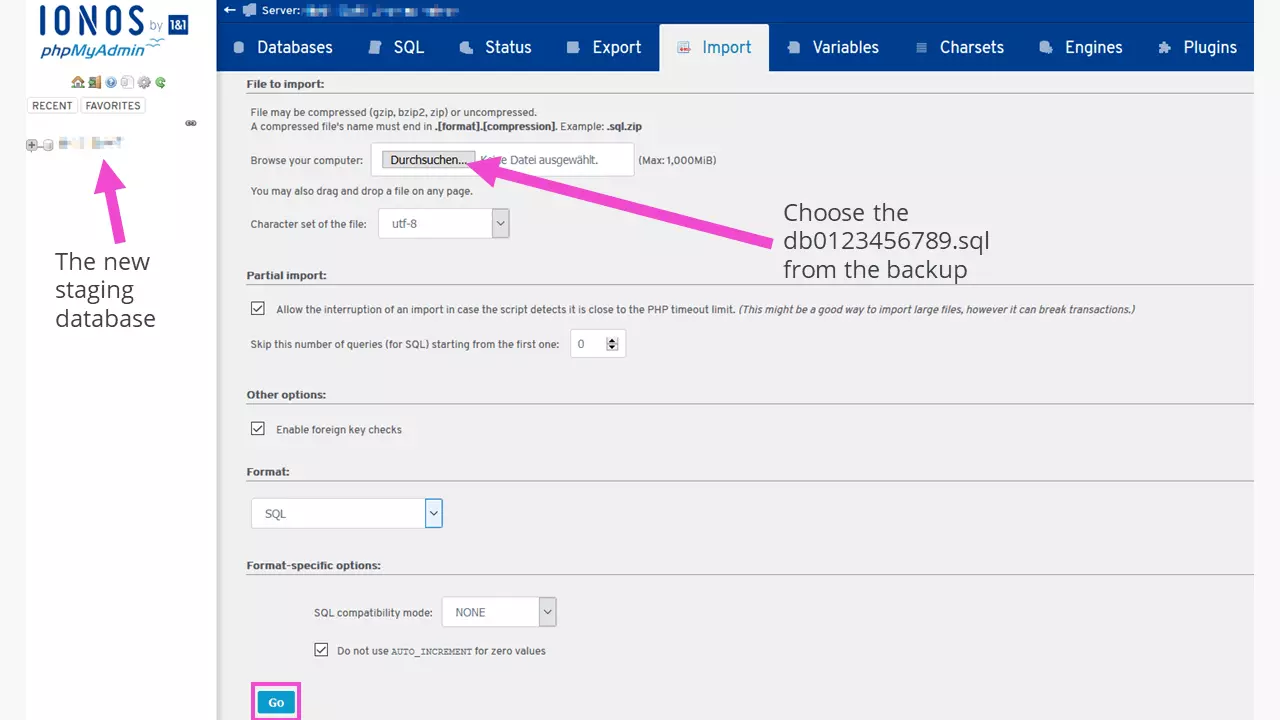
- The new database now has to be populated with content. This can take a little while.
- The manually configured WordPress staging environment can be accessed by the administrator or developer by visiting exampledomain.ca/test-stage/wp-admin.
You can also decide whether a subdomain like “test-stage.exampledomain.com” makes sense. The subdomain then needs to refer to the newly created directory.
Configuring a WordPress test environment with a plugin
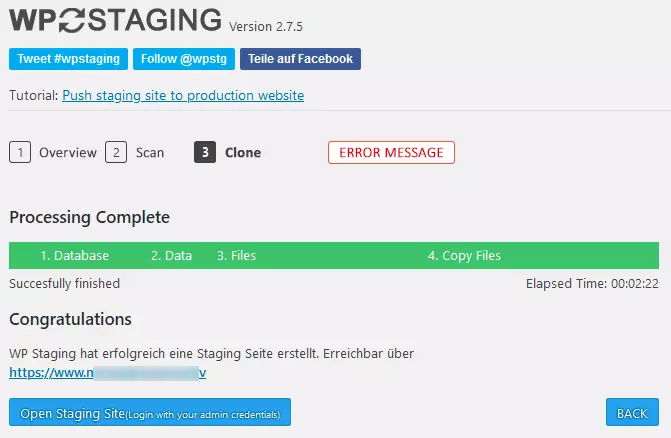
As already mentioned, there are thousands of plugins for WordPress, including plugins for duplicating or cloning a website. The “WP Staging – DB & File Duplicator & Migration” plugin is particularly popular. This automates the process to a large extent. Duplicating an existing WordPress installation into a test environment is no problem at all with the free version of the plugin. For those who want more – such as carrying successful changes over to the live site or cloning to other domains or databases – the paid Pro version can be purchased. At the time of writing this tutorial, the plugin was tested up to WordPress 5.5.1. It is available in English, German, and Spanish.
The entire cloning process for a complete test website (without a shop function) takes 2.5 minutes. As a result, the user receives a link that they can use to log in with their usual admin data. With the free version of the plugin, all existing database tables are newly created in the same database with another table prefix. When working in the WordPress staging environment, only these new tables are changed. The database tables of the actual WordPress installation remain unaffected. An advantage of this method is that web tariffs for only one database do not require an upgrade.
Protecting the WordPress test environment
To protect the WordPress test environment against undesired visitors, directories can be protected in your provider’s administration area, including the directory for WordPress staging. With IONOS, you can find this section under “Hosting” in “Webspace”. There you’ll find the menu item “Protected directories” via the cog symbol. Setup is easy. But remember to note down your password in a secure place!
Another way to protect the directory is offered by the .htaccess file in the root directory of the WordPress test environment. Here, open the locally saved .htaccess file with an editor and insert the following lines:
AuthType Basic
AuthName "Testsite"
# Store the password file with the absolute server path #
AuthUserFile /homepages/99/d1234567890/htdocs/test-stage/.htpasswd
Require valid-user
To create the .htpasswd file, there are many online generators that produce character strings using an encryption process, such as:
Testsite:$1$xyUaMnyQ$AbkfDta7T876ObPNYaoj1.This line is likewise saved as .htpasswd with a text editor. If a test editor allocated file endings, you can change this manually after uploading it to the root directory of the WordPress test environment. When accessing the WordPress staging site, a request will now appear for the username and password.
Local WordPress test environment
A local staging environment is also useful for (further) developing a WordPress site. This keeps the development process protected against any external attacks, since there is no connection to the internet. To work in this way, the computer needs to be able to run as a server and requires special server software. Why? The script language PHP, for instance, can’t be interpreted by a browser. It needs the services of a server.
Software that can implement this locally include MAMP or XAMPP. The latter is open source and works on Linux, Windows, and macOS. It was developed by “Apache Friends” – a non-profit project for supporting the Apache web server and home of the XAMPP project. This type of WordPress staging is primarily used by professional developer teams.
Advantages and disadvantages of both variants: local vs. online WordPress staging
Let’s conclude by comparing the advantages and disadvantages of both types of WordPress staging.
| Local WordPress test environment | Online WordPress test environment | |
|---|---|---|
| Advantages | - No internet connection required- Development and troubleshooting without jeopardizing the live website- Secure against attack attempts | - Automated with a plugin and quickly created- Changes can be pushed to the live website with a suitable plugin |
| Disadvantages | - Requires the local installation of server software- Changes to the live website have to be implemented manually | - Test environment is vulnerable to attack like the website itself- Convenient work requires a paid plugin- Can cause extra hosting costs for added necessary database |
WordPress staging is an elegant and secure way to further develop and troubleshoot WordPress websites. Using a plugin for this work offers considerable convenience benefits. A WordPress test environment is indispensable for anyone who develops WordPress plugins or themes themselves.


