Positioning Website Elements in MyWebsite Now
The Flexibility feature allows you to freely place text and graphics in your MyWebsite Now project. This article explains how to use it.
Please see the article Welcome to MyWebsite Now for more information on the following editing and design options:
- Customizing templates
- Design: Colors and Styles
- Contents: Pages and structures
Please Note
- The Flexibility feature is not included in all MyWebsite Now packages.
- The Flexibility feature must be activated separately for each section.
Activating the Flexibility Feature
- Go to the Websites & Stores section of your IONOS account.
- Next, click on the tile with the name of your online project. Then, click the Open MyWebsite Now button.
- If the Presence Suite opens, select the Web Page item in the left menu bar to open the MyWebsite Now editor in a new window. Otherwise, skip to the next step.
- Select the Content item in the left menu bar of the MyWebsite Now editor if you are not already there.
- In the content-editing section, move your mouse over the desired section and click the Section Options button. Details of the section options will be displayed between the left menu bar and the details window after activation. Take note that the Section Options button is only displayed when you are over the section with the mouse pointer.
- Click on the Try it now! button to activate the Flexibility Feature. If the Flexibility Feature is already active for the section, the button is not displayed.
If the Try it now! button contains an additional arrow icon, your current package does not have the Flexibility Feature. Click the button to switch to a plan that includes the Flexibility feature using the View All Plans button that appears as a result.
Moving Elements
After activating the Flexibility feature, you can move elements within the selected section with your mouse:
- Move your mouse over the element you want to move. The element is highlighted and gets a square icon in the upper-left corner.
- Click and drag the element with the left mouse button held down. A shaded grid will then be displayed where you can freely move the element. The grid and section will automatically expand as you move your element beyond the grid's boundaries.
Creating a Group
If several elements in a paragraph are functionally or graphically related, you can combine them into a group. This way you will be able to move the whole group as one instead of having to do so with each individual element.
- Move your mouse over the element you want to move. The element is highlighted and gets a square icon in the upper-left corner.
- Click on the square icon to select the element.
- Repeat the previous step for all the elements you want to add to the group. Note that only the elements surrounded by a dashed line can be added to the group.
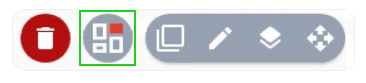
- Click the Create new group button in the Multiple options column next to the menu bar on the left edge. This button is displayed only after at least two elements are selected.
- Move the mouse cursor over the newly formed group. An arrow icon will be displayed in the upper-right corner of the group.
- Move the group by guiding the mouse pointer over the arrow symbol and dragging it with the left mouse button. Similar to when you are moving individual elements, a shaded grid will be displayed for guidance.
Separating Elements From a Group
To dissolve a group, move the mouse pointer over the three-dot icon and wait a brief moment for it to expand. The three-dot icon appears in the upper-right corner of the group next to the arrow icon when the mouse pointer is over a group.
Click the rectangle icon to ungroup.