VPS: Getting started
Valid for Linux VPS and Windows VPS managed in the Cloud Panel.
The VPS package is suitable for both simple and highly complex projects.
This article explains how to set up your VPS and which steps to take once it is set up. It also explains the key features of the Cloud Panel.
Managing your VPS
You manage your VPS in the Cloud Panel. To open the Cloud Panel, complete the following:
- Log in to your IONOS account.
Click on Menu > Servers & Cloud in the title bar.
Optional: If you have multiple server contracts, select the desired contract.
The Cloud Panel will then open.
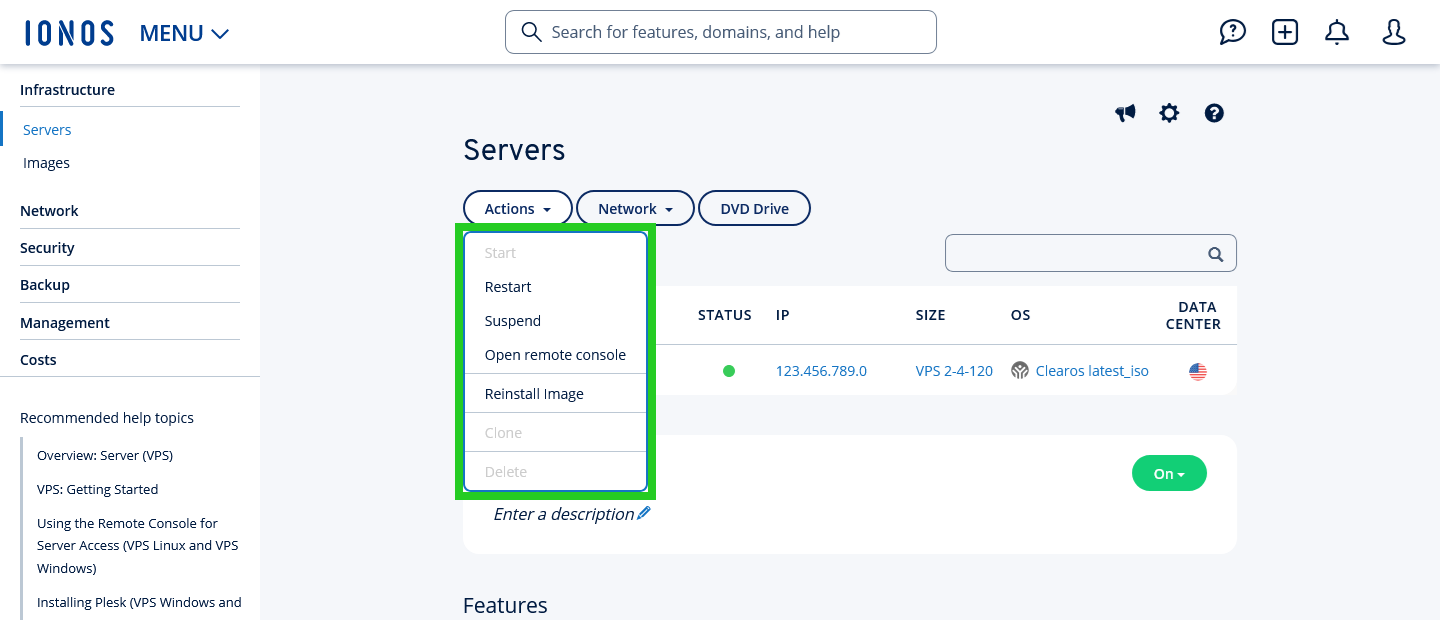
In the Infrastructure > Servers section, you can manage your VPS. To restart or suspend the server, open the remote console, or reinstall an image, click on Actions and select the desired action.
To assign a new IP address to the server, click on Network > Assign IP.
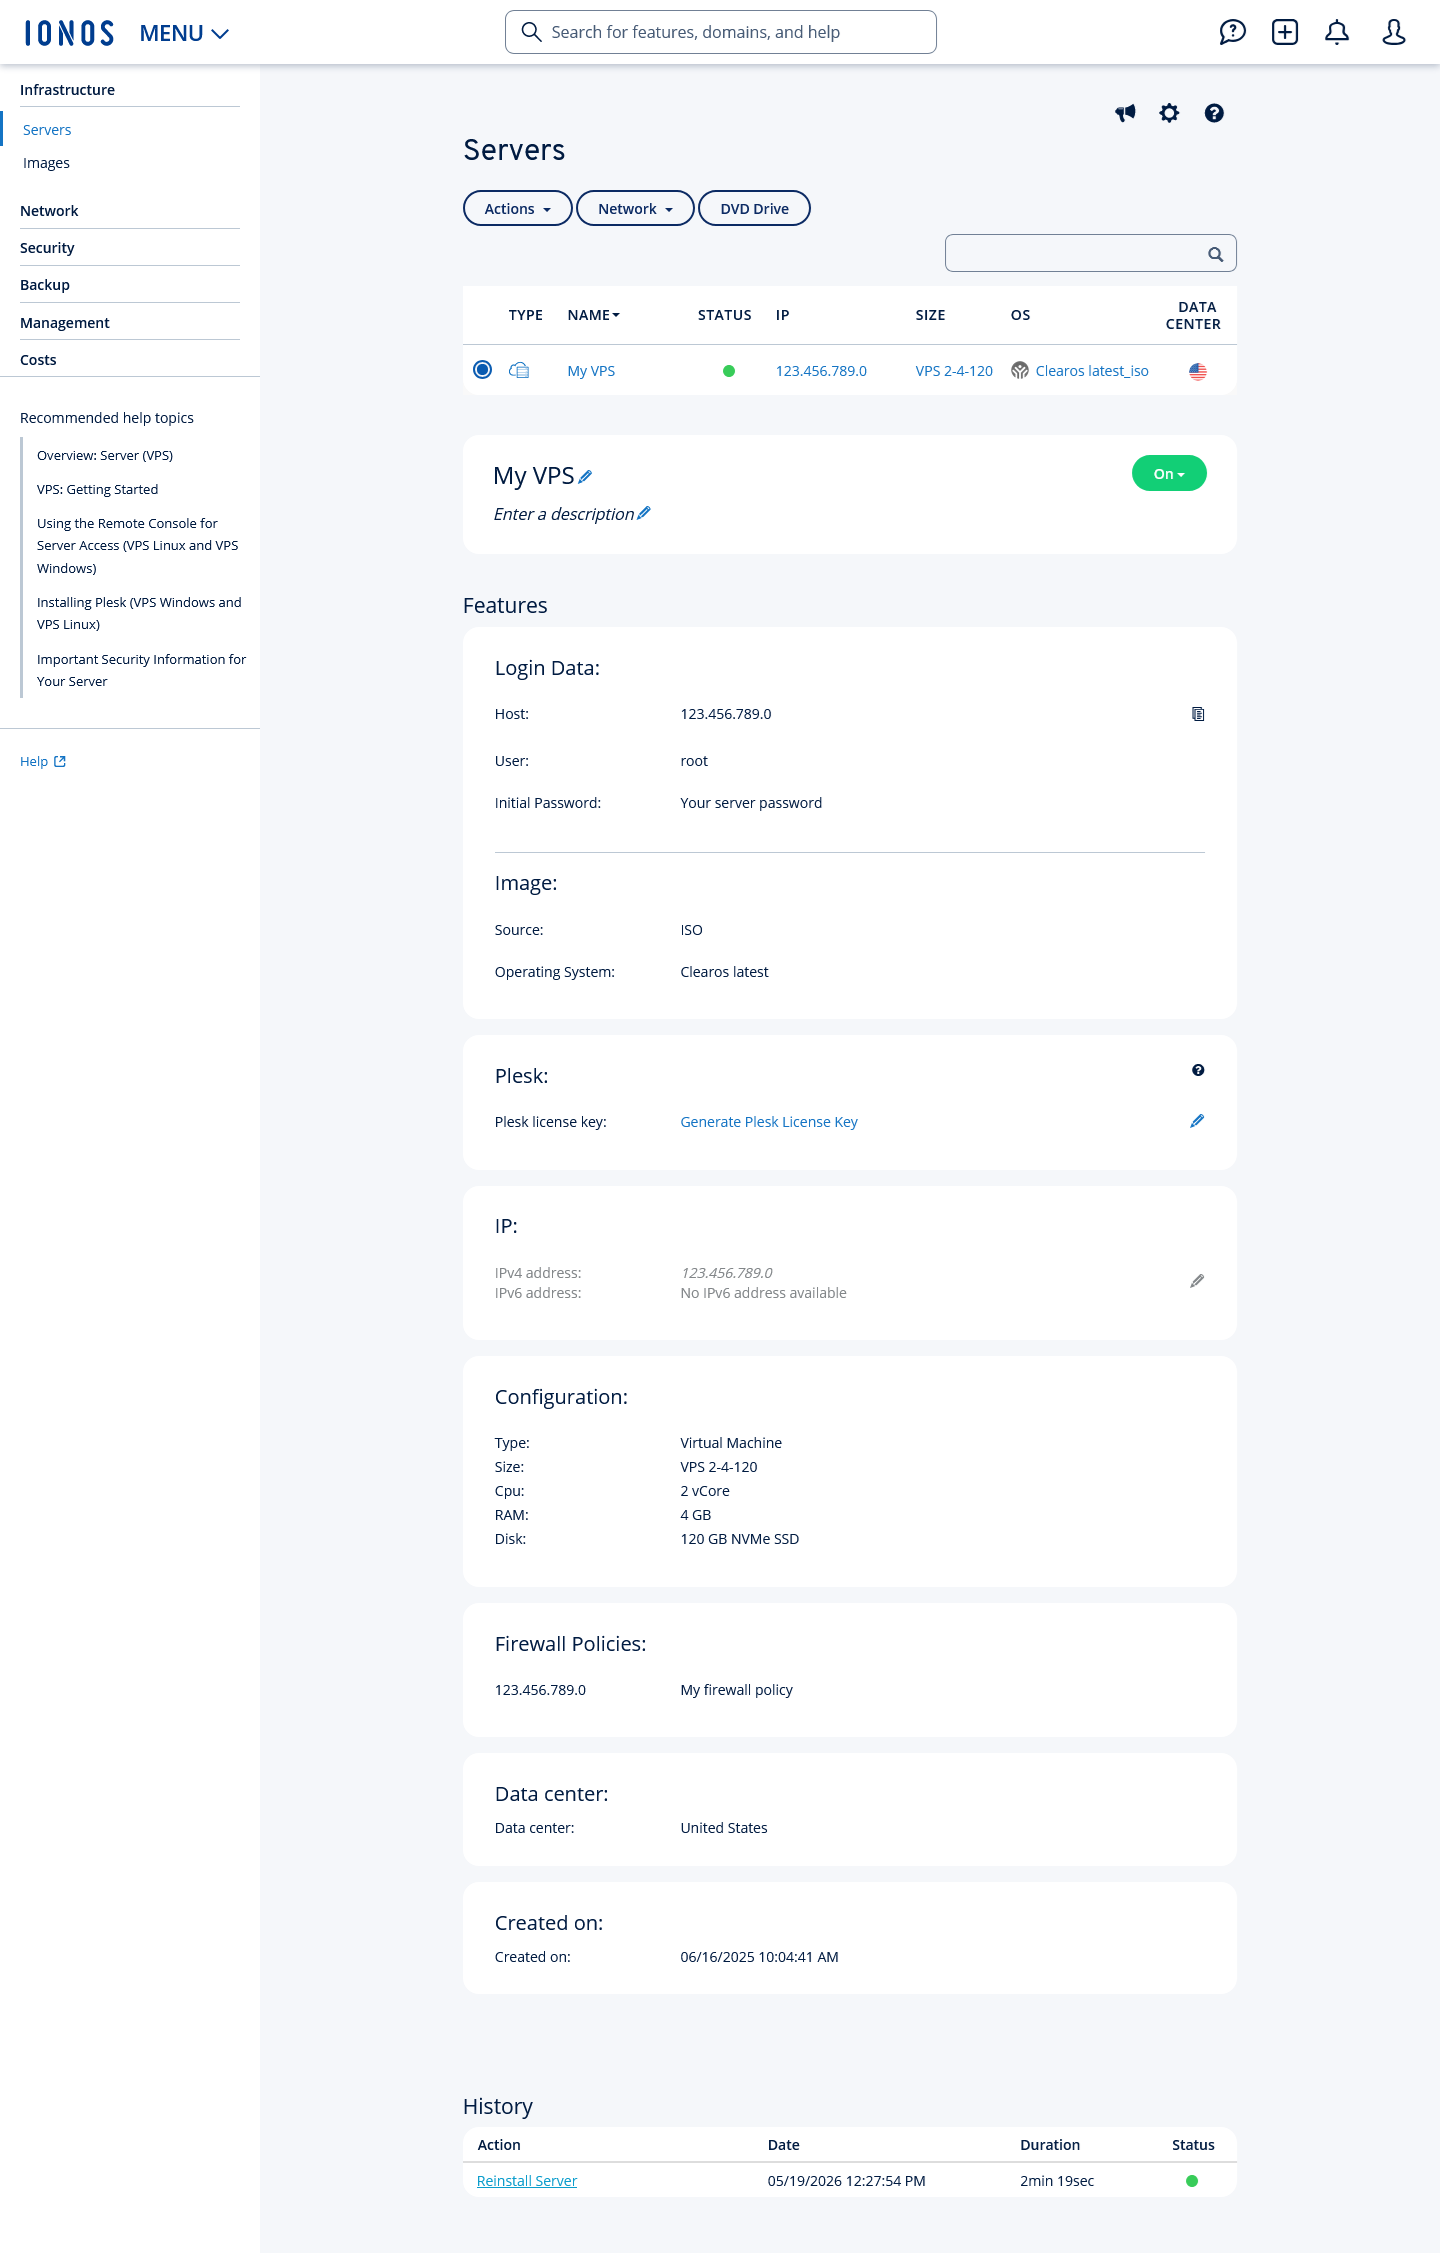
To view the server’s details, click on the desired server. All the key information about the server is then displayed.
Further information on managing your server in the Infrastructure > Servers section can be found in the following category of the IONOS Help Center:
Default server configuration
By default, your VPS is provisioned with the following settings:
Public IP
A public IP address makes your server accessible from outside your network. This is necessary so that your customers can access your website. By default, the server is assigned a public IPv4 address.
Firewall
For security reasons, the server is protected by an external hardware firewall, which you can configure in the Cloud Panel. This firewall blocks incoming traffic on all ports except those specified in its rules.
By default, a firewall policy is configured according to the requirements of the installed image:
Linux Server: Incoming traffic is permitted on TCP ports 22, 80, 443, 8443, and 8447.
Windows Server: Incoming traffic is permitted on TCP ports 80, 443, 3389, 8443, and 8447.
You can create additional rules at any time to open further ports or protocols.
Note
For security reasons, outgoing SMTP port 25 is blocked by default. This prevents emails from being sent from your server. If you want to unblock the port, please contact IONOS Customer Support by phone. You can find the contact details on the following page:
We recommend keeping all unnecessary ports closed to improve the security of your server.
For further information on firewall policies, please see the following article:
Editing a firewall policy (VPS, migrated Cloud Servers, and VPS+)
For more information on the ports used by Plesk, please see the following article:
Installed applications
When you install one or more applications on your VPS, they are deployed in a Docker container or directly on the server, on top of the latest Ubuntu LTS version, depending on the application. Once installed, the access URLs for the applications are listed in the Applications section of your server’s details under Infrastructure > Servers.
The installed applications are protected by an additional password. The login details are listed in your server’s details. There you will also find information on how to disable the password protection.
Note
In rare cases, the SSL certificate may be issued with a delay. A security warning is then displayed when you access the URL, for example, Your connection is not private. If you see this security warning, restart the server. Alternatively, you can establish an SSH connection to the server and trigger a new certificate request. To do this, enter the following command:
docker restart traefik
Installing Plesk
If the image installed on your VPS does not include Plesk, you must install the software manually. You can generate the required license key in the Cloud Panel: in your server’s details, click on Generate Plesk License Key in the Plesk area.
Instructions on how to set up Plesk with the default configuration can be found in the following articles:
Installing Plesk (Linux VPS, VPS+ and migrated Cloud Servers)
Installing Plesk (VPS+ Windows, Windows VPS, and migrated Cloud Servers)
Monitoring server performance
An overview of the programs you can use to monitor the performance of your servers can be found in the following articles:
Note
You can only monitor servers that have been assigned an IP address.
Connecting to the server
You can find the login details for your VPS in the Cloud Panel, in the Login Data area of your server’s details. To connect to your server, make a note of the following details:
Host (the server’s IP address)
User
Initial Password
Note
Only passwords that are automatically generated when a server is created or reinstalled can be displayed in the server details.
The following articles explain how to connect to your VPS:
Connecting from a computer running Microsoft Windows to a VPS running Microsoft Windows:
Connecting to a Windows server with Remote Desktop Connection
Connecting from a computer running Microsoft Windows to a VPS running Linux:
Establishing an SSH connection to your Linux server from a Microsoft Windows computer
Connecting from a computer running Linux to a VPS running Linux:
Establishing an SSH connection to your Linux server from a Linux computer
If your server is running but can no longer be accessed via SSH or Remote Desktop Connection, you can log in to the server using the remote console. The remote console lets you maintain the system remotely, as if you were sitting in front of it. You can view system messages just as you would on a physical screen and interact with the server at any time. For example, if the server has problems starting up, you can boot it using different boot options. The remote console is particularly suitable for advanced troubleshooting. You can find instructions on how to connect to your VPS via the remote console in the following article:
Configuring a domain
You can access your server directly via its public IP address or the automatically generated host name. However, to make your website easy for your customers to reach, you need a domain. Connect this domain to the server’s static IP address so that the domain points to your server. To do this, configure an A record (Address Resource Record) for an IPv4 address or an AAAA record for an IPv6 address. The following articles explain how to do this:
Ordering a Domain as an IONOS Customer
Changing a Domain's IPv4/IPv6 Address (A/AAAA Record)
Setting up a domain for your Linux server using Plesk (First login to Plesk)
Security recommendations
Creating backups
Protecting your server is crucial for the security of your data, particularly in the event of a server failure. We therefore strongly recommend that you create backups regularly.
For example, you can use Cloud Backup to back up your servers. This backup solution is particularly suitable for scheduled, medium-term, and long-term backups. You manage these backups in a backup console. For further information on Cloud Backup, please see the following article:
Keeping your operating system up to date
When you order a server from IONOS, it is always delivered with the latest available updates for the operating system or distribution. Nevertheless, you should always keep the server up to date.
Operating system updates mainly provide two things: new features and fixes for bugs or security vulnerabilities. If a security vulnerability in the operating system installed on a server is not fixed, cybercriminals can exploit it to gain access to the server. Patch management is therefore a vital part of maintaining your systems. Because applying security updates promptly is one of the most important and effective measures you can take to protect your server, your patch management should be as efficient as possible.