Installing Your Own Plugins and Themes in Managed WordPress
For Managed WordPress installations version 4.5.3 or higher
Learn how to install custom WordPress themes and plugins you've downloaded or purchased. These are themes and plugins not found in the WordPress Theme Directory or the WordPress Plugin Directory.
First, log in to the admin area of your WordPress installation. You can go directly to the login page by adding /wp-admin to your domain name (e.g. http://example.com/wp-admin).
Installing Plugins
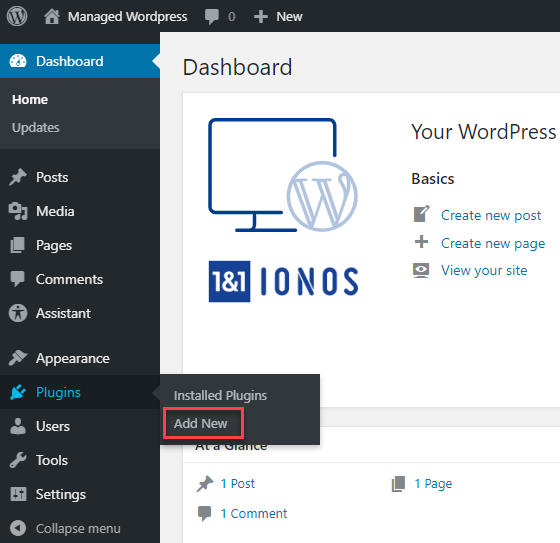
Step 1
Find the Plugins category in the WordPress menu on the left, and click Add New.
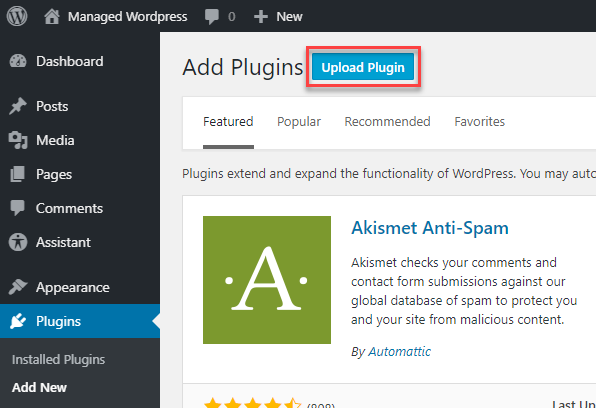
Step 2
Click Upload Plugin.
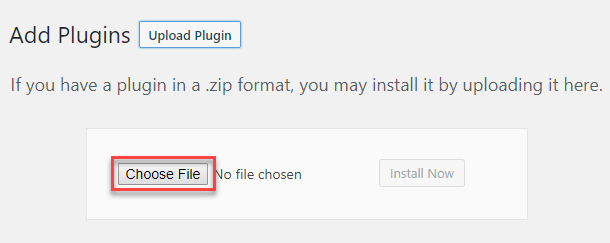
Step 3
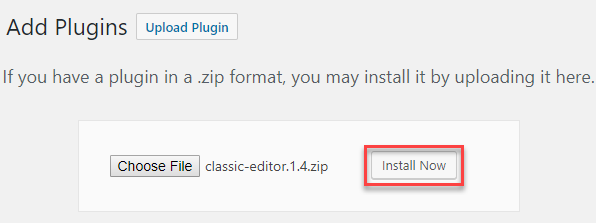
Click Choose File.
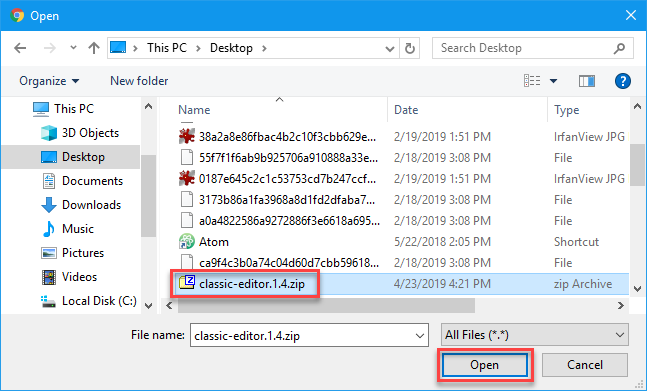
Step 4
Locate and select the plugin ZIP file, then click Open.
Step 5
Click Install Now.
Step 5
If you would like, click Activate Plugin in order to use it right away.
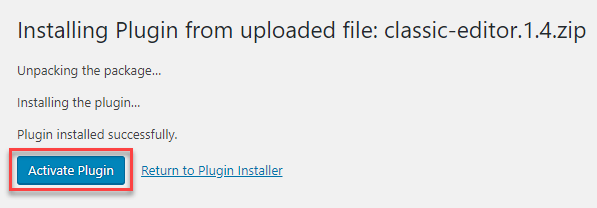
You can now begin using the plugin. Please check your WordPress site to ensure the plugin did not adversely affect your site. If the plugin causes any issues, you can always deactivate it from the WordPress Plugins page.
Installing Themes
Step 1
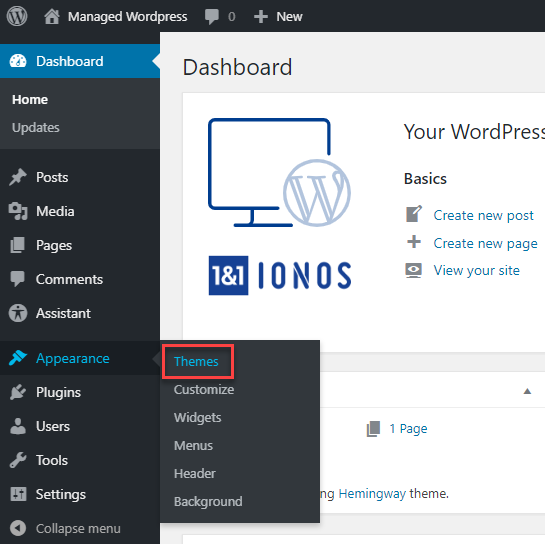
Find the Appearance category in the WordPress menu on the left, and click Themes.
Step 2
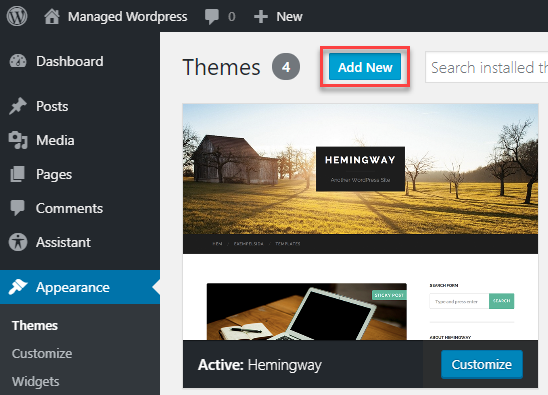
Click Add New.
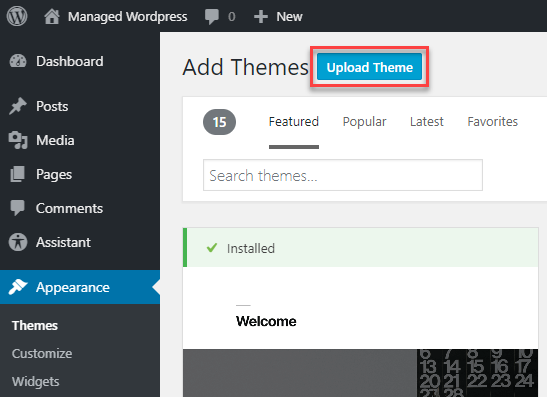
Step 3
Click Upload Theme.
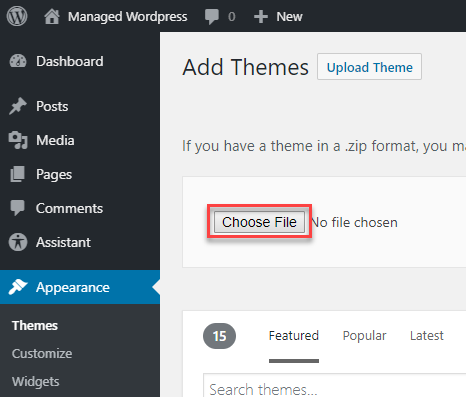
Step 4
Click Choose File.
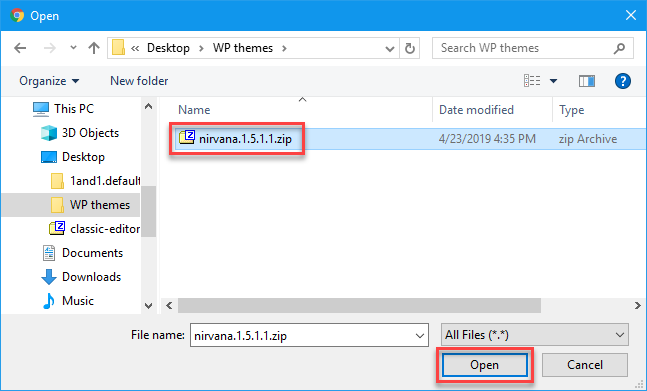
Step 5
Locate and select the theme ZIP file, then click Open.
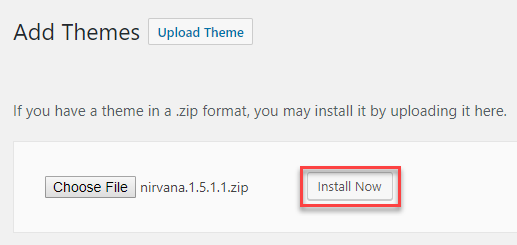
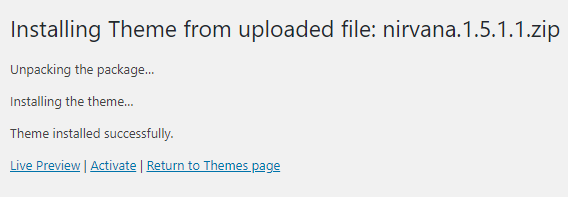
Step 6
Click Install Now.
Step 7
Once the theme is successfully installed, you can either view the Live Preview, Activate the theme immediately for use, or Return to Themes page.
Your theme is now available for use. If you activate the theme, please check your website as much of the layout may change with the new theme. You can always activate your previous theme from the Appearance > Themes page until you are ready to activate and customize the new theme.