Set Up a Mail Business Account on Android Devices
With Mail Business, you have access to all of your emails, contacts, and calendars from anywhere on your Android smartphone or tablet. In this article, we'll show you how to set up your Mail Business account on an Android device.
Please Note
The email account setup described below uses a Samsung Galaxy S10 with Android 11 as an example. The menu items listed may differ on other Android models.
Tap the Settings icon.
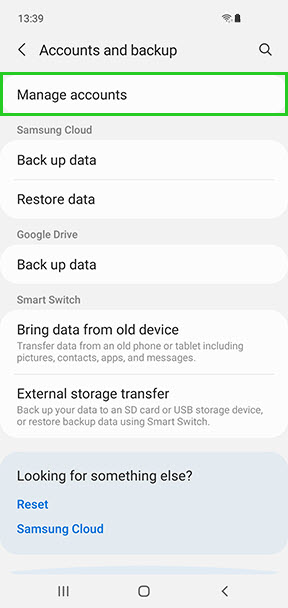
Tap Accounts and Backup.

Tap Manage accounts.
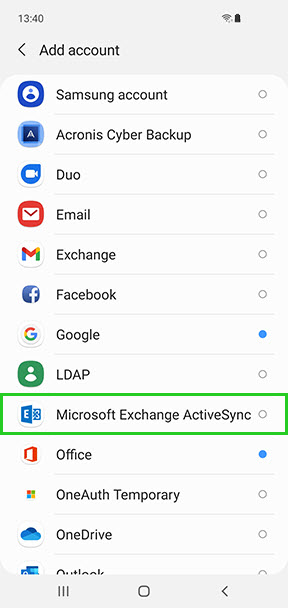
Tap Add Account.
Select Microsoft Exchange ActiveSync. If this option is not displayed, select Exchange instead.
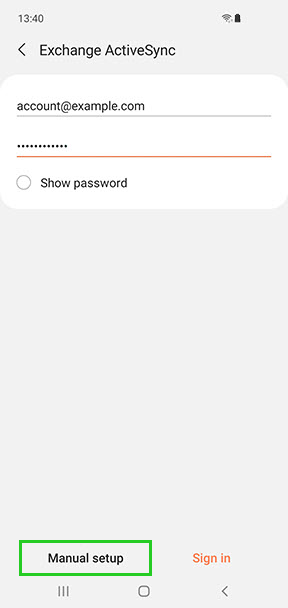
Enter the following information:
Email Address: The full email address of the Mail Business account (such as account@example.com)
Password: The password for the Mail Business accountTap Sign In.
The following message appears:
Allow email to access your contacts?Tap Allow.
The account is now set up. You can begin using it immediately.
Manual Setup
If you do not want to use our configuration service (Autodiscover) - or if the automatic setup should fail once - enter the following settings:
Tap the Settings icon.
Tap Accounts and Backup.
Tap Manage accounts.
Tap Add Account.
Select Microsoft Exchange ActiveSync. If this is not an option, select Exchange instead.
Enter the following information:
Email Address: The full email address of the Mail Business account (such as account@example.com)
Password: The password for the Mail Business accountTap Manual Setup.
In the Domain\username field, enter your email domain (such as example.com).
Please Note
Your device may not have separate fields for domain and username. For example, if there is only a single field called User/Domain (or similar), enter your full email address there again.
Username: The name part of the email address (what comes before the @ sign) - e.g.: For johnsmith@example.com, the username would be johnsmith.
In the Exchange Server field, enter s.mailbusiness.ionos.com.
Make sure that the option Use secure connection (SSL) is enabled.