Checking and Changing Your Sender Address in Mozilla Thunderbird
This article explains how to check and change the sender address in Mozilla Thunderbird.
Setting up the e-mail account is described using Mozilla Thunderbird version 102.12.0. If you are using a different version, the steps described here may differ.
Please Note
In order to increase security for our customers, we will deactivate sending with alternative or empty sender addresses on our email servers, starting on January 29, 2024. After this date, emails can only be sent if the sender address has the same domain as the email inbox used.
For details on the settings you need to change the settings, please refer to the article Important change for sending emails with a different sender address.
Changing a Sender Address in Thunderbird
To check and change the sender address in Mozilla Thunderbird, follow these steps:
Open Mozilla Thunderbird.
If the menu bar is not displayed, press the Alt key.
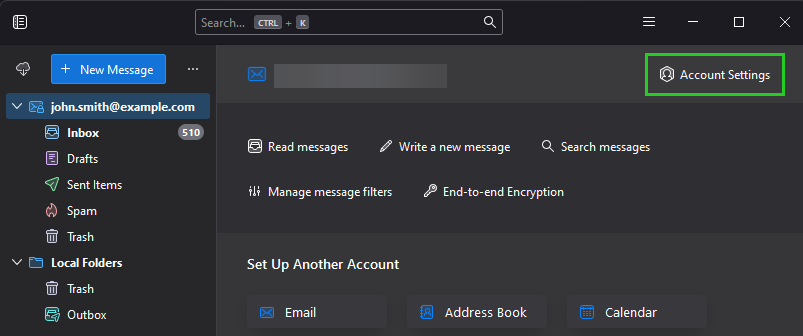
Click Tools > Account Settings in the menu bar. Alternatively, simply click Account Settings if it is already displayed.
If you have set up several e-mail accounts, click on the name of the e-mail account. If you have only set up one email account in Thunderbird, the account settings of the email account are automatically displayed.
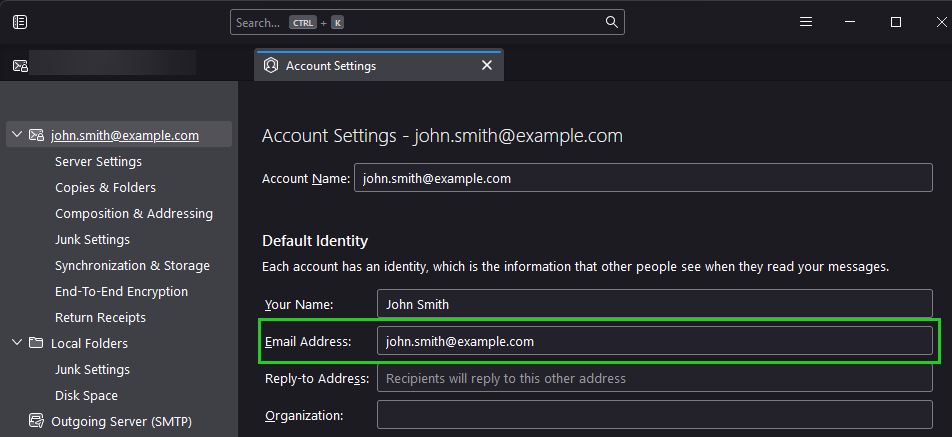
In the area Default Identity, check whether the e-mail address you created when setting up the email inbox is entered in the field Email address. If a different email address is entered, replace it.
Example: You have set up an e-mail inbox with the e-mail address john.smith@example.com. This address is also used for authentication on the IONOS outgoing mail server (SMTP). As the sender address you are using an email address from Gmail (Google Mail) with the ending @gmail.com.
Starting on January 29, 2024, you can only use sender addresses ending in @example.com. Emails with a different sender, such as the @gmail.com used in the example, will no longer be delivered. In this case, the IONOS outgoing mail server (SMTP) sends the following error code: Sender address is not allowed
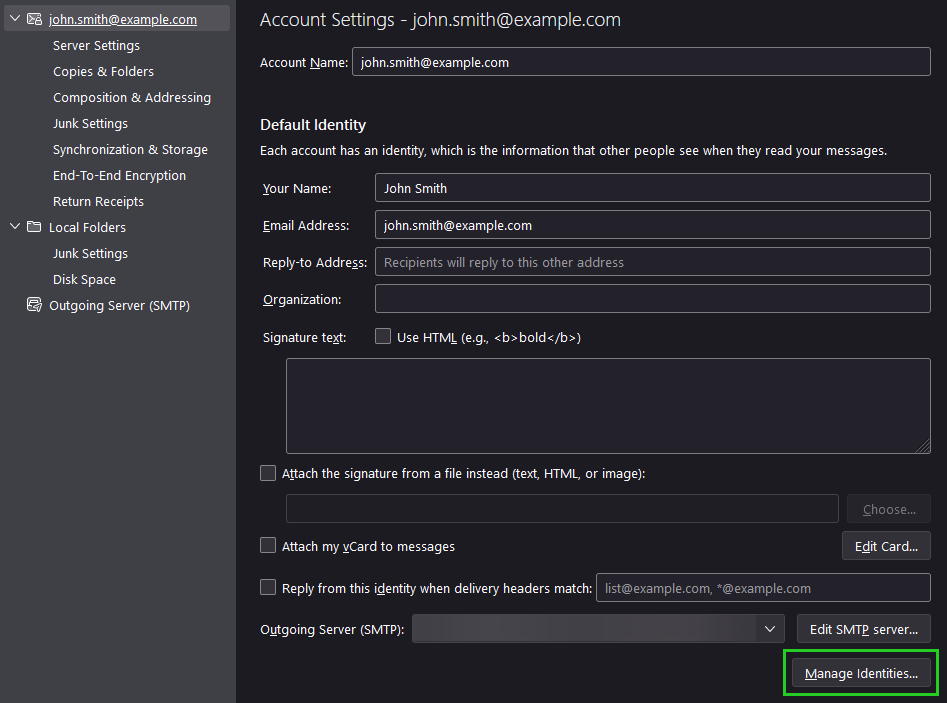
When you set up an account, an "identity" is created for the account by default, which includes, for example, your name, email address, and signature. If you create multiple identities, you can use multiple sender addresses. Make sure that no other identities exist, if any, and that the identity that contains the email address you created when you set up your email account is used. To check if other identities are set up as senders, click Manage Identities...
If another identity is set up as the sender, select it.
To remove this additional identity, click Delete.

Click Close.
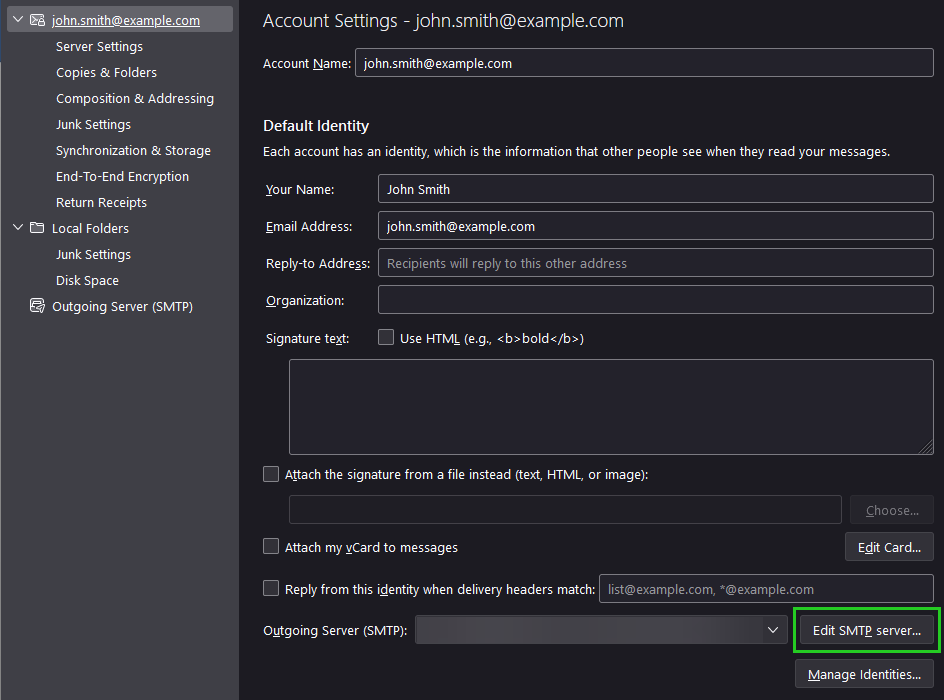
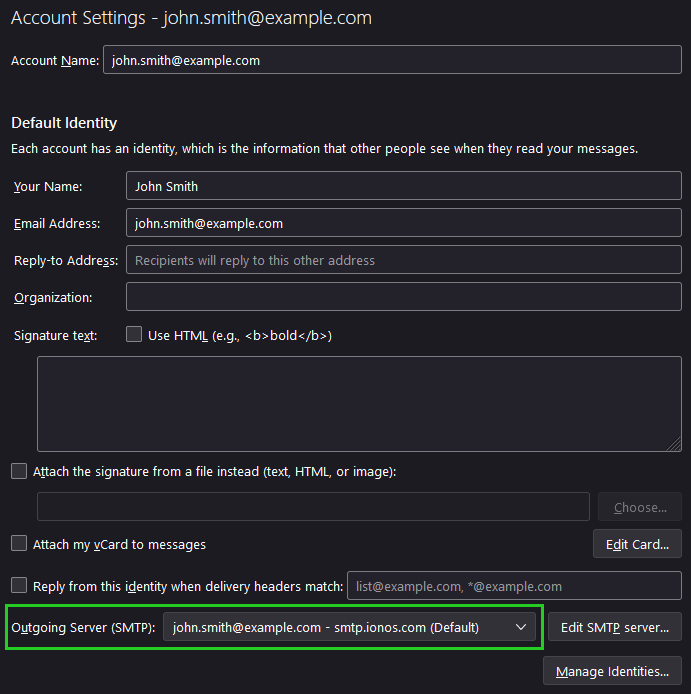
Check which outgoing mail server is set in the Outgoing mail server (SMTP) field. The account selected in this field must contain the email address you created when you set up your mailbox. To check this, click Outgoing Server (SMTP) in the navigation bar on the left.
Double-click the appropriate account.
Please Note
In some cases, it is possible that no account is available.
In the Username field, check that the email address you created when you set up your email box is entered.
If this is not the case, add a new outgoing mail server. For instructions on how to do this, see the section Adding a new outgoing mail server below.
Click the email account in the navigation bar on the left to open the account settings.
In the Outgoing server (SMTP) list, select the newly added outgoing mail server.
Sending Email Not Possible After Changing the Sender Address
If sending email is not possible after changing the sender address, check the set outgoing mail server and its settings. To do this, proceed as follows:
Click Tools > Account Settings in the menu bar.
To check the server settings, click Edit SMTP Server...
Check the settings and correct them. Make sure that the server smtp.ionos.com as well as the port 465 and the email address of your email account are entered. In addition, SSL/TLS must be set in the Connection Security field and Password, Normal must be set in the Authentication Method field.
Click OK.
Check which outgoing mail server is set in the Outgoing Server (SMTP) field. The account selected in this field must contain the email address you created when you set up your mailbox. To check this, click Outgoing Server (SMTP) in the navigation bar on the left.
Double-click the appropriate account.
In the Username field, check that the email address you created when you set up your email box is entered.
If this is not the case, add a new outgoing mail server. For instructions on how to do this, see the section Adding a new outgoing mail server below.
Click the email account in the navigation bar on the left to open the account settings.
In the Outgoing Server (SMTP) list, select the newly added outgoing mail server.
Adding a New Outgoing Mail Server
To add a new outgoing mail server in Thunderbird, follow these steps:
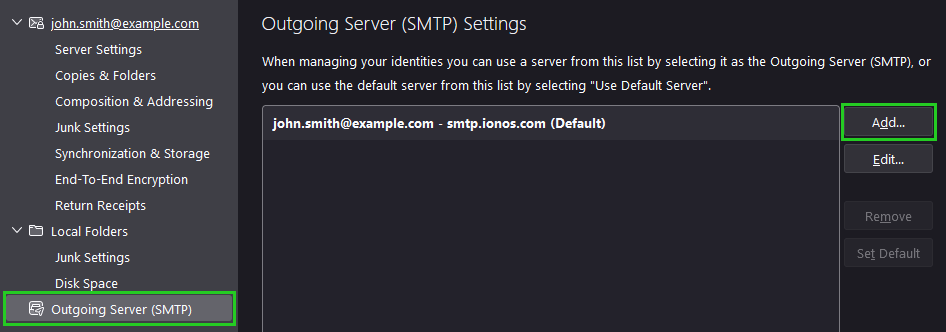
In the navigation bar on the left, click Outgoing Server (SMTP).
Click Add...
In the Description field, enter a suitable name.
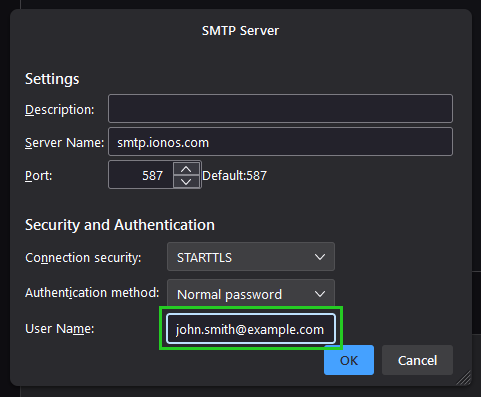
In the Server field, enter the server smtp.ionos.com.
In the Port field, enter port 465.
In the Connection security list, select SSL/TLS.
In the Authentication method list, select Normal password.
In the User name field, enter the email address you created when you set up your email box.
Click OK.
To use this account for sending email, click the desired email account in the navigation bar on the left.
In the Outgoing Server (SMTP) field, select the outgoing mail server you have set up.

Close the account settings.