Creating additional administrator accounts (Windows Server 2025)
Please use the “Print” function at the bottom of the page to create a PDF.
Valid for Cloud Servers, Virtual Servers, VPS, Dedicated Servers and Server Power Deals with the Microsoft Windows Server 2025 operating system.
This article explains how to create an additional administrator account.
To create an additional administrator account, complete the following:
Create account
- Log in to the server with the Administrator account.
- To open the Windows settings, enter the word Settings in the search bar located in the taskbar. Then click on Settings in the search results.
Alternatively: Click on Start > Settings. - Click on Accounts in the navigation bar on the left. The Accounts area opens.
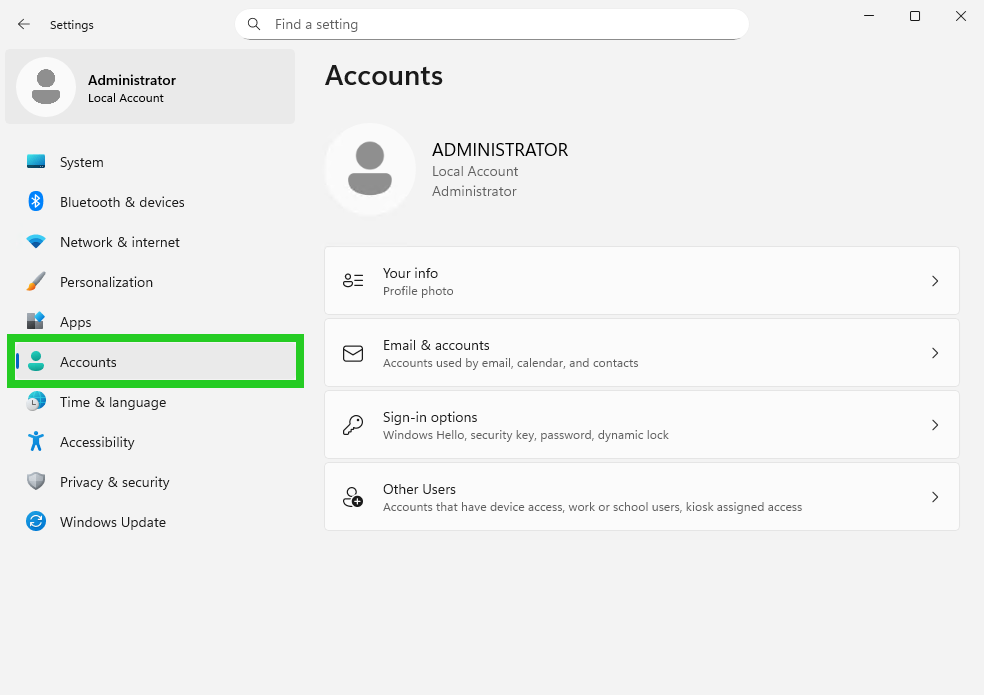
- Click on Other Users. The Accounts > Other Users area opens.
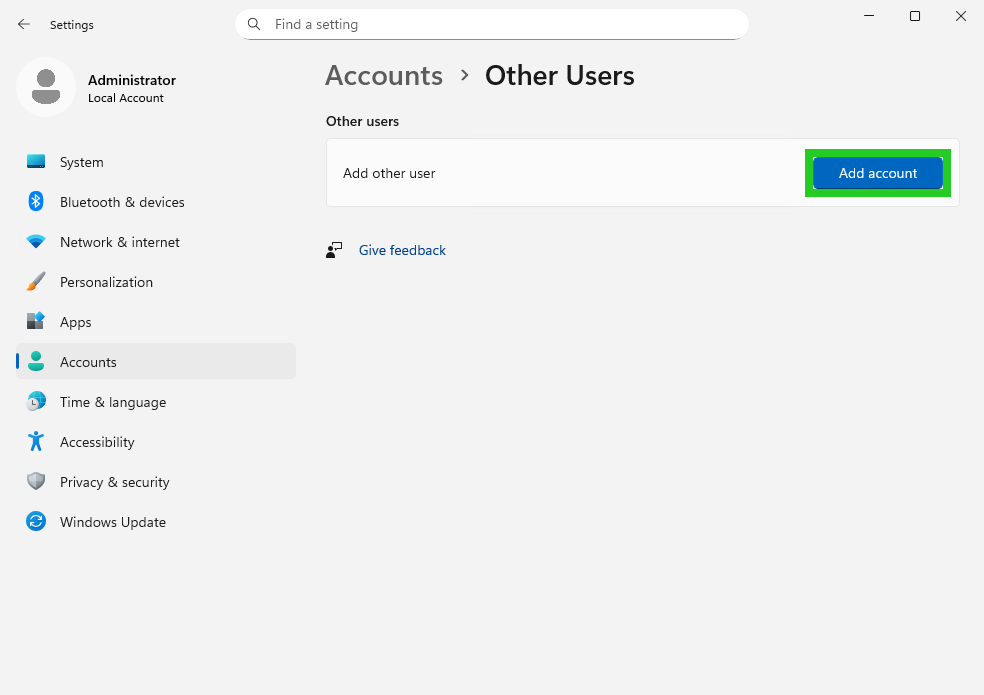
- Click on Add account. The lusrmgr - [Local Users and Groups (Local)]\Users] window opens.
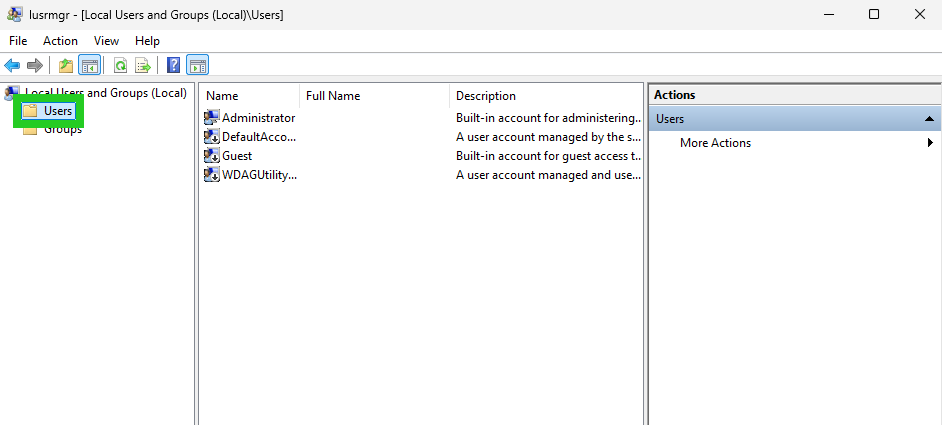
- Click on Users in the navigation bar on the left.
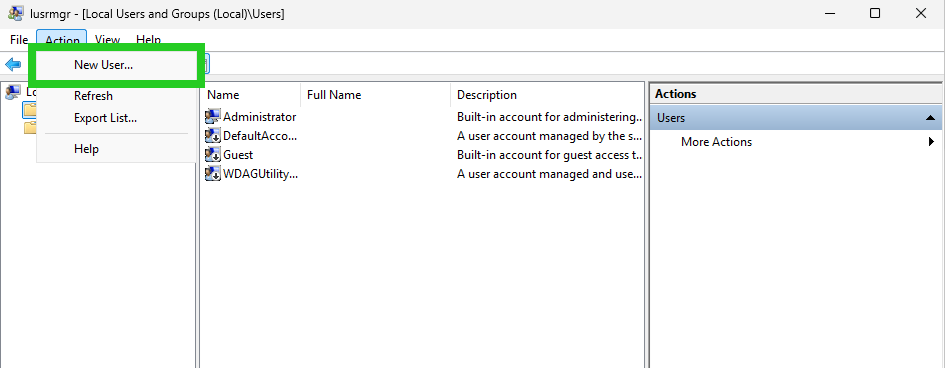
- Click on Action > New User in the menu bar. The New User window opens.
- Enter the desired user name in the User name field.
- Optional: Enter the name of the administrator in the Full name field.
- Optional: Enter a description in the Description field.
- Enter the desired password in the Password field and repeat it.
Please Note
If the option User must change password at next logon is activated, the new user can only log on via remote desktop connection after a password change. Therefore, make sure that this option is deactivated.
- Click on Create.
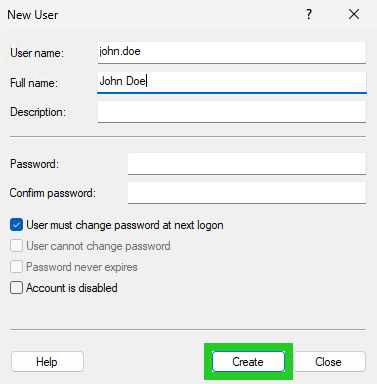
- Click on Close.
Add account to the Administrators group
To give the new user administrator rights, you must add the account to the Administrators group. To do this, complete the following:
- Double-click on the user you have created. The Properties window for that usernameopens.
- Click on Add in the Member Of tab. The Select Groups window opens.
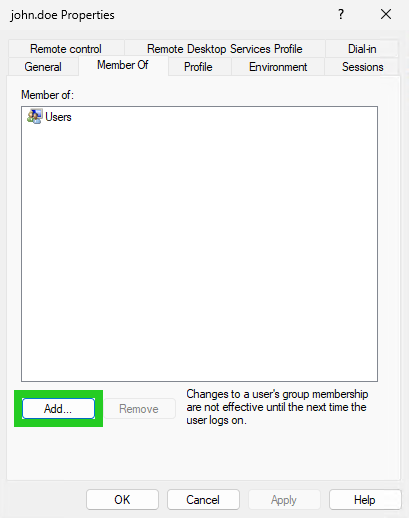
- Enter the object name Administrators in the following field: Enter the object names to select
- Click on Check Names.
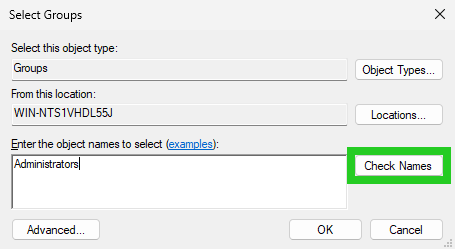
- Click on OK.
- Click on Users in the Member Of tab.
- Click on Remove.
- Click on Apply and OK.
Further information
Further information can be found in the following article: