Creating additional software RAID volumes (Windows)
Valid for customizable Dedicated Servers with software RAID and Microsoft Windows Server 2019, Microsoft Windows Server 2022, or Microsoft Windows Server 2025.
If you order a customizable Dedicated Server with software RAID and additional data storage, a software RAID with level 1 is only created for the primary storage of the server. In this case, you must create a separate software RAID for the additional storage.
In this article, you will learn about the advantages and disadvantages of the most important RAID levels and which criteria should be considered when selecting the appropriate RAID level. It also explains how to create a separate software RAID with level 1 for additionally purchased HDD, SSD, or NVMe disks in Microsoft Windows Server. The procedure described here is recommended in order to optimally utilize the advantages of RAID 1.
Depending on the area of application, you can also create RAID systems with different RAID levels for your data storage.
Note
If you order a customizable Dedicated Server with hardware RAID, you must create a separate software RAID for the additional data storage in the following cases:
You have ordered a customizable Dedicated Server with hardware RAID that has HDD disks as primary storage, and NVMe disks as additional data storage.
You have ordered a customizable Dedicated Server with hardware RAID that uses NVMe disks as primary storage, and HDD, SSD, or NVMe disks as additional data storage.
Please Note
This article assumes a good knowledge of server administration with Microsoft Windows Server.
Criteria for selecting the appropriate RAID level
You can clarify which RAID level is suitable for your server with the help of the following questions:
Which operating system is used on the server and which RAID levels are supported by it?
What storage capacity is required? How much capacity of the data storage used should be usable?
What are the requirements in terms of read and write speed?
What are the requirements in terms of data security?
Please Note
RAID systems provide greater reliability and/or higher speed. However, they are no substitute for regular backups. To avoid data loss, we recommend that you make regular backups.
Overview of the most important RAID levels
The following table lists the most important RAID levels and their advantages and disadvantages:
| RAID 0 | RAID 1 | RAID 5 | RAID 6 | RAID 10 (1+0) | |
|---|---|---|---|---|---|
| Minimum number of data storage devices (HDD, SSD or NVMe) | 2 | 2 | 3 | 4 | 4 |
| Method used | striping | mirroring | striping and parity | striping and double parity | striping of mirrored data |
| Failure safety | none | failure of one drive | failure of one drive | failure of two drives | failure of two drives of a sub-array leads to a crash of the entire system |
| Capacity utilization |
100% Number of drives x capacity |
50% (number of drives -1) x capacity |
67% Number of drives - 1 |
50% (number of drives - 2) x capacity |
50% (number of drives - 2) x capacity |
| Write speed | very high | low | medium | low | medium |
| Read speed | very high | medium | high | high | very high |
| Advantages |
Higher bandwidth than single drives Higher number of input and output operations per second than with single drives |
Complete redundancy Data security and speed can be optionally increased with the right controller or software. increased reliability through parity Good price-performance ratio in terms of redundancy and storage optimization |
High reliability thanks to double parity Slightly improved throughput rate during the read process compared to single drives |
Increased read speed compared to single drives Increased reliability of the integrated data storage devices | |
| Disadvantages |
Higher probability of failure than single drives Lack of redundancy ensures that a large proportion of the data is lost in the event of a defective data storage device |
Storage capacity of the network is at most as large as the capacity of the smallest data storage device High cost factor |
Reduced write speed compared to individual drives Storage capacity of the individual data storage devices is restricted to a certain extent storage capacity of the individual data storage devices is limited to a certain extent |
Write speed is significantly reduced compared to single drives Storage capacity of the individual data storage devices is significantly limited - especially in smaller arrays |
Severe limitation of the maximum available storage capacity Failure of two data storage devices of a sub-Array leads to a crash of the entire system |
Create a separate RAID with level 1 and integrate additionally acquired data storage
Log in to the server as an administrator.
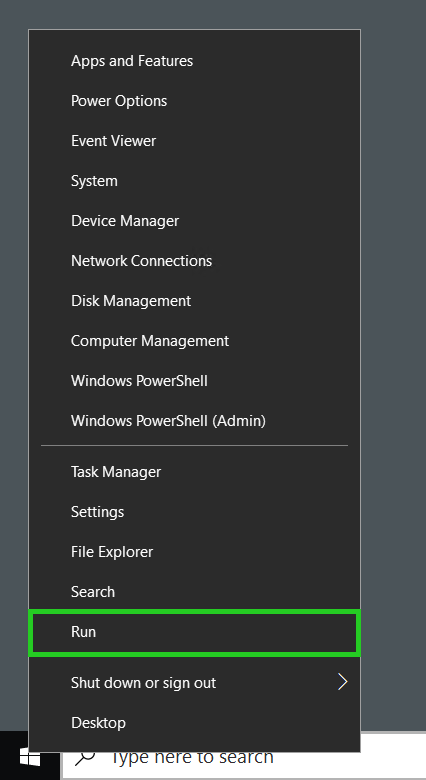
Right-click on the Windows button at the bottom left.
Click on Run. The Run window is displayed.
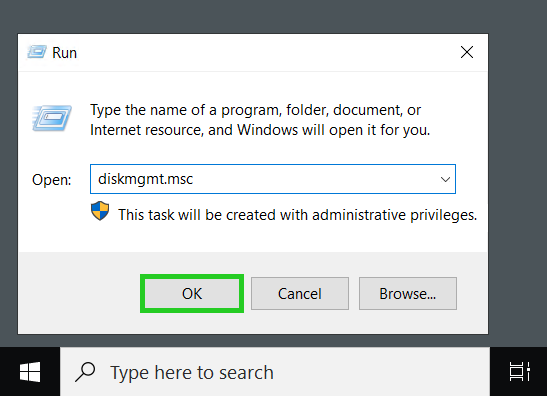
Enter the command diskmgmt.msc and click OK.
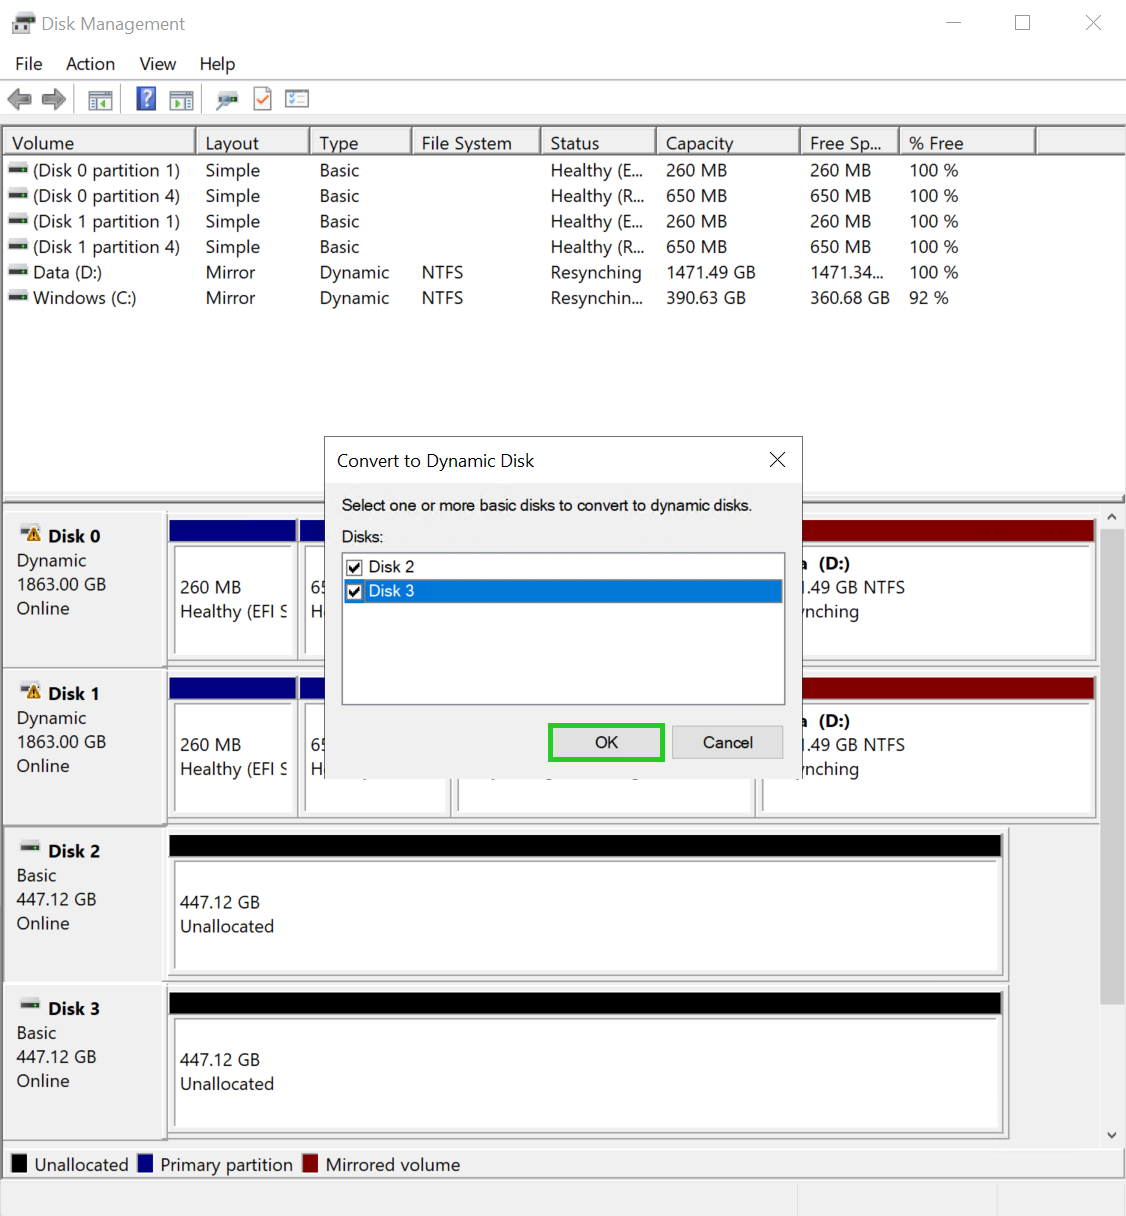
The Disk Management window opens.
To convert the purchased additional data storage devices into dynamic data storage devices, select them in the Convert to Dynamic Disk window and click OK.
If the Convert to Dynamic Disk window is not displayed, right-click on one of the additionally purchased data storage devices. Then click on Convert to Dynamic Disk to display the window of the same name.
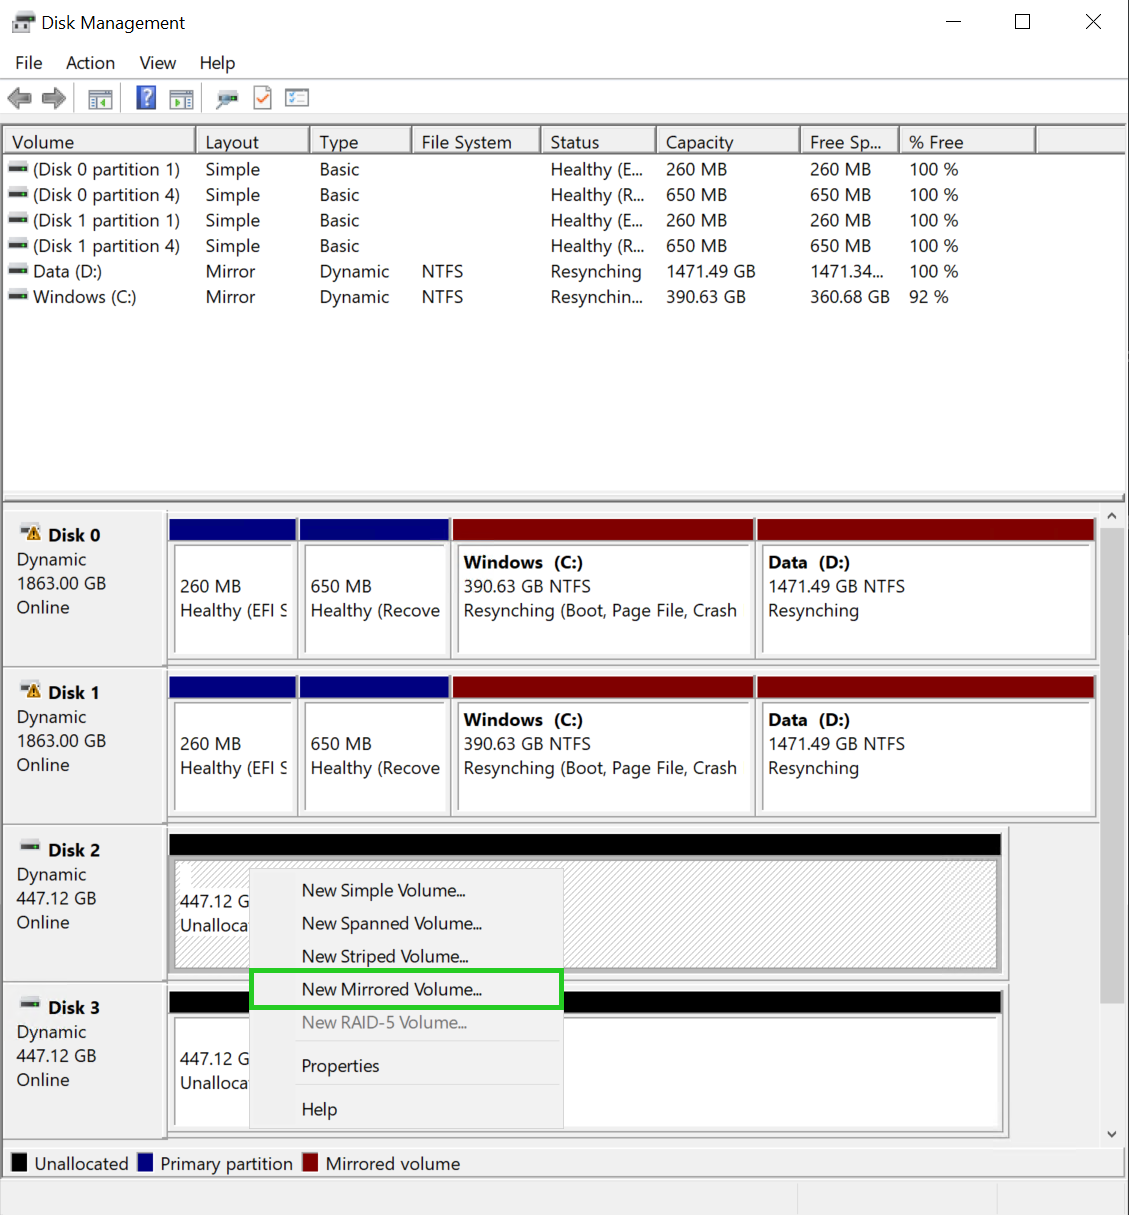
Right-click on one of the additionally purchased data storage devices.
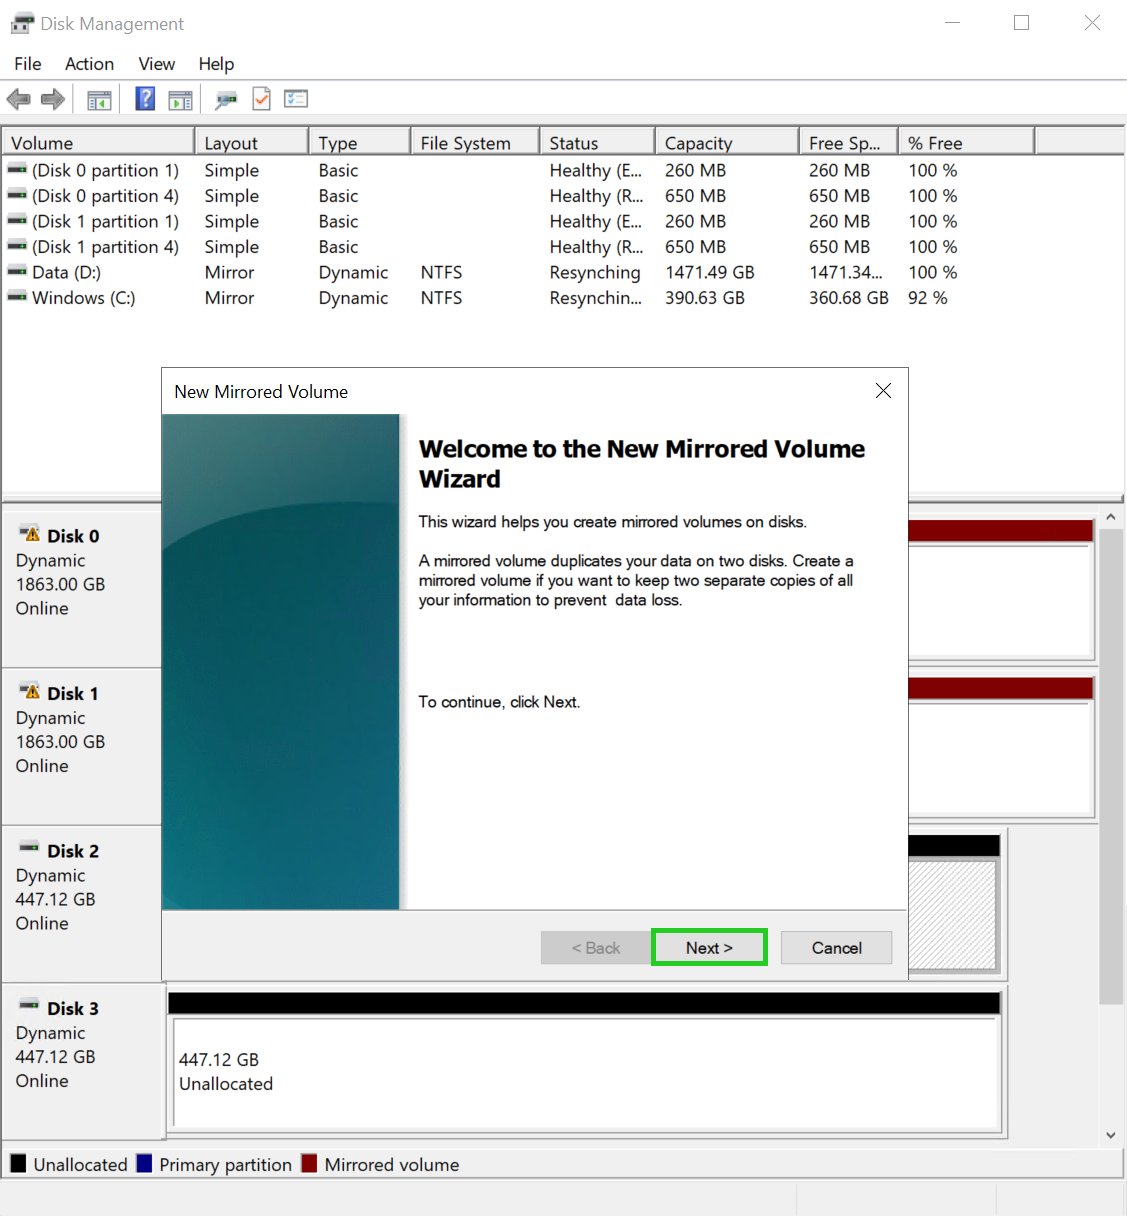
Click on New Mirrored Volume. The New Mirrored Volume Wizard is displayed in the New Mirrored Volume window.
Click on Next. The selection window for hard disks in the wizard for a new mirrored volume is displayed.
Select the second data storage device in the Available: area and click Add >.
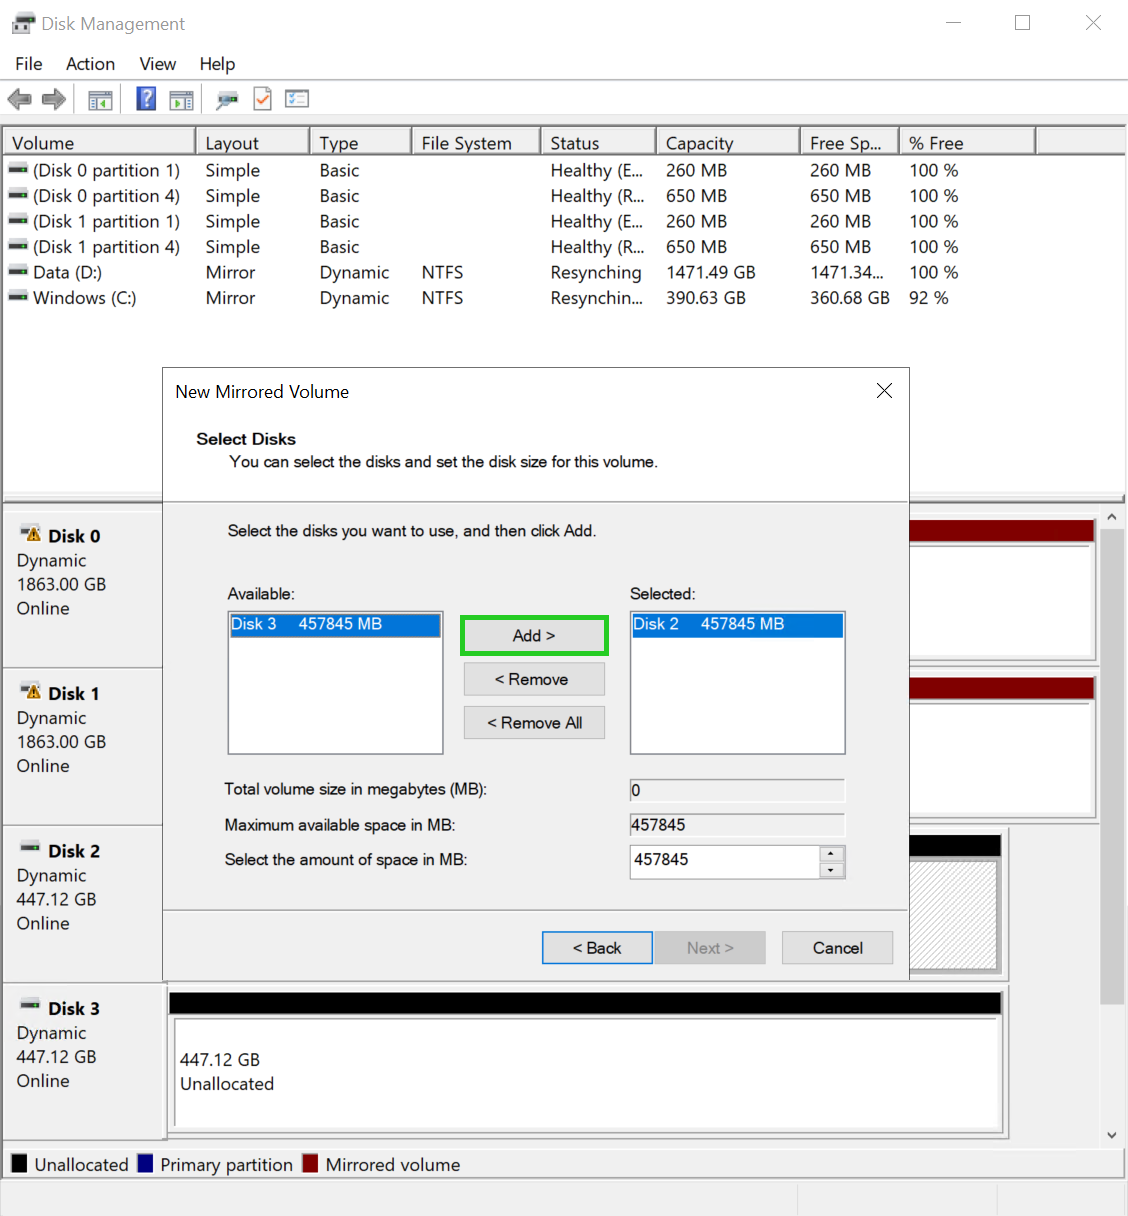
Click Next. The assign drive letter screen is displayed in the wizard for a new mirrored volume.

Optional: Select the desired drive letter.
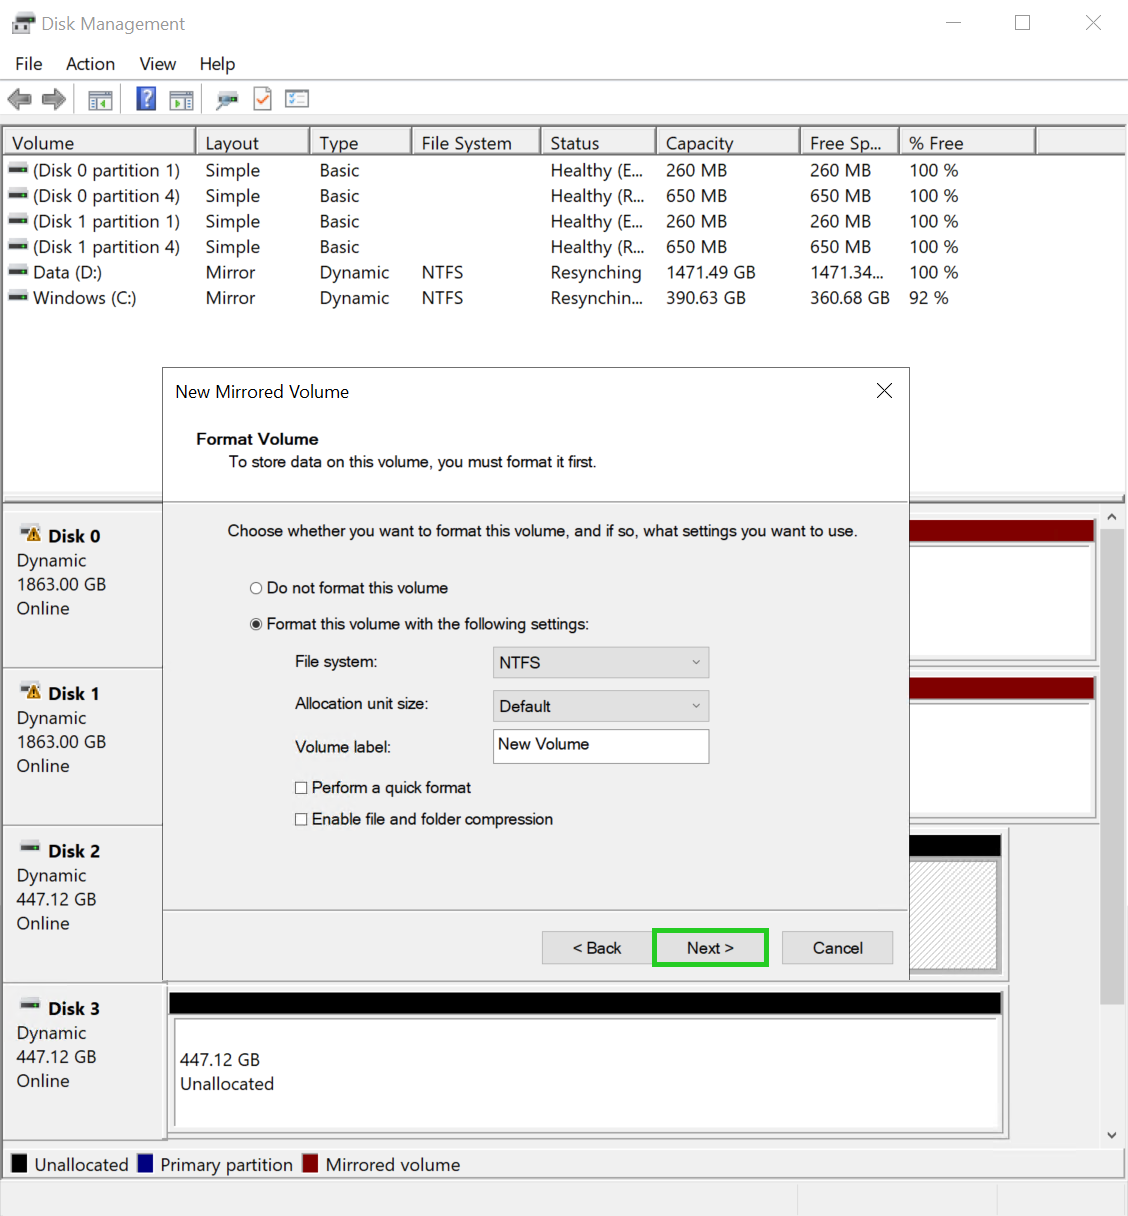
Click Next. The formatting settings are displayed in the wizard for a new mirrored volume.

Optional: In the File system: field, select the desired file system.
Optional: In the Allocation unit size field, select the desired size of the allocation unit.
Optional: In the Volume label field, enter the desired name for the drive.
Click on Next. The summary of the settings is displayed in the wizard.
The Completing the New Mirrored Volume Wizard overview is displayed.
Click on Finish.
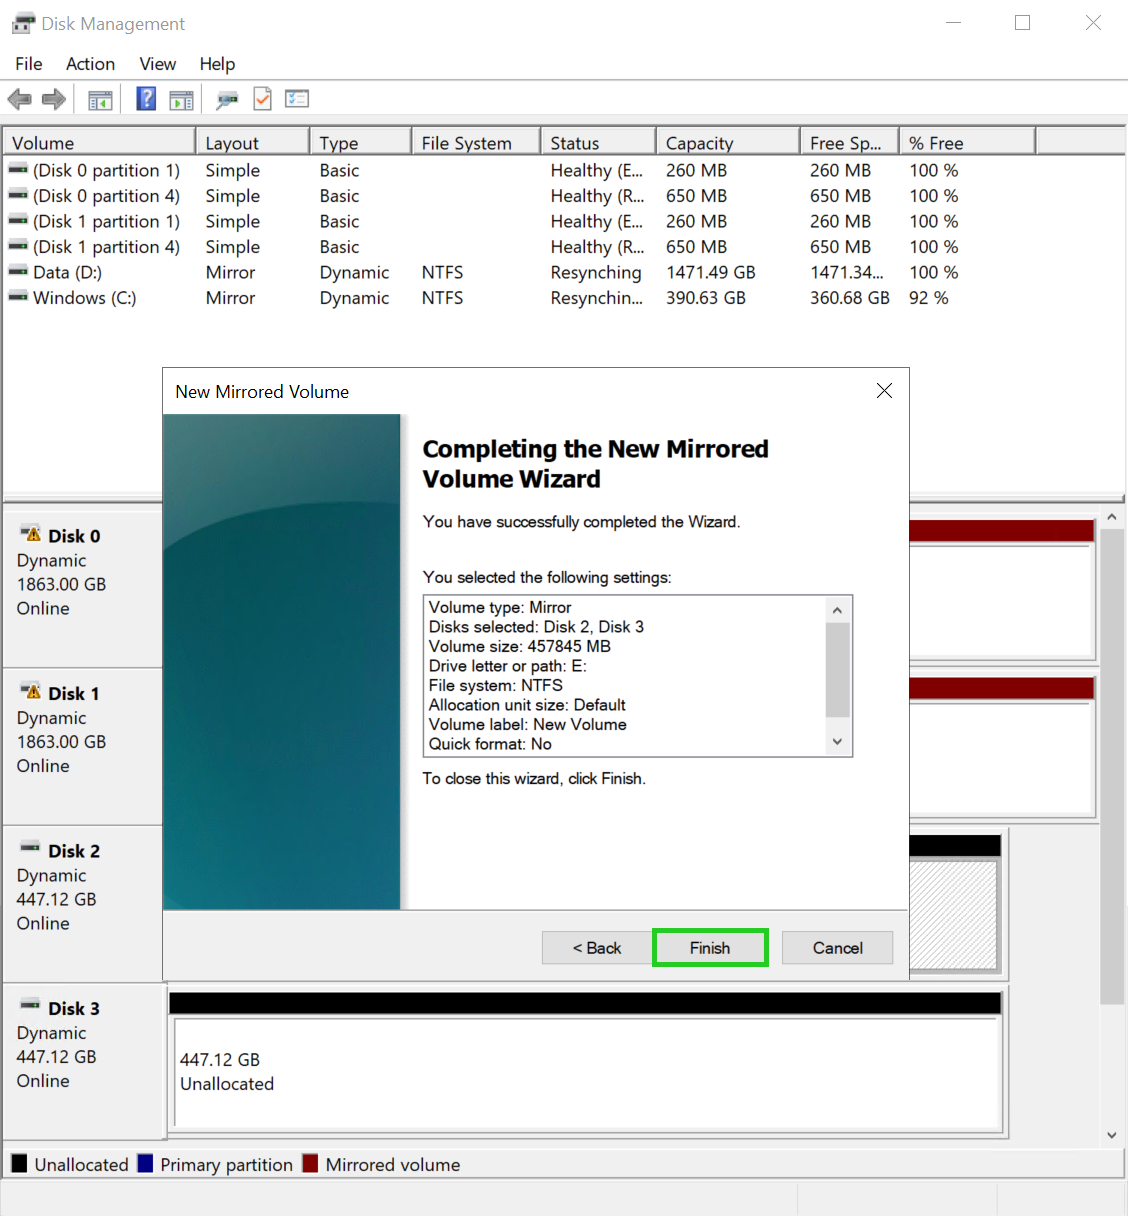
The disk is now formatted and the software RAID is configured.