Webmail: Translating texts with AI Email Assistant
Valid for Mail Basic and Mail Business
With AI Email Assistant, you can write, translate and summarize your emails quickly and easily using artificial intelligence (AI).
In this article, we explain how you can use AI Email Assistant to translate the texts of your incoming and outgoing emails.
Note
AI Email Assistant is a paid extension and is therefore not included as standard in Webmail. We show you how to order AI Email Assistant in the article Webmail: Adding AI Email Assistant
Translate received email
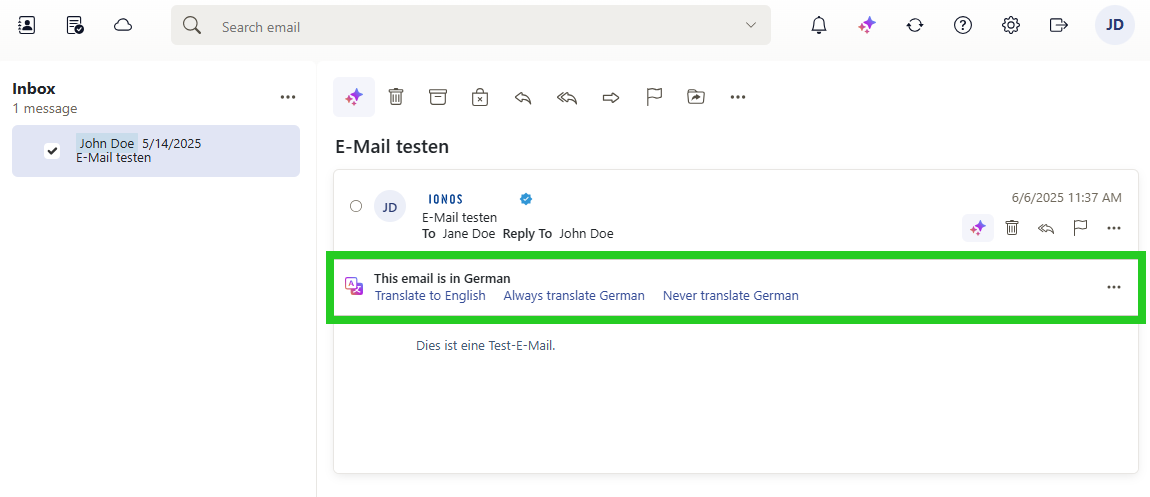
If you have activated the AI Email Assistant and receive an email in a language other than the language specified in Webmail, you will automatically be offered an option to translate the email.
You will be offered the following options:
- You can have the email translated into the language you have specified in Webmail.
- You can specify that all incoming emails are automatically translated from the recognized foreign language into the language specified in Webmail.
- You can specify that incoming emails are not to be translated.
Alternatively, you can complete the following steps to manually translate an email you have received in your inbox:
Log in to Webmail.
In the left-hand navigation bar, click on Inbox and select the desired email.
In the email, click on the button with the three star symbols (AI integration tooltip) at the top of the navigation bar .
- Select the desired language in the Translate to area.
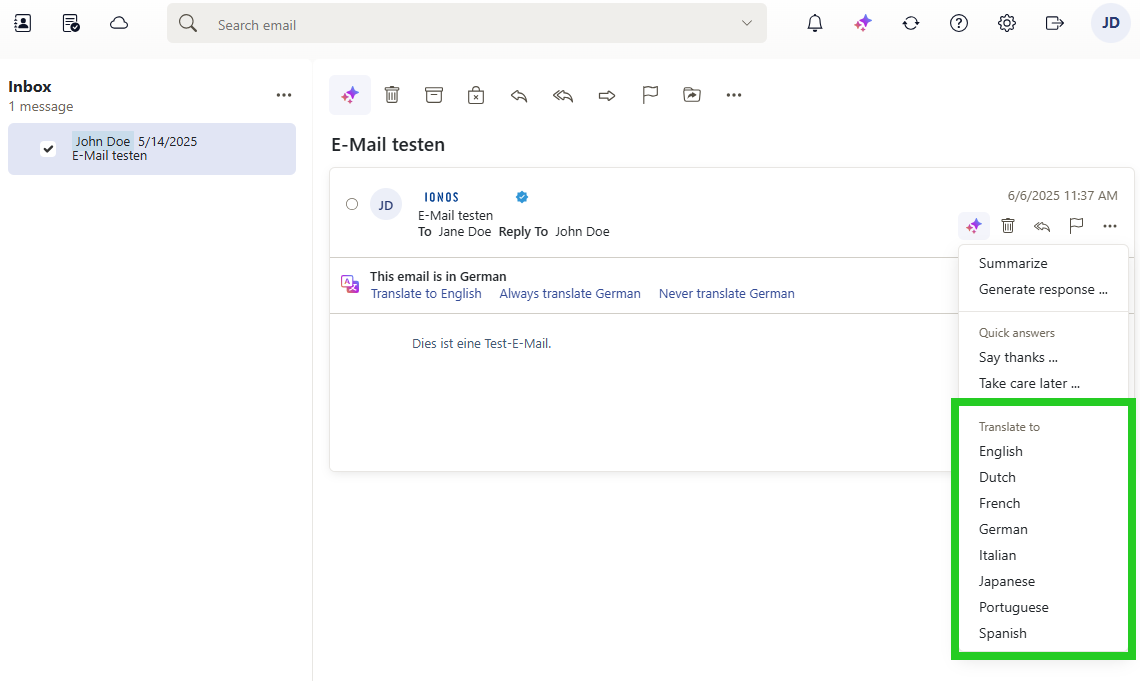
- The AI-generated translation is displayed at the top, above the original text of the incoming email.
Translate outgoing email
Write and translate your emails quickly and easily in 7 languages with the AI Assistant:
Log in to Webmail.
In the left-hand navigation bar, click on Inbox and select the desired email.
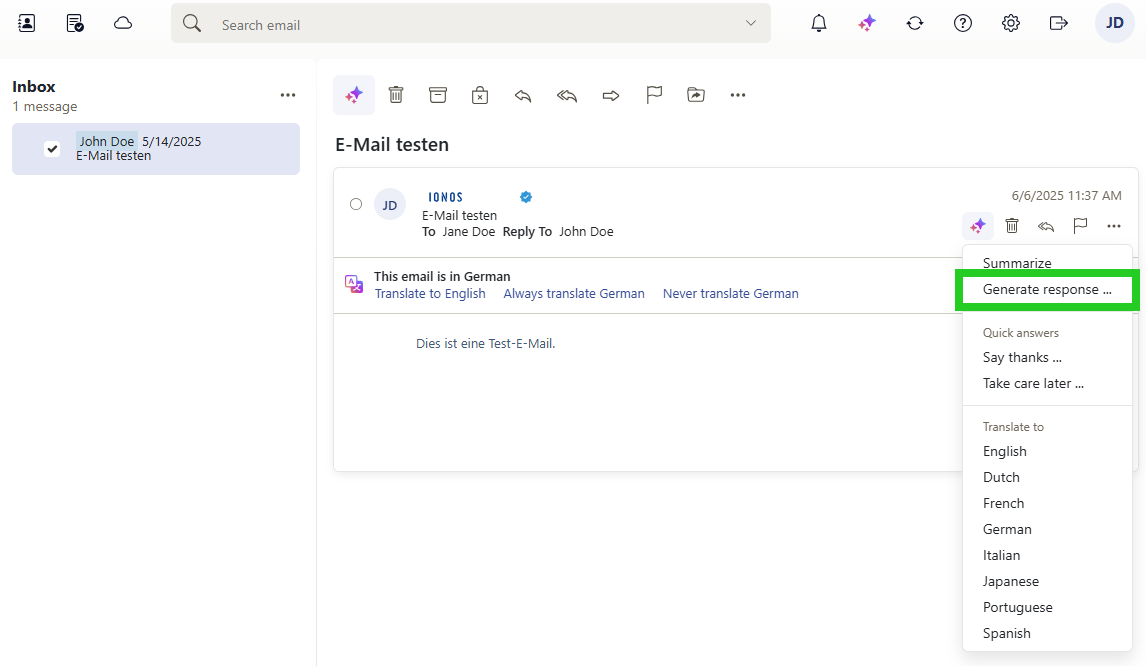
In the email, click on the button with the three star symbols (AI integration tooltip) at the top of the navigation bar .
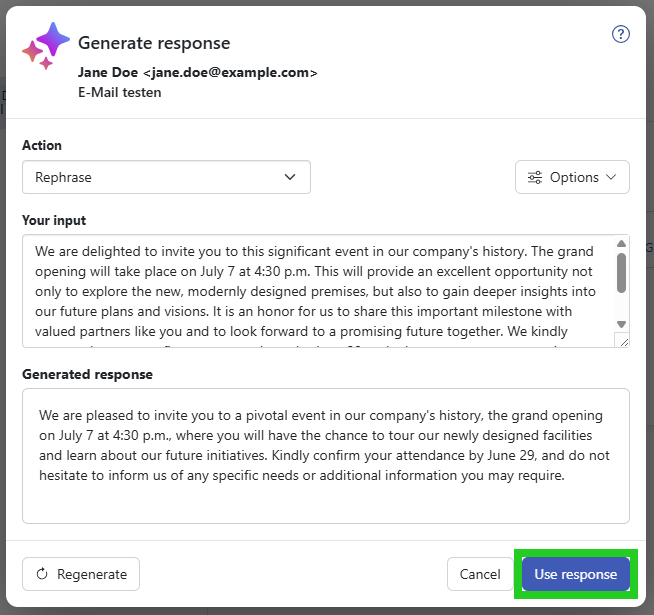
- Select Generate response. The Generate response window opens.
- Enter the text to be translated in the Your input field.
- Under Action, click on the selection list and select the language into which you would like to translate your message in the Translate to area.
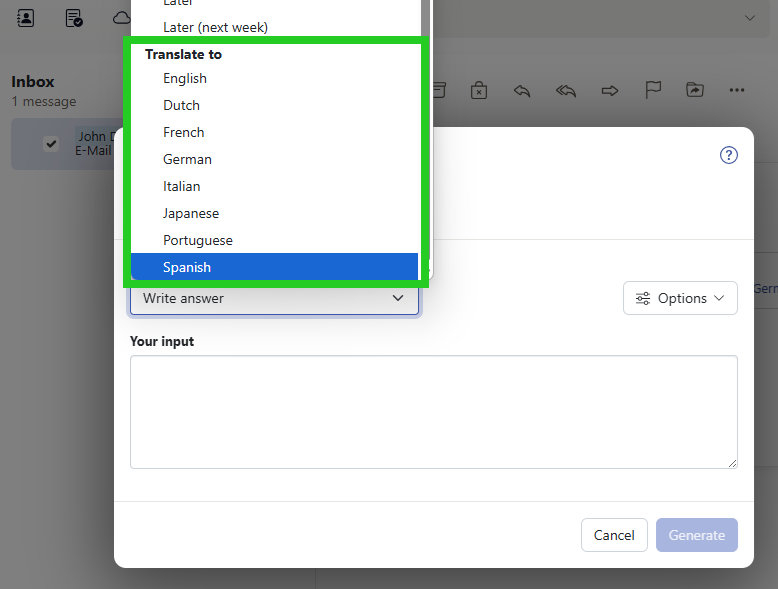
- The translation created by the AI is displayed in the Generated response field.
- To insert the text translated by the AI into your email, click on Use response.
Optional: If you are not satisfied with the generated text, click on Regenerate.
Further information
You can find useful information about AI Email Assistant in the following articles:
Webmail: Creating texts with AI Email Assistant
Webmail: Summarizing emails with AI Email Assistant
Webmail: Editing emails with AI Email Assistant
Webmail: Deactivating AI Email Assistant