Creating and managing filter rules in IONOS Webmail
Valid for: Mail Basic and Mail Business
This article explains how to create filter rules in Webmail, set the order of filter rules, and edit, deactivate, or delete filter rules.
Filter rules help you organize your incoming emails in Webmail. For example, you can automatically move emails from social networks to a separate folder to keep your inbox tidy.
- Log in to IONOS Webmail.
- In the main navigation at the top right, click the gear icon (tooltip Settings).
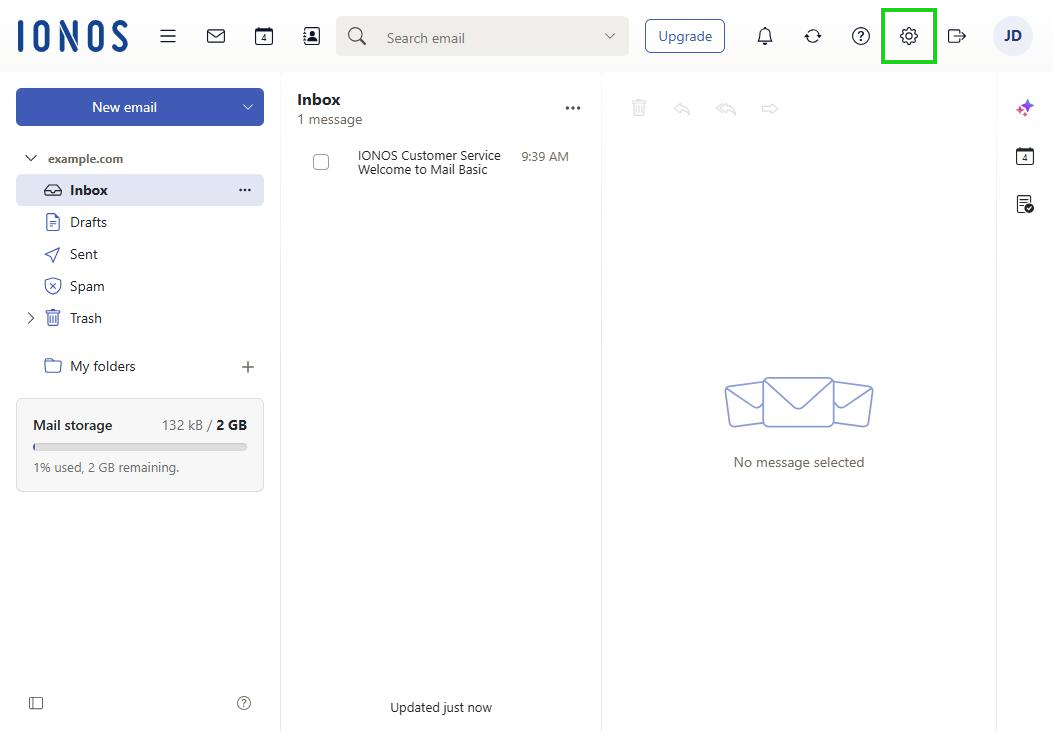
- Click All settings …. The Settings window opens.
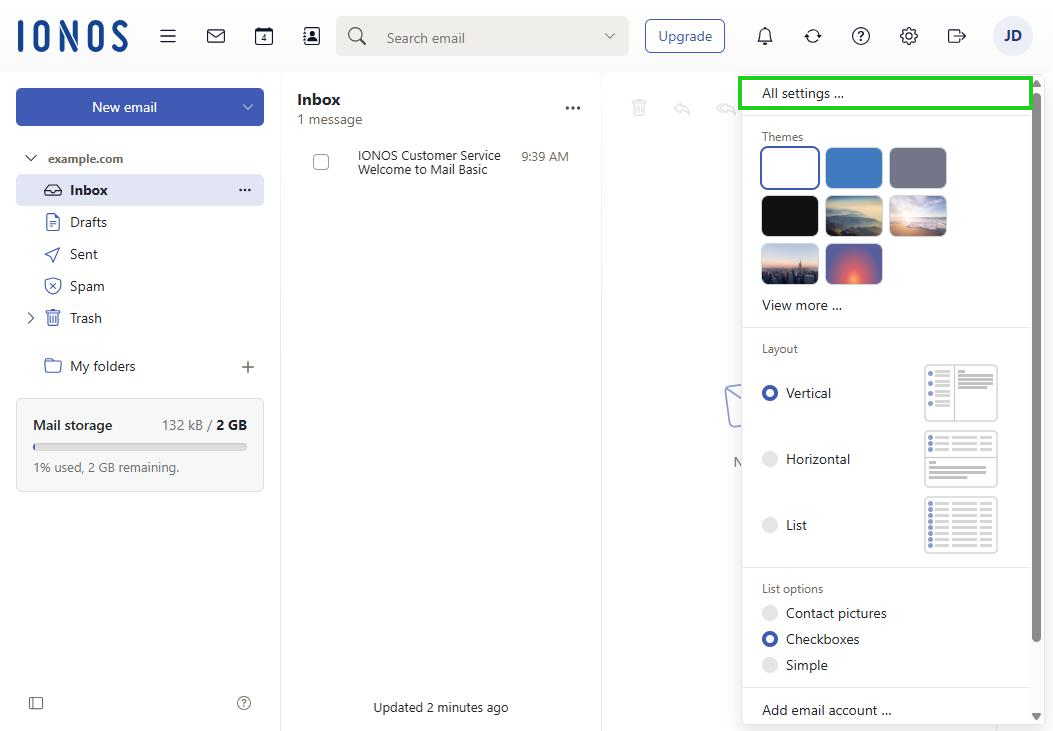
- In the navigation bar on the left, click Mail.
- Click Rules.
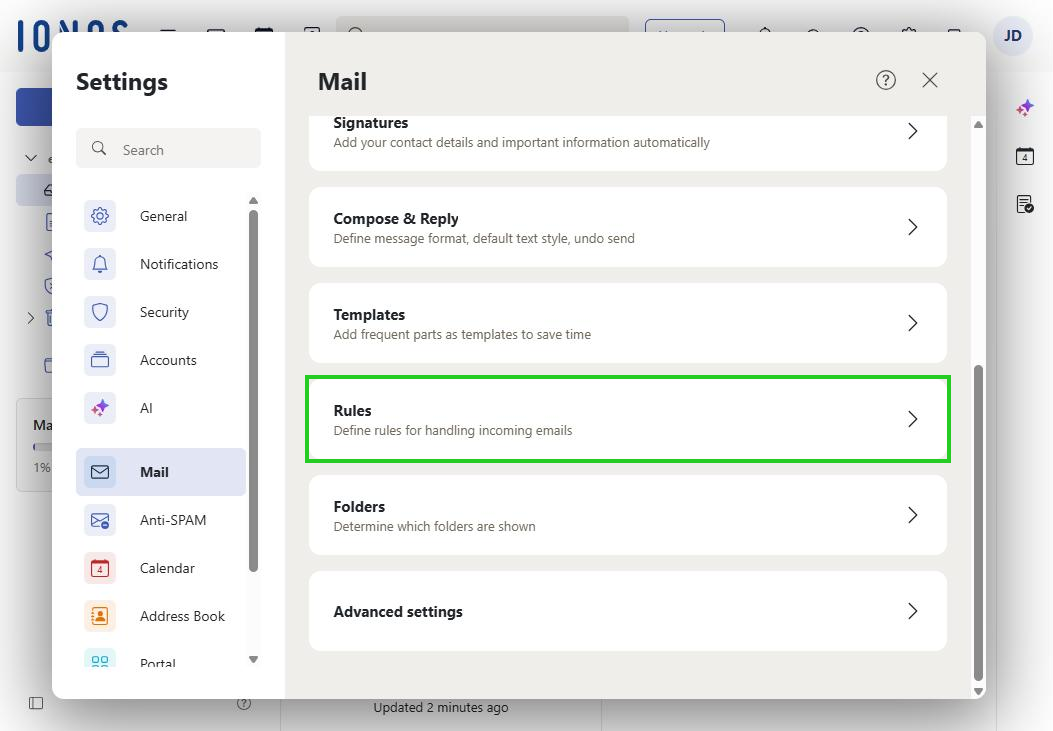
- Click Add new rule. The Create new rule window opens.
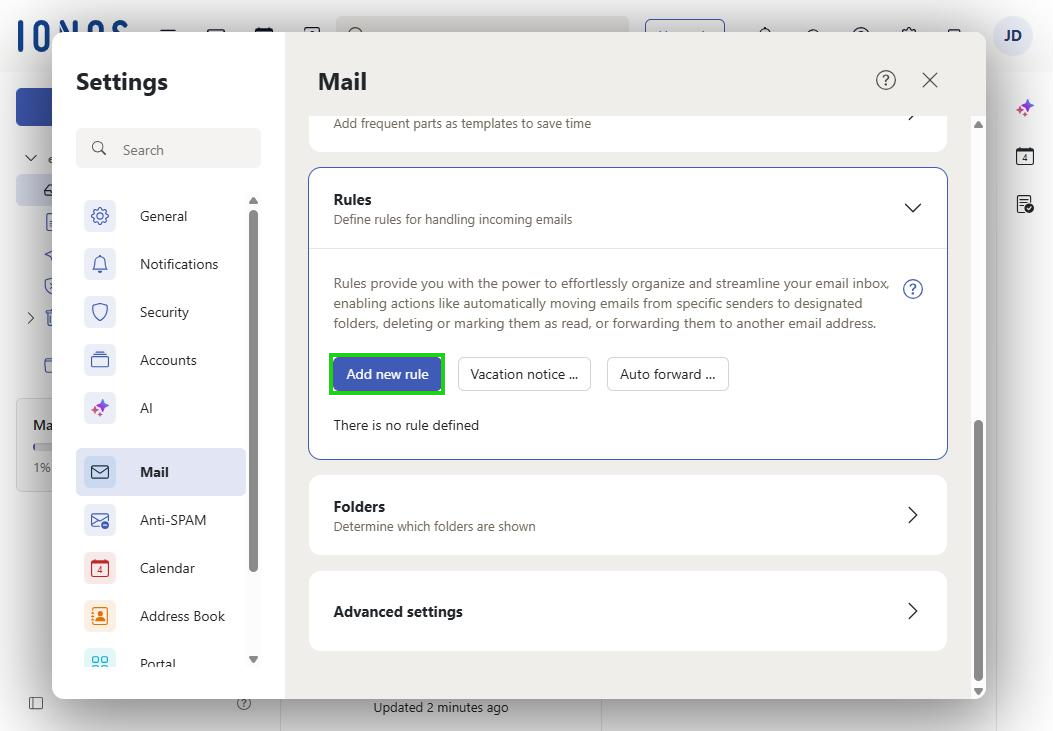
- In the Rule name field, enter a name for your filter rule.
- Leave the Process subsequent rules option enabled if the next filter rules in the overview should also be applied to the same email. If you disable this option, no further filter rules are applied to emails that match this rule.
- Click Add condition.
- Add the condition that must be met for the rule to be applied to an email. Conditions are checked when an email is delivered to your inbox. If you do not add a condition, the filter rule applies to all incoming emails.
- Click Add action.
- Specify what happens to emails that meet the conditions you defined. For example, with the File into action, you can select a Webmail folder to which the email is moved.
- Click Save to complete your rule definition.
Note
Filter rules are processed in the order in which they are arranged in the overview. For example, if your first filter rule deletes the emails of a particular sender, filter rules applied after it no longer take effect for this sender.
Conditions
Conditions refer to specific parts of incoming emails, such as the sender or the email size. Depending on the condition type selected, different criteria are available, for example, Contains or Is exactly.
A filter rule is applied if one or all of the conditions, and therefore the criteria defined in them, are met.
Note
If you do not define a condition for your rule, the rule applies to all messages.
Actions
Actions are triggered when one or all of the conditions you defined are met.
Creating a filter rule automatically
When you move an email to a folder, you can automatically repeat this for further emails from the same sender.
To create a filter rule automatically, complete the following steps:
- Log in to Webmail.
- Select an email in your inbox.
- At the top right of the email preview, click the three-dot icon (tooltip More actions). A context menu opens.
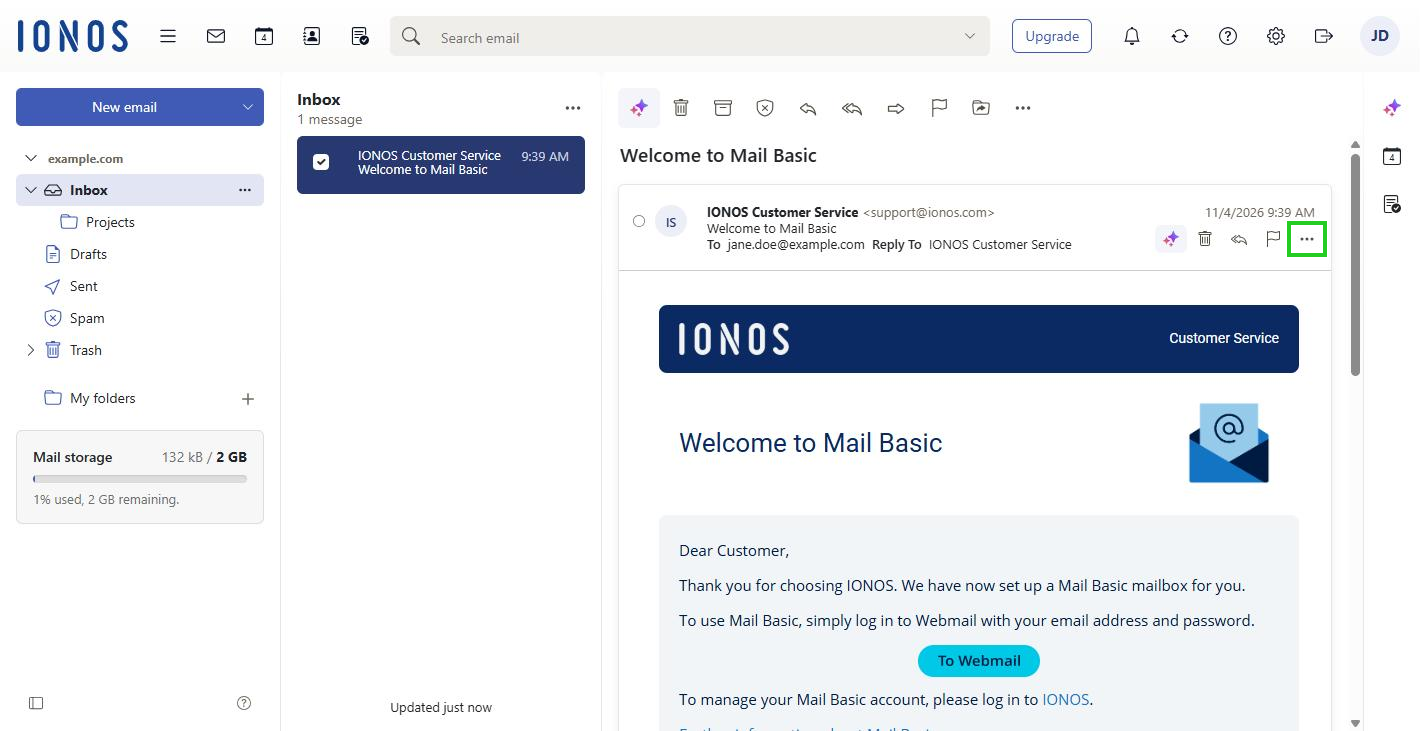
- Click Move. The Move window opens.
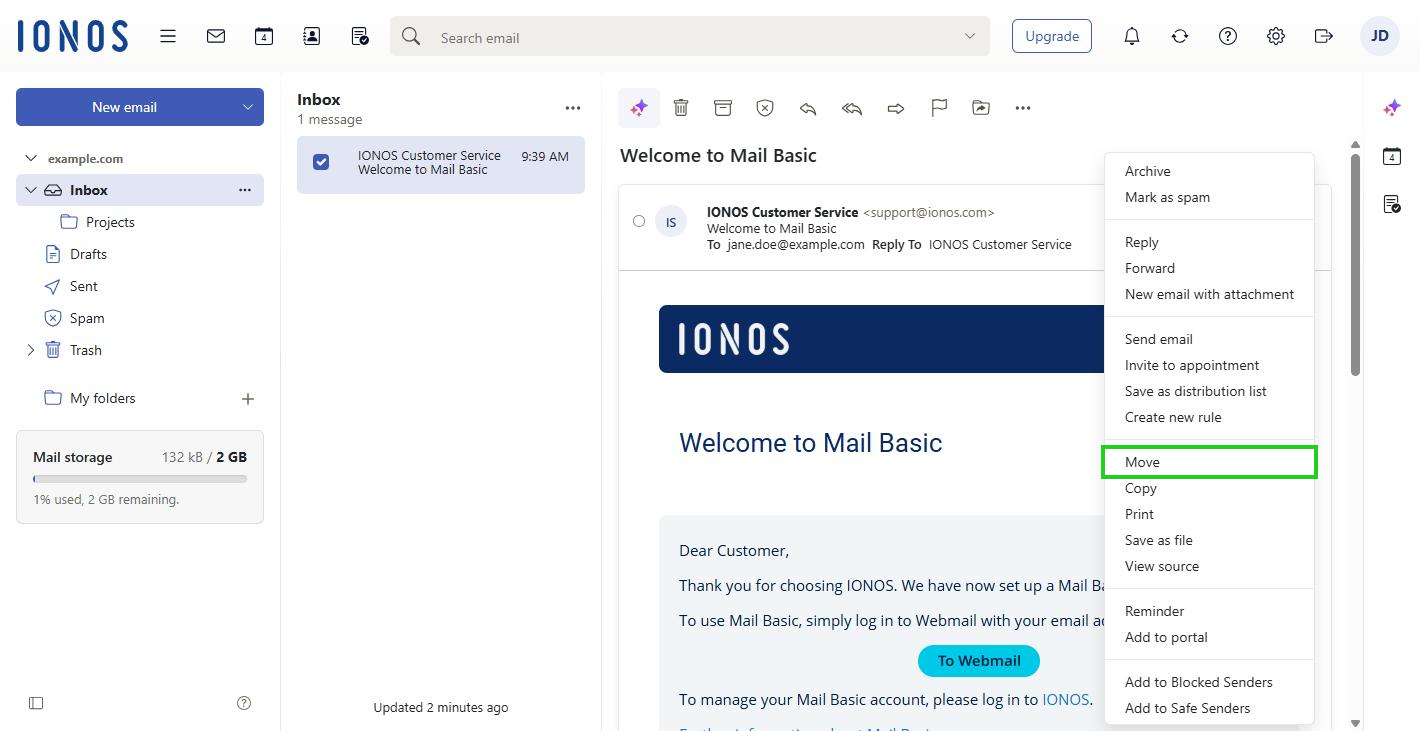
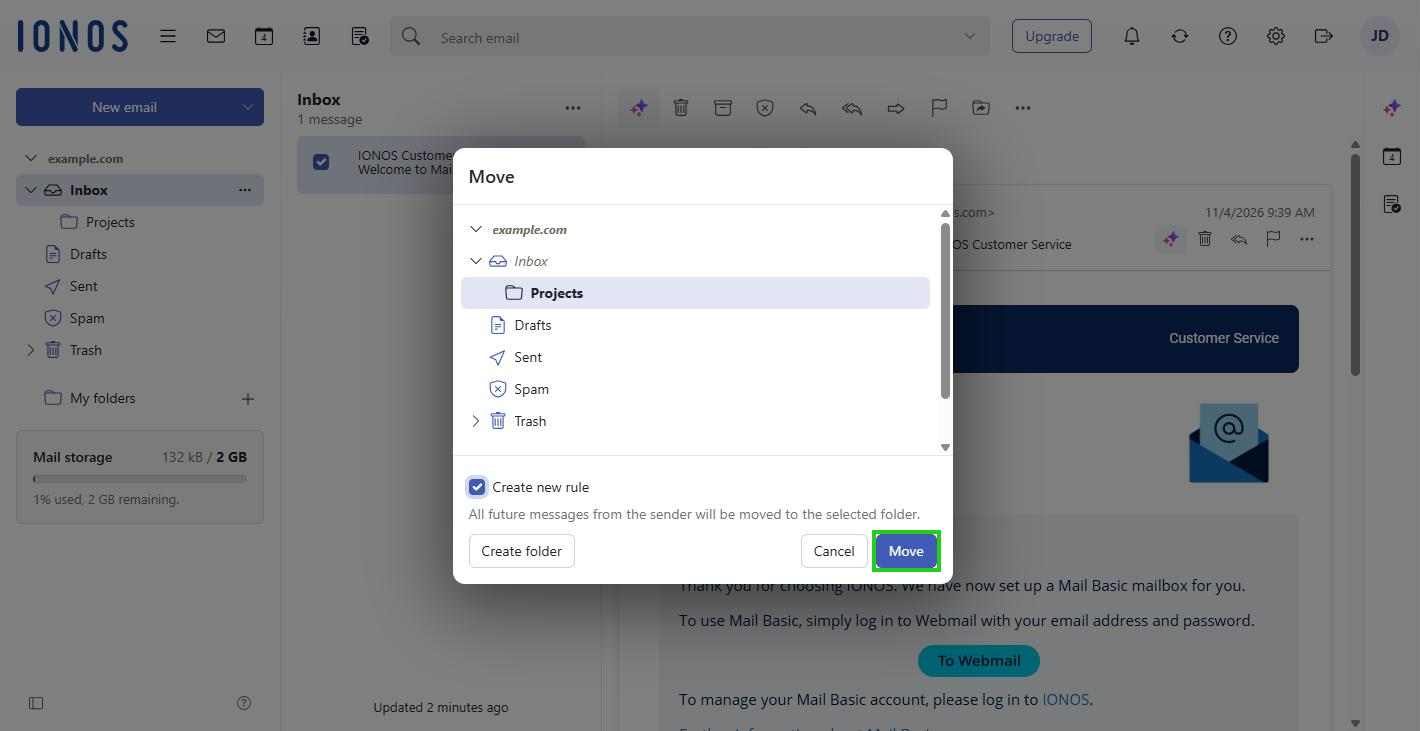
- Select a folder and enable the Create new rule option.
- Optional: To create a new Webmail folder as the destination, click Create folder.
- Click Move. The email is moved, and the Create new rule window opens with the settings of the filter rule already filled in.
- Adjust the settings of the filter rule if required and click Save to complete your rule definition.
Setting the order of filter rules
When you receive a new email, all the filter rules you have created are checked one after the other.
To change the order of your filter rules, complete the following steps:
- Log in to IONOS Webmail.
- In the main navigation at the top right, click the gear icon (tooltip Settings).
- Click All settings …. The Settings window opens.
- In the navigation bar on the left, click Mail.
- Click Rules. Your existing filter rules are displayed.
- Click the grip icon to the left of the filter rule you want (tooltip Drag to reorder rules), hold down the mouse button, and drag the filter rule to its new position. The icon is only displayed if you have created at least two filter rules.
Note
To apply several filter rules to an email one after the other, enable the Process subsequent rules option in the settings of the filter rule.
Editing, deactivating, and deleting filter rules
To edit, deactivate, or delete filter rules that you have already created, complete the following steps:
- Log in to IONOS Webmail.
- In the main navigation at the top right, click the gear icon (tooltip Settings).
- Click All settings …. The Settings window opens.
- In the navigation bar on the left, click Mail.
- Click Rules. Your existing filter rules are displayed.
Option 1: To change the settings of a filter rule, click Edit next to the filter rule.
Option 2: To deactivate a filter rule temporarily, click Disable next to the filter rule.
Option 3: To delete a filter rule permanently, click the X icon next to the filter rule and confirm by clicking Delete.